Tuesday

Mummy Yam's birthday 2021


Earlier this month, we celebrated Mummy Yam's birthday at home with my first peanut butter mousse crunch cake. 


Mum wanted all her grandchildren in the photo.....it took a while and some threats of not being able to eat the cake to get this "almost perfect" shot. *LOL*


The glazing wasn't perfect...I used the crunchy popped rice bits to cover up the imperfections. *winks*


Just some random scrap bits from the stash....


Playing along with Stick It Down.


Share/Bookmark

Pin It

Monday

Make Stuff Monday - 2 twenty-minute projects on a Monday


Happy Monday friends! For today's Make Stuff Monday, I'm sharing 2 twenty-minute projects that I did today. :) Yep...this girl is going real time. *winks*

First up, this morning's  warm-up watercolour painting of abstract florals which were done with just flat brushes. I think I might have overdone the leaves but I was having fun! And I was all done in 20 minutes! I followed along with Ellen Crimi Trent's tutorial on abstract florals. Of course, mine looks nothing like hers because I like to add my own creative flair to things (but in this case maybe creative mistakes! *LOL*)


Nest up I decided to make a quick card...for my bloggy pals who are more in to the papercrafting side of things. I know I have been in watercolour overload for the last 2 weeks or so. Which is how I roll when it comes to obsessions. Hehehe.

So here is today's 20 minute card. I really really wanted to use the cut-out sentiment but I didn't really like the original design of a crown. I dug through my scrap stash and found the cute little girl with her teddy bear and some random fussy-cut frame (perfect for covering the crown) To add a little more interest  I added a doily diecut and a fussy-cut owl to "complete" the visual triangle. And for more texture, I finished with a ribbon tab, a glittered tape strip and a pearl strip.

There you have it, 2 twenty-minute projects on a Monday. :)


Share/Bookmark

Pin It

Friday

Friday's Florals: geraniums in terracotta pots


Geraniums in terracotta pots

I have been practising my loose florals every morning...here are some geraniums in terracotta pots for Friday's Florals. :)

Still have so much to learn about being "loose". So tempted to paint the individual blooms instead of blobs to represent flowers. *winks* Quite enjoyed painting the pots though. Except for the shadows. I always feel like mine looked like bad accidents.*LOL*

Happy weekend friends! :)


Share/Bookmark

Pin It

Thursday

This week's 5 minute card with scrap bits


Well, it's July and about time to start on the Christmas projects! *winks*


Last year I had a theme going because I had a gazillion Santa faces that I could incorporate on ALL my Christmas projects. This year, I'll be attempting to use up my random bits of Christmas stash. *uplifting music plays in the background*


This quick card only has 4 elements - 2 fussy-cut pieces, a wax seal sentiment and a sequin. :)

Happy Thursday friends! :)


Share/Bookmark

Pin It

Wednesday

Workspace Wednesday - my messy standing desk setup


On today's edition of Workspace Wednesday, let's have a look at my unglamorous and messy standing desk setup, shall we?

I have had this bamboo portable desk for years...which I would prop on the bed when I needed extra desk space to spread out my stuff (when I have multiple projects going at the same time...*winks*). The other day, I just put it on my actual desk and it was the perfect height for me to stand and paint! 

Of course, it also means extra space for me because I can use the space under the mini desk as a storage nook for even more stuff.  *LOL*


Share/Bookmark

Pin It

Tuesday

Incorporating an old project into a new one


So you might have noticed something familiar on this decorated paper bag....


It was the redesigned decorated envelope that I did back in Match.


So I tore the flap of the envelope which meant that I could:

1. Remake a flap so that it can serve as an envelope.

2. Incorporate it in a new project while still serving its function as an envelope.


Since I had this paper bag to decorate, I decided to go with option 2.


I kept the elements simple so that the envelope design remains the focal point. I went with a subtle background paper, added a punched border and washi tape. Then matted the envelope on a patterned paper with colours already in the design of the envelope.


I love that I can still put a note in the envelope when I give away this decorated paper bag. :)

What about you? Do you rework your old projects into new ones?


Share/Bookmark

Pin It

Monday

Mixed Media Monday - lilacs in a glass jar


So I'm currently obsessed with loose florals...at least for the last week. This piece - lilacs in a glass jar - was done with watercolours except for the white highlights which were done in gouache. 

I am tempted to go in with some dry media to really get some details in...but I shall resist ...because it's supposed to be loose florals, not detailed florals. *LOL* 

Happy week ahead friends! :)


Share/Bookmark

Pin It

Friday

Double page spread for my guest designer stint at Stick It Down


This month I'm guest designing over at Stick It Down and here is my double page spread which features what the Yams ate in June. :)


It doesn't feature ALL the food I've made...just the ones I remembered to take photos of...before they got eaten. *winks* 


I did try to whip up some new-to-me recipes to keep the creative juices flowing. Yep, even the ugly donuts get to be in the family scrapbook. *LOL*


I kept the pages relatively simple by using the same patterned paper and repeating elements on both pages for cohesiveness.

Happy weekend friends! :)


Share/Bookmark

Pin It

Thursday

This week's loose watercolour florals


So I discovered this artist on YouTube - Ellen Crimi-Trent and decided to just paint along with her this morning. And here is my loose watercolour florals in a mason jar! :)


She was right...you are so much looser in your brush strokes when you stand to paint as it enables you to utilize your entire arm.


The general composition is hers but you know me...I had to add more florals (and details) to make it somewhat my own. *winks*


This was done in under an hour! 


I think I might just start my days doing a loose watercolour floral painting....this was so much fun! 

Happy Thursday friends! :)


Share/Bookmark

Pin It

Wednesday

Workspace Wednesday - my first mousse cake


Guess what? I've officially made my first mousse cake! *high fives all around*

As you know, I tend to go all out when it comes to family birthdays...make a lot of stuff and give myself unnecessary stress. While I do believe that some stress in life is good because it engages your sympathetic nervous system, this time for my mum's birthday, I went with ONE singular cake. No tarts or cookies on the side. (Okay, there was the fail-safe fruit jelly in the fridge....I mean it is after all a birthday celebration, there has to be some sweet stuff). 

But of course, it had to be a cake I had never attempted before. Because I like to challenge myself. *LOL*


I decided to make Dominique Ansel's Peanut Butter Crunch Cake. Now I watched this video last year but thought it was a little too technical for me. But when I watched the video again last week, I thought that it was totally doable. Just 3 components: the crunchy base, the mousse middle and the chocolate ganache glaze.

Even though I didn't have the equipment (8 inch cake ring), corn syrup or puffed rice. But I had a few days to get my act together.

I did manage to get a 7 inch cake ring (on sale) on Amazon with next day free shipping (LOVE Amazon Prime). The 8 inch ring was twice the price so I went with the 7 inch of course...because it's the same of yumminess in a slightly smaller size right?

I didn't have corn syrup but decided I would just use honey instead. Surprisingly the hardest thing to find was the puffed rice. I couldn't even score Rice Krispies as an alternative in my nearby supermarkets. Luckily my sister was in town and got me a box of Rice Pops! I was already googling how to make puffed rice at home (either using oil or salt)...phew, I got the ready-made version. :)


But of course, I screwed up the first step by adding my melted chocolate to my puffed rice without caramelising the puffed rice first. It was yummy but I wasn't sure if it would get soggy when I put on the mousse layer so I made another batch (no worries, this batch didn't go to waste...the Gangster Gang ate them all up!).

The original recipe called for corn syrup and sugar to be added to the puffed rice before caramelising in the oven. I went with just raw honey because I didn't want it to be too sweet as the melted chocolate would add more sweetness to the mix.

And of course, I reduced the sugar in the mousse by 30% because I find that American recipes tend to be way to sweet for my liking. Plus I used regular sweetened peanut butter. I just made sure that I didn't kill my gelatine because that was what would set my mousse.

So I made the cake base (puffed rice) and mousse the night before and let it sit overnight in the freezer. In the morning, I made the glaze and poured it over the perfectly set frozen mousse and crunch layers. Then I added the puffed rice pieces to the cake as decoration. Done by 10am for birthday celebration at dinner time! :)


It was the first time I didn't have to rush through the whole afternoon, baking and frosting and preparing dinner too. I mean, there was a slight worry that the cake might not have set and we might end up with a soupy mess but it was a hit! 

Nephew #3 and the niece requested for this birthday cake for next year's birthdays. Mum was like, "Is this all you made?" when I took the cake out. But once we finished the cake, no one complained that it wasn't enough. I mean, there were no leftovers.

I think I'm becoming a lot more confident about my baking/cooking abilities these days. Even on recipes that are new to me. For that I'm grateful for the extra time I have during this stay-at-home-during-a-pandemic period. 

If peanut butter is your thing, give this recipe a go. I'm thinking I might buy his cookbook....and try to make the famous cronut.:)


Share/Bookmark

Pin It

Tuesday

This week's really simple card


This week's really simple card features another fussy-cut tin man from my stash. There might be another one coming if I can find his head...it got decapitated in my stash *dramatic music plays in the background*. You know, sometimes accidents happen when you are digging through stash. *winks*


And yes, I've been working through my Graphic45 stash. I used to LOVE their collections. But I haven't bought any in the last 5 years or so. Which roughly coincides with the time I started drawing...and the time  I decided to use up all my patterned paper stash without buying any more. 

I've succeeded in the "not buying" any more part (in part due to getting happy mail/design team freebies) but the "using up" part is another story. Which also explains why I'm not on any design teams. For a while now. Every time I'm tempted to try for a design team, I look at the stuff I already have and just don't apply. As it is, I'm still trying to use up design team stash from teams I was on 6-7 years ago! Why do you think I always use my Xyron Creative Machine? Because I still have a cupboard full of adhesive cartridges. *LOL*


I know that lots of people still get so excited when they get on design teams in anticipation of all the lovely stuff they would receive. I've been there and done that. I'm actually quite happy that I don't have huge boxes of "happy" mail coming to me and having to find a place to stash them as I work through a design team term. Maybe I've been paper scrapbooking for far too long. I started in 2006! 

What about you? Are you still buying the new collections or just working through your stash?


Share/Bookmark

Pin It

Monday

Monday's Desk View - the ugly stage


Okay,  I started out painting a bird...which as usual got a little rounder as I added more paint. *winks* And then I dropped a loaded paintbrush on my paper *dramatic music plays in the background* So I had to start drawing a bunch of flowers to "cover" up the splatters. Eh...now it looks like the chubby bird loves flowers. Like a lot. *LOL*

Oh well, the ugly stage in my pieces last a long time.*hahaha* I keep persevering because I hate to waste art supplies in any way...which has worked in my favour because I get to use other supplies in my stash in order to "save" it. And there's this strange sense of satisfaction when you've "saved" a piece from total disaster. Could be a totally "me" thing. Hehehe.

Happy Monday friends! 


Share/Bookmark

Pin It

Friday

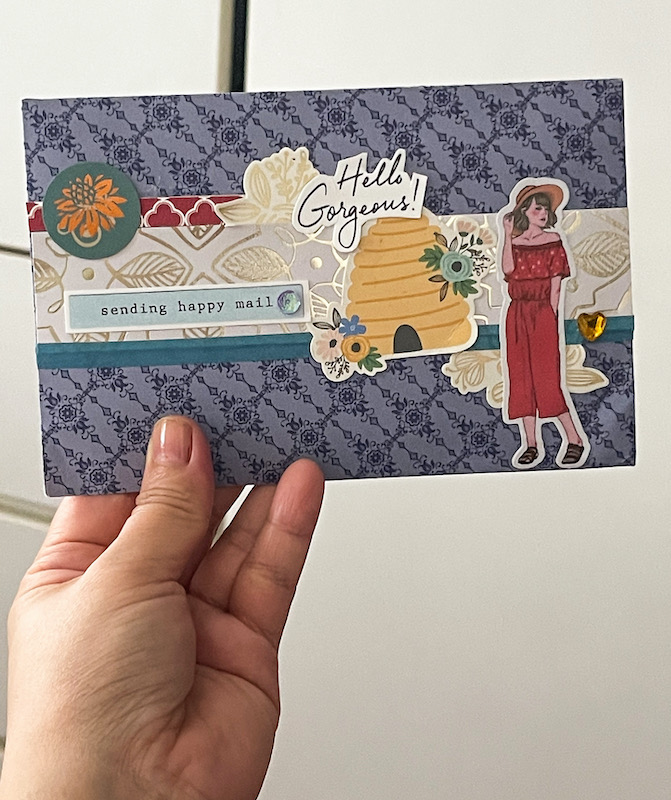
This week's fun decorated paper bag project


Happy Friday friends! Here is this week's fun decorated paper bag project.:)


I wanted to use up the leftover foiled patterned paper (from last week's decorated paper bag project). Also had a strip of border punched paper left over from another project and used it here too. Don't you love it when seemingly random stuff thrown together just work? *hahaha...that might just be a "me" thing*.

It's my mum's birthday this weekend so I'll be busy in the kitchen. :)

See you next week!


Share/Bookmark

Pin It

Thursday

Thursday's desk: loose watercolour florals


Hello friends! How's your week going? I'm currently learning to paint loose watercolour florals (watching and painting along with some YouTube tutorials). 

Right now, I'm just learning how to paint basic blooms and leaves. Hope to progress to a floral bouquet next...and eventually a bird painting with florals. Or maybe a portrait with a floral background. Goals! *winks*

What about you? What are your currently working on?


Share/Bookmark

Pin It
>
Related Posts Plugin for WordPress, Blogger...

LinkWithin

Pin It