Monday

What we ate in August - Yams' fave chicken dishes


With more stay-at-home cooking, I've had to be a tad more creative in the kitchen....so that I enjoy the cooking process, the family gets to eat delicious food and I stretch the food dollar to the max. *winks*


While we do have a steak day once a month, the daily protein is usually pork or chicken (most accessible and economical), along with eggs and tofu.

These three chicken dishes are always on rotation because they are the Yam faves:

1. Oven roasted chicken and veggies

2. Pan-roasted chicken breast with butter and apple cider vinegar

3. Air-fryer Korean chicken wings


Had a little fun with the text - a combination of fussy-cut letters, diecuts, stamping, stickers and thickers. :)


What are your family's fave dishes?


Share/Bookmark

Pin It

Friday

How to incorporate washi tape like a pro on your creative projects Part 2


I love using washi tape on my projects. They are a quick way to add pattern and interest to your projects and serve as an added adhesive security too. Back in July 2019, I shared How to incorporate washi tape like a pro on your creative projects, here's Part 2. :)


1. Embrace the pattern on your washi tape.

I love this fun banner design on my washi tape so I used it like I would use an actual banner embellishment. Perfect for a birthday party layout. :)


The overdone tea tin

2. Use it for altered projects.

Sometimes it's hard to get patterned paper to stick to a curved surface....why not just use washi tape? I used gold patterned washi tape along the top edges of this square tea tin with rounded edges. :)


We-are-family

3. Treat it like strips of patterned paper on your projects.

Because of its translucency, it is a great a alternative to patterned paper strips if you still want your base to be visible. On this layout, I used washi tape of the same width to add more pattern and interest but still allowed the misted stencilled background to be seen.


4. Utilize it as a unifying feature in your Christmas wrapping.

Last year, I used this red washi tape on all my Christmas wrapping so they all looked like a cohesive whole even though I used different patterned papers for the wrapping.


Roast-chicken-again?

5.  Incorporate more patterns and added adhesive security on your projects.

You know how I love my patterns. Adding a strip or two of washi tape is a great way to up the pattern factor on your projects. Try using washi tape with colours that coordinate with the colours on your projects for a cohesive look and feel. I stick to the Japanses MT tape because the washi tape really stays down once you put them on.

There you have it...how to incorporate washi tape like a pro on your creative projects Part 2. :)

What about you? Do you like incorporating washi tape on your projects?

Happy weekend friends! :)


Share/Bookmark

Pin It

Thursday

This week's quick card with paper scraps


I must say that I'm a slacker when it comes to cards. I see others make easel cards, multi-layered cards, cards with moving parts etc..and I tell myself to try making ONE but I never do. *winks*

One reason is because I only used paper scraps to make my cards. I never cut into a new sheet of paper just to make a card. Otherwise, the paper scrap pile will just get bigger and bigger. *LOL*


Plus I need my cards to be relatively flat for ease of storage and shipping. And of course, I like my cards to be done in under 15 minutes....from conceptualisation to completion. So I have to keep them really simple. :)

What about you? Are you adventurous when it comes to making cards?


Share/Bookmark

Pin It

Wednesday

Stay-at-home hard labour


Well friends, bet you didn't know that I'm the handy woman around the house eh? I take after my mum...we fix things around the house. The Yam men..aren't that useful to have around...unless you need help finishing food...*LOL*


Given the lack of exciting things happening in the last few months of mostly staying at home (you know, other than watching my sourdough starter grow..hehehe), the 2020 Yam family album was in desperate need of family documentation that was not food-related. So I delved into my phone archives and found these selfies I took of myself providing hard labour (= unpaid labour) while repairing the ceiling in my sister's room. *winks*


Yep...the dog was missing hind legs so the woman was incorporated as a "cover-up". You know how I roll....hahaha.


And yes, this gal played with a stencil and mists on this layout! They have been neglected for months...definitely needed to rectify that!


Playing along with Stick It Down.


Share/Bookmark

Pin It

Tuesday

This week's upcycled Santa project


Today's share is a quick upcycled Christmas-themed plastic container. Perfect for candy or some other sweet treat. :)


I left the back portion a little see-through so that the recipient can see the treats inside. *winks*


This was the container I upcycled....one of my fave body scrubs. :)

Share/Bookmark

Pin It

Monday

Mixed Media Monday - brow practice


Hello friends! Hope you had a great weekend! 

This week's mixed media eye is all about the brow. I find brows a little challenging ... bushy in some areas and sparse in other areas. I know people in real life who will spend tons of time drawing their brows to perfection before they can step out in public. *winks* Your gal here has been blessed (thankfully) with decent eyebrows so she skips adorning them altogether. Okay, she tries to make them a little more full but always ends up with pimples on her brows. *I kid you not! LOL*

Happy Monday!:)

Share/Bookmark

Pin It

Thursday

A quick makeover of a mooncake box


This year's Mid-Autumn Festival is on October 1st...and you know what that means....mooncake boxes to decorate! But I have to confess that I have a few undecorated ones lying around, conveniently used as storage boxes until they can be "prettified". *winks*

Like this one. :)


It is a solidly constructed mooncake box meant to be a jewellery box for the recipient after he/she devours the mooncakes inside. Of course, it came to me minus the mooncakes courtesy of a well-meaning friend who knew I would appreciate the box more than the mooncakes. *LOL*


I decided to just keep it simple. I cut patterned paper for the sides of the box and the top (which had the brand of the mooncake company), ran the pieces through my Xyron Creative Station for an even layer of adhesive. Then just adhered it to the box. I added pearl trim to the top of the box and finished with a bloom.


In case you were curious about how the jewellery box looked like inside....:)


Share/Bookmark

Pin It

Wednesday

What's new in my life - August 2020 edition


The one good thing about staying at home over the last few months has been really using up the stuff I have at hand. It's interesting how an adhesive you didn't really like and chucked aside in the drawer can suddenly be used up when you can't get to a store physically but absolutely refuse to pay ridiculous shipping for your item or buy more stuff to qualify for free shipping. 

Anyway, I did an art supply store run and bought some much needed adhesive to replenish the stuff I've used up. :)


I also picked up some new tea towels for my bread-making needs. Apparently, the damp tea towel that you use to cover the dough when it rests cannot be washed with laundry detergent as the dough would absorb the scent (errr...you know me, when I get obsessed with something, I do extensive research..*winks*). Now, I can't have my bread smelling like laundry so I bought new tea towels that would only be washed with baking soda and warm water. I know, the things I do for bread-making. *LOL*


And apparently I've only bought ONE eyeshadow palette in 2020 so far. Which clearly needs to be rectified right? Yeah, so I got this Huda Beauty eyeshadow palette that I had my eye on about 9 months ago since it was on sale. I'm actually pretty fussy about what gets into my makeup supply arsenal because I like to maximize the use of my items. Because of the hot and humid weather in Singapore, things don't last very long. They either dry out or get mouldy. 

What about you? What's new in your life?


Share/Bookmark

Pin It

Tuesday

My sourdough journey -the sandwich bread


2020 is fast becoming a year where there are more food photos than people photos in the family scrapbook album. Probably because the food is far more exciting than the people too.... I mean I see the same few faces every day...*LOL*


The upside of all this time at home is that I can really try out a variety of sourdough breads and hopefully find the "perfect" one for the Yam family....you know, soft crumb, not too chewy. Stays moist for 4 days. Can be eaten at room temperature. Not too tangy.


Well, the sourdough sandwich bread may be a winner. It's light and fluffy. With holes just the right size. And it's gone in 3 days. :)


This layout came together very quickly, using little bits from a previous project...and delving into my box of die-cuts for the text.


Playing along with The Studio Challenges.

Share/Bookmark

Pin It

Monday

Mixed Media Monday - a tired eye drawing


Hello friends! Today's drawing is a tired eye. Perhaps a little reflection on my current state of mind? I think we might all be suffering from COVID fatigue...it's been months of staying at home, restrictive socializing, curtailing of regular activities and nothing but bad news all over the world about the rising number of cases, civil unrest and political tension.

I'm doing okay except that meal prep is becoming a chore...food finishes faster than I can make it. My freezer is full of stuff that I can just bake for a meal because some days I just don't feel like making a meal from scratch. *LOL*

How about you? How are you doing in your corner of the world?
  

Share/Bookmark

Pin It

Friday

Another week, another Santa card


Happy Friday friends! Just sharing this week's Christmas card featuring the infamous Santa...*winks*

Enjoy your weekend and stay safe wherever you are!

Share/Bookmark

Pin It

Thursday

How to use embellishments to tell your story


We might not always be able to capture detailed photos to tell our stories because we were of course, busy living that life moment. *winks* Here are some ways to use embellishments to tell your story. Enjoy! :)


How to use embellishments to tell your story

1. Create a whimsical "scene".

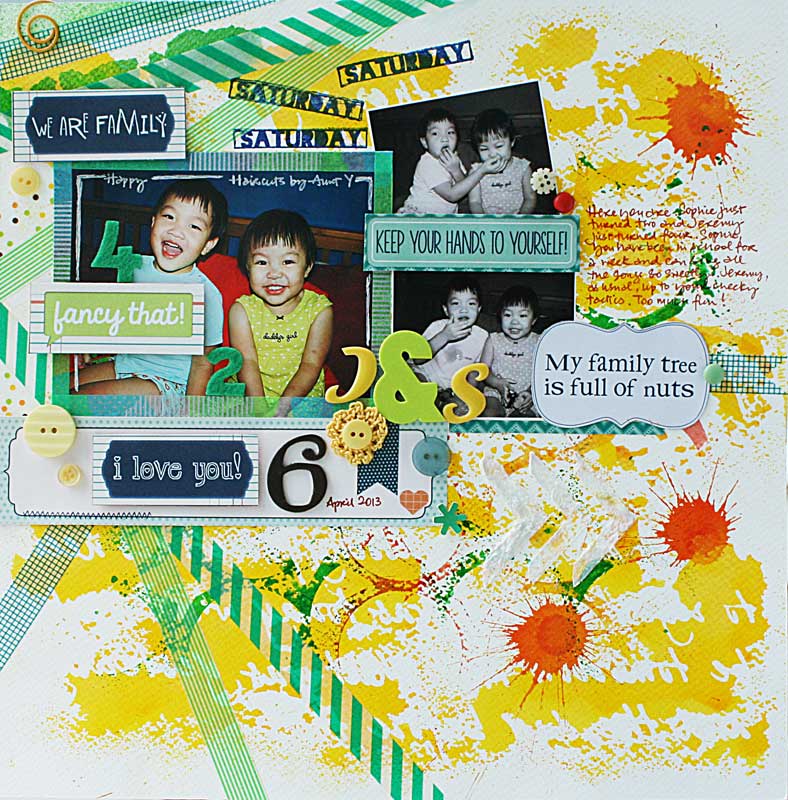
On this layout, the Gangster Gang boys (aka nephews) were very excited about going to the fish farm to catch fishes for my fish tank. Since I was busy ensuring that the kids did not "kill or injure any fishes" while they were catching them with nets, I only managed to get some photos after we bought the fishes. 

Since they were consecutive photos, I decided to break them apart to help tell my story.

I silhouetted one photo to create a whimsical "scene" with their happy faces. They were standing on "netted" grass with a pig posing with them, next to a lamp post with a bird nearby. *LOL*

The smaller photo at the bottom right was another photo with the actual background of the fish farm.

I also used a circle punch to showcase their  happy faces as part of my title work. 


Good-food

2. Showcase joy with your chosen embellishments.

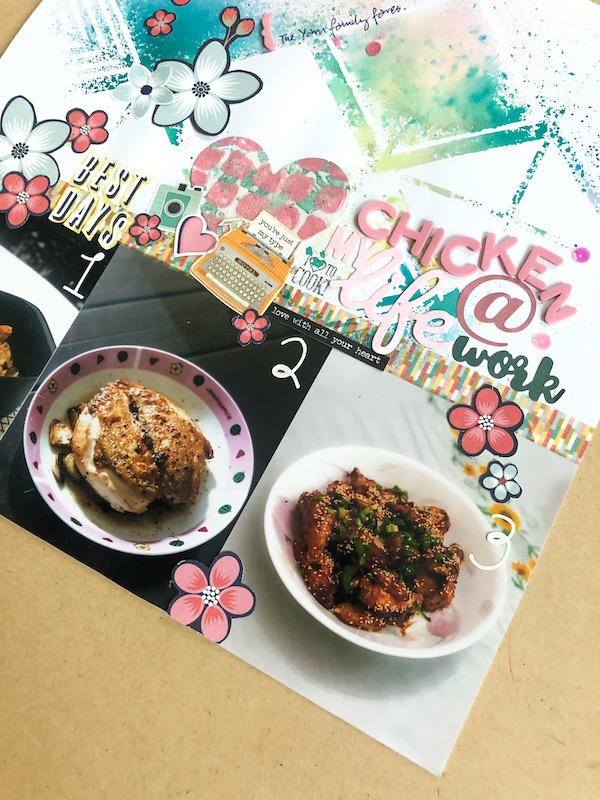
Let's get real. It's hard to get good food photos when you are dining out because

1. The lighting conditions need to be in your favour.
2. You need to angle your phone so that you capture what you want (food) instead of other diners in the eatery.
3. You need to work fast because your eating companion may not be so patient as to wait for you to take "that perfect shot".
4. The food may be "languishing" as time passes..eg. ice-cream melting, crispy chicken getting soggy...etc.

All conditions that hinder the taking of the perfect food shot. *hehehe*

Anyway, on this particular layout, I went with a "party" theme to convey the joy from eating the yummy food. I incorporated the party critters jumping for joy, the banners at the top of the page and the strip of "lucky" text to express the emotion. Can you feel the joy? *winks*


Bandage-buddies-by-Yvonne-Yam-for-Scrap-Africa

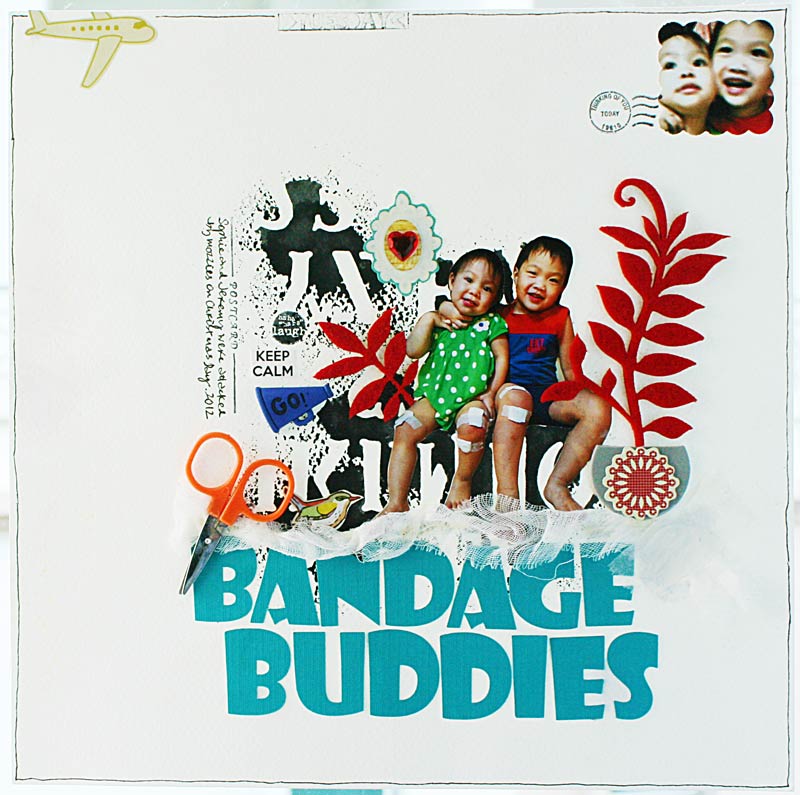
3. Incorporate elements/replicas in your actual photo as embellishments.

This one is probably quite easy to incorporate with diecuts or stickers eg...animal stickers on a zoo layout or paper flowers on an outdoor garden photo. On the Bandage Buddies layout, nephew #3 and the niece were "attacked" by mosquitos and since we didn't want them to scratch the bites, we covered them with bandages! *hehehe* I incorporated a strip of bandage and a pair of travel scissors as part of my title work. :) This is also a great way to reimagine found ephemera and use it on your projects. 


Marinison57

4. Creatively insert your photo in the background design of your layout.

Now I really wanted to document my first visit to Marini's on 57, a really hip bar on the 57th floor in one of the towers of the iconic Petronas Towers in Kuala Lumpur. But I only took a photo of the cocktails when I was there. So, the next day, I took a photo of one of the towers from the ground floor and incorporated in my skyscraper "scene" as a way to highlight the spot when we had our drinks. Can you spot the actual building? ;)


Farmers-news

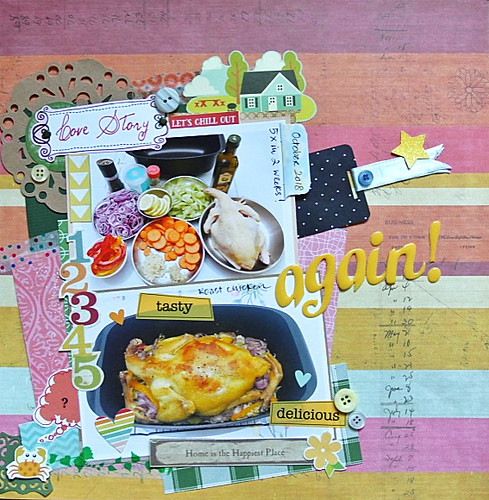
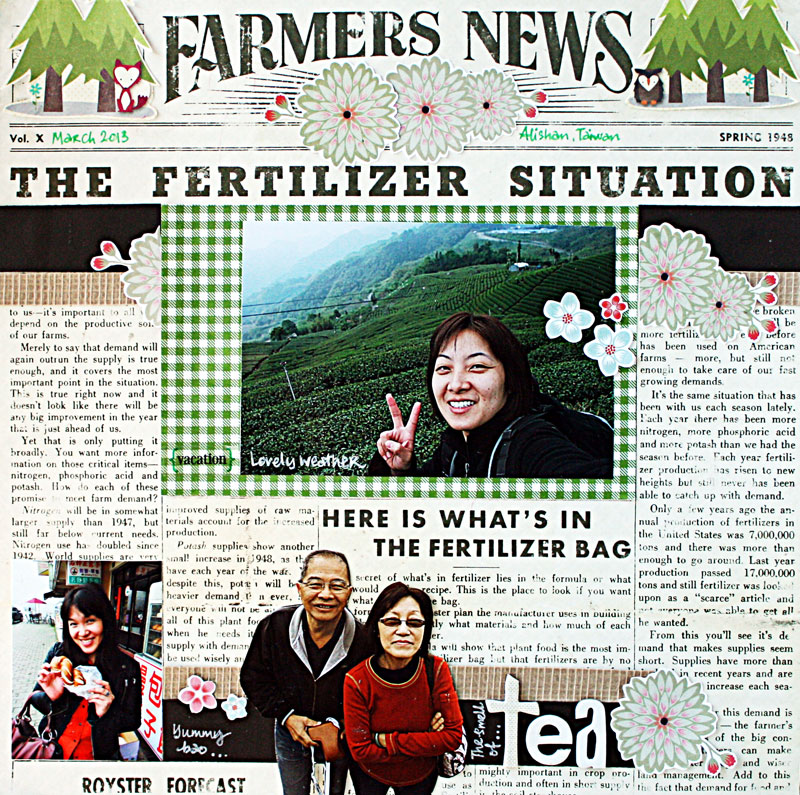
5. Use your patterned paper to tell your story.

Sometimes you find THE perfect piece of pre-designed patterned paper that helps you tell your story. So just use it. :) Here, on this layout, we were in the mountains of Alishan in Taiwan surrounded by tea plantations. All I did was add some trees, flowers and cute critters to create a newspaper article style layout for a bit of fun. ;)

There you have it, 5 ways to use embellishments to tell your story. Have you used any?


Share/Bookmark

Pin It
>
Related Posts Plugin for WordPress, Blogger...

LinkWithin

Pin It