Monday

The one about the muffins


The-one-about-the-muffins

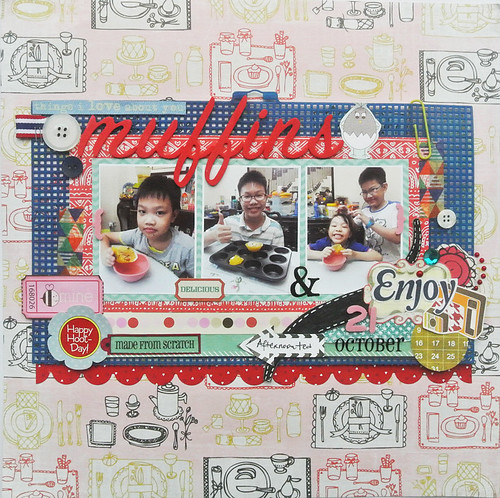
The Gangster Gang (aka nephews + niece) always looks forward to tea time on Saturdays.  Because that's THE day their fave aunt (me!) bakes them something yummy. 


Once the timer on my phone goes off, they rush off to see the baked goodies in the oven. And the 15 minutes they have to wait while the baked goods rest in the pans is like the loooooooongest time ever...for them. *LOL*


I really enjoy watching them eat ...they think everything I make is yummy...such discerning tasters...haha


Now there are 11 of us in the house on Saturdays (including my brother's helper) so when you bake 12 muffins, people are going to "fight" for the last muffin. 


Of course, everyone wants a fair chance at the last muffin because you know, the last muffin is always THE most delicious one. *winks*


Everyone gets to plead their case on why they deserve the last muffin...and the baker gets to choose who gets it. 


Of course, I always make the four of them share it AFTER I get some decent photos. Bribery always works! ;)


Playing along with The Studio Challenges.

P/s: This layout was an October favourite at The Studio Challenges.

Share/Bookmark

Pin It

Friday

A mixed media girl in my travel art journal


A-mixed-media-girl-in-my-travel-art-journal

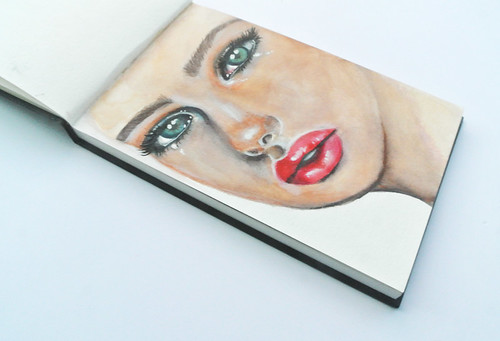
When I travel, I like to spend quiet nights in my hotel room playing with my art supplies. There's something about being in a foreign land that really gets my creative juices flowing. Plus, the limited art supplies I bring forces me to just go with the flow with what I have.


I will usually start with a quick sketch on the plane (I like using the pictures in the magazines on-board as my reference photos).  And yes, I bring my art supplies on the plane (The other day, when I was going through airport security, the officer asked to see my pencil case and I was like, "which one? I have 3!" *LOL*). 


I painted this mixed media girl in watercolours before refining her features with coloured pencils and a white acrylic marker. Yeah, my girl is wearing falsies because I was too lazy to sharpen my black coloured pencil. *winks*


Well, you are most attracted to those red luscious lips anyway right? *haha*


Happy weekend friends! :)


Share/Bookmark

Pin It

Tuesday

2 sheets of 1 patterned paper design = 5 projects


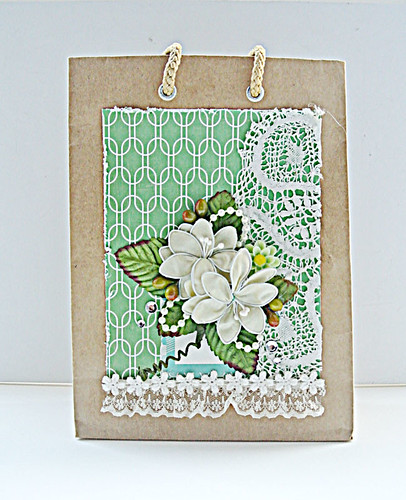
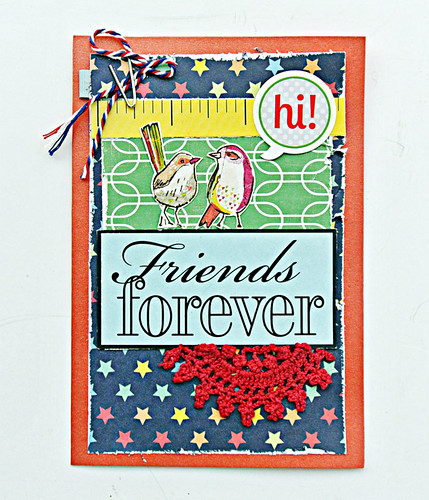
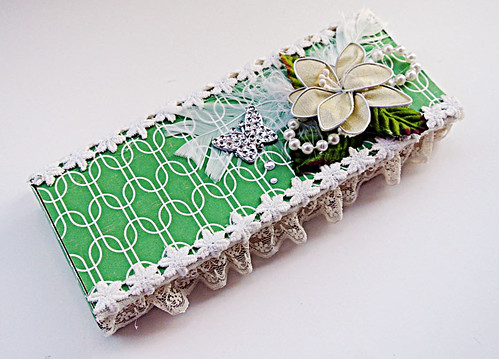
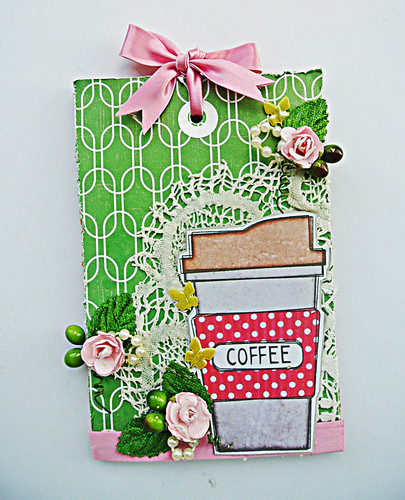
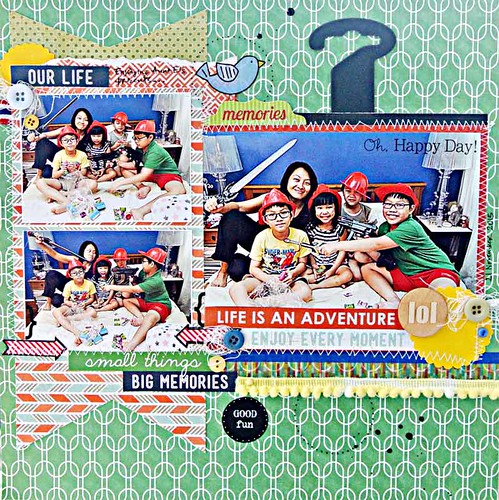
Sometimes it's fun to challenge yourself to create a variety of projects using a sheet or 2 of a particular patterned paper design....like I did. Here is how I utilized 2 sheets of this We R Memory Keepers patterned paper to create 5 different projects. :)

The-decorated-paper-bag
The decorated paper bag
1. A decorated paper bag

When-I-went-shopping-in-my-scrap-pile
When I went shopping in my scrap pile

2. A card.

A-quick-decorated-box
The quick decorated box

3. A decorated box.

Spring-coffee-tag
Spring coffee tag

4. A tag.

Life-is-an-advemture
Life is an adventure

5. A layout.

There you have it, stretching two sheets of a particular patterned paper design to create 5 different projects. Which one do you like?

P/s: All projects are linked to their original posts if you want to see closeups.  :)


Share/Bookmark


Pin It
Monday

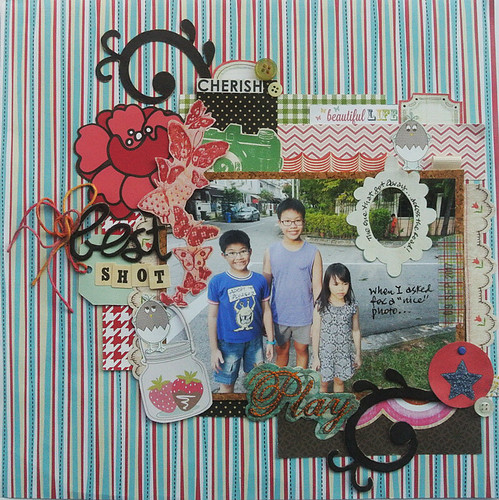
When I asked for a "nice" photo....and got this...*LOL*


When-I-asked-for-a-nice-photo...

Now I love doing multi-photo layouts because I feel that they help to tell the story better. This is THE exception.


"Come on...let's take a "nice" photo together!"


Problem #!: The over-smiler.


Problem #2: One remained in the shot but across the road!


Yep. This was an outtake that needed to be scrapbooked. See what I'm dealing with when it comes to The Gangster Gang (nephews + niece)? *winks*


Currently I'm a little obsessed with using my odd-sized paper scraps to form a fun mat for my photos. 


I also try to fit as many fussy-cut elements on my layout as possible. Look Julie,  a birdie from Jillibean Soup! *hehe*


All while keeping the items as flat as possible to maximize album storage.


Playing along with Stuck? Sketches.


Share/Bookmark

Pin It

Friday

Projects for the Maya Road/Chameleon Pens Swap....tutorials included


Hello friends! Today I'm sharing two projects I created for the Maya Road and Chameleon Pens swap. Now, I've been eyeing these pens for a really long time (they are really pricey here) so I was really happy to receive two sets courtesy of the lovely folks at Chameleon Pens. :)


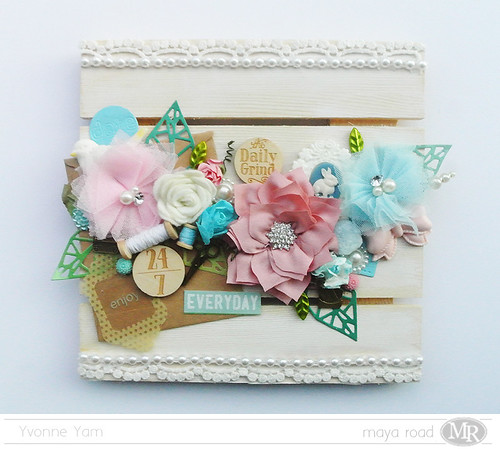
Mixed-media-wood-pallet-by-Yvonne-Yam-for-Maya-Road-Chameleon-pens-swap

My first project is this mixed media wood pallet. So soft and pretty, eh? *winks*

1. I started with the Maya Road 8x8 DIY wood pallet that I covered with some gesso and white to give the pallet a slightly white wash look.

2. I went with a Maya Road kraft envelope as the base to start my embellishment cluster because I really wanted the embellishments to stand out and patterned paper might detract from that. You must have seen those diecut leaves a million times but I really LOVE the Maya Road Geometric Leaf Die. *LOL*

3. Since I was going with sweet pastel colours for the embellishments, I coloured some white flowers with the light blue Chameleon Pen. The first one was covered entirely in blue. For the second one, I played with the toning medium to get a much lighter tone. I also coloured a small threaded wood spool blue. LOVE how fast I got these done with no mess to clean up!

4. I used the yellow Chameleon Pen to colour in the beak and tail of a Maya Road white resin bird. 

5. And then it was time for my fave part - putting everything together. I usually like to start from the center and work my way out but this time, I started from the left and worked all the way across because I tend to go crazy when clustering. *winks*


For me, clustering is all about mixing up the textures and shapes. And tucking little knick knacks here and there. I went with different types of blooms - tulle, ribbon, felt, paper and resin. I added metal charms, wood tokens and trinket pins.


And I went really slow and steady with the hot glue gun...after my last painful incident....and I emerged unscathed this time! Yay me! ;)


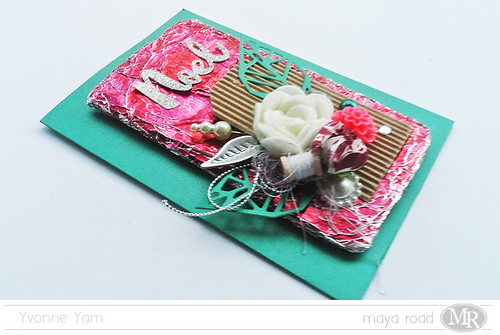
Mixed-media-cad-by-Yvonne-Yam-for-Maya-Road-Chameleon-pens-swap4

My next project is this dimensional mixed media Christmas card. Now you know that I like flattish cards in general but I made this so that I can adhere it to the top of a box and call it decorated...hehe. *lazy bones*


I started with packaging cardboard that I cut to size and wrapped with aluminium foil.


Then I coloured the whole thing with a red Chameleon pen (hard to photograph the shiny foil). I love that it was quick to colour and I kept my hands totally clean!


I also coloured some thread and white paper bloom with the same pen, varying the intensity of the colour with the toning medium.


I love that I got 3 different tones from just one pen! The foil turned out like a ruby red, the bloom was a rich burgundy and the thread is a light plum colour. 

Full disclosure: I wanted to make a tag actually...but the red was just whoa...too strong! 


So I glued the whole thing on a card base ...and called it a card done! Hahaha....that's how I roll!

There you have it, two projects using Maya Road goodies and Chameleon Pens. Happy weekend friends! :)


Share/Bookmark

Pin It

Monday

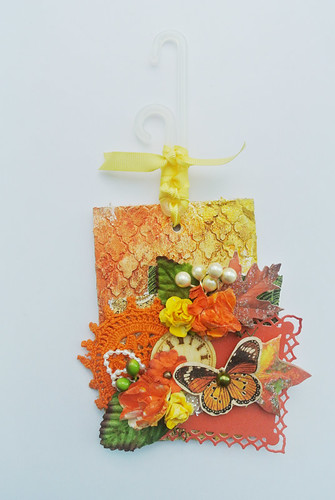
Fall-inspired mixed media tag


Fall-inspired-mixed-media-tag

Why yes, it's another fall-inspired mixed media tag! Autumn colours just make me happy.  :)


As always, I started with a cardboard base which I went over with a stencil and texture paste. After a coat of gesso, I applied mists for all-over colour and slight sheen.


I even went matchy-matchy with the flowers by using white ones and misting them the same colours as the base for a cohesive look. Would you believe that I made this tag just so that I could use that Graphic 45 fussy-cut butterfly? Yeah, sometimes I do crazy things! *LOL*


Yep, I even used a diecut! Go me! *high fives all around*


Of course, when I was rummaging my ribbon stash, I found a sock hanger which I just HAD to use. You know how it is...*winks*

Happy week ahead friends!


Share/Bookmark

Pin It
>
Related Posts Plugin for WordPress, Blogger...

LinkWithin

Pin It