Thursday

7 ways to use buttons on your projects


You know I LOVE using buttons on my projects. They are a great embellishment to use for adding that little bit of texture, dimension and a pop of colour to your projects without being obnoxiously in-your-face. *winks* Plus you can never run out of buttons. Ever. Just the other day, the bestie passed me some recycled buttons.

"Where did you get them?"
"From my old shirts. Took out the buttons for you and gave the shirts to the Salvation Army. Still totally wearable. "
"Eh...thanks???"

Good intention, bad execution? Picture the folks at the Salvation Army stitching some buttons on those shirts. *LOL*

Anyway, I digressed. Here are some fun ways to use buttons on your projects.


Wood-pallet-for-CHA2017
Wood pallet for Maya Road CHA2017
1. To add a decorative element to an embellishment cluster.

Here I used a crystal flower button and an embellished wood button to add a little more texture and interest to my embellishment cluster.

Decorated-paperbag-for-Maya-Road-by-Yvonne-Yam
Decorated paper bag for Maya Road
2. As the centre of a bloom.

Don't like the centre of a pre-made bloom? Switch it up to a button that coordinates with the theme of your project.

Every-picture-tells-a-story
Every picture tells a story...or does it?
3. As the lens of a camera.

This is a quick way to add a little dimension and interest to your paper camera element.


Wet-and-wild-in-the-tub
Wet and wild in the tub
4. To triangulate your focal point.

The pink buttons help guide the eye to the focal point - the photos!


Inspired-by-pop-art-mixed-media-canvas-by-Yvonne-Yam-for-The-Crafter's-Workshop7
The appeal of mixed media
5.  As a base element for mixed media application.

Here I used applied lots of gesso and coloured paints to the silver buttons on my mixed media canvas.

Repurposing-happy-mail-packaging
Repurposing happy mail packaging

6. To anchor twine/thread/ribbon.

This is one of my fave ways to use buttons. Such an easy way to use up little bits of twine that you may have lying around...just twine them up and anchor with a button - instant way to jazz up a card!

This-week's-fun-card-from-the-scrap-pile
This week's fun card from the scrap pile
7. Create a banner.

Use a mix of colourful buttons to create a fun banner on a card.

There you have it. 7 ways to use buttons on your projects. Do you like using buttons on your projects?


Share/Bookmark

Pin It

Wednesday

Workspace Wednesday June 2018


Happy Wednesday friends!

Here's a look at what's currently on my desk: a work-in-progress mixed media canvas. It takes me a while to build up the messy background layers because I take the opportunity to really try out different techniques. Progress has been slow...can you see that Tasmanian Devil is super frustrated with me???? *LOL*


Share/Bookmark

Pin It

Tuesday

Mother's Day breakfast at McCafe


Mother's-Day-breakfast-at-McCafe

So mum requested a family breakfast at her fave McCafe on Mother's Day. And nobody says no to the "queen"...right?*winks*


She said she wanted something salty (pesto chicken sandwich), something sweet (Oreo cheesecake) and something bitter (black coffee)...so she got them all of course!


And....having graduated with honours from Yvonne's Camera Must "Eat" Before Person Does course, she provided me with a lovely photo. Go mum!


Yes my friends, I took out my sticker stash to play! :)


Playing along with Let's Get Sketchy.


Share/Bookmark

Pin It

Monday

Another updated monogram


Another-updated-monogram

Hello friends! Meet another updated monogram. 

Yes. I can't help myself....since I have it off the wall, might as well just embellish it a little more right? *winks*

Bits-and-bobs-on-my-monogram
Bits and bobs on my monogram
Here's the old monogram (circa 2015) for reference.


I kept to the same colour scheme of greens and reds...


With some subtle "enhancements"....can you spot them?


Happy week ahead friends!


Share/Bookmark

Pin It

Thursday

Pasta and waffles for lunch


Pasta-and-waffles-for-lunch

So you know my sister is fantastic at sniffing out great deals on Fave (previously known as Groupon). The other day, she scored a pasta and waffles deal at Gelare....and I was the lucky lunch companion! *winks*


I only managed to get a photo of the pasta because the ice-cream on the waffles was melting away and we had to save the ice-cream by eating it asap!  *LOL*


Of course, that wasn't the only deal she scored...I also snagged a iced milk tea and a pulled pork bun for tea! :)


Yep...even the Mad Hatter was shocked...hehehe...


Can you tell that I had soooooooo much fun using up my paper scraps on this layout? 


Tucking a little bit here and a little bit there...:)


Playing along with Sketchabilities.

P/s: This layout was featured on Sketchbilities Sketch #150. :)


Share/Bookmark

Pin It

Monday

How to incorporate humour in your layouts (Part 2)


Back in June 2017, I wrote a post called How to incorporate humour in your layouts...9 ideas because that's the underlying theme in most of my family layouts. Others may have scrapbook albums filled with gorgeous pics and embellishments, mine almost always makes the viewer laugh out loud either in my choice of photos, embellishments, title or journaling. And that's the way I like it. Here is a Part 2 version of how to incorporate humour in your layouts. :)


At-last
At last
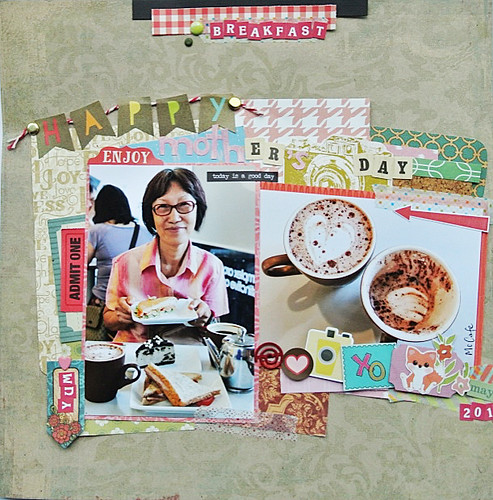
1. Use a song title as your layout title.

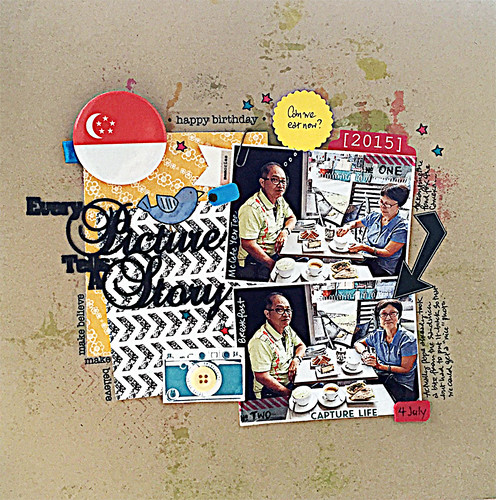
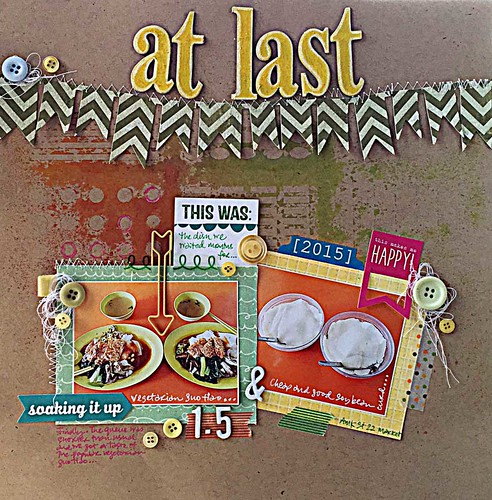
If you've ever been to Singapore, you would know that queuing up for good food at hawker centres/food courts is a norm. And it can be rather discouraging when your taste buds want to savour the food but the physical body does not want to wait in line to purchase said food. You know, life's hard.*winks* So when you happen to be in the vicinity of said food and the queue is wayyyyyyyy shorter than usual, you jump at the opportunity to finally satisfy your taste buds....and of course, make a scrapbook page out of it. After all, it is a momentous moment in life right? *LOL*

On this layout, I went with At Last by Etta James. :)


2. Incorporate fun text/quotes.

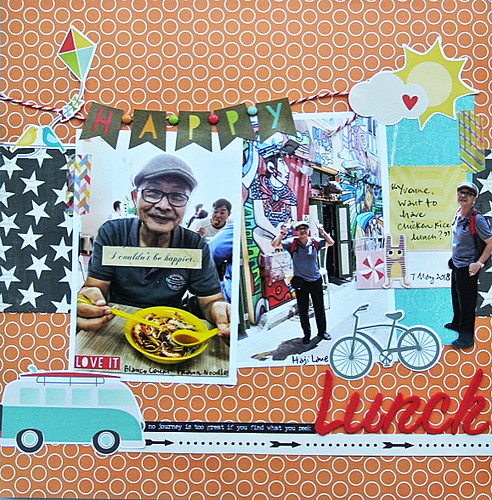
I love to use fun sticker text/quotes on my layouts to help tell my story. Like the van driving down the road with the quote " No journey is too great if you find what you need..." and ending with the journey being lunch!  *winks* Well, you know I did walk to the lunch place in 4 inch heels in the sweltering heat! 

Will-I-ever-get-a-nic-photo-
Will I ever get a nice photo?

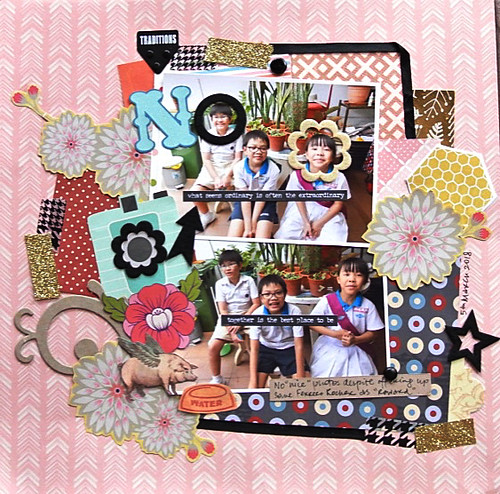
3.  Include a flying pig drinking water out of a dish.

Of course, in my already "overdone" layout with an overwhelming mix of patterns and colours, I just had to include a flying pig drinking water out of a dish because you know, I'm so extra. Hahahaha!

When-I-asked-for-a-nice-photo...
When I asked for a nice photo..

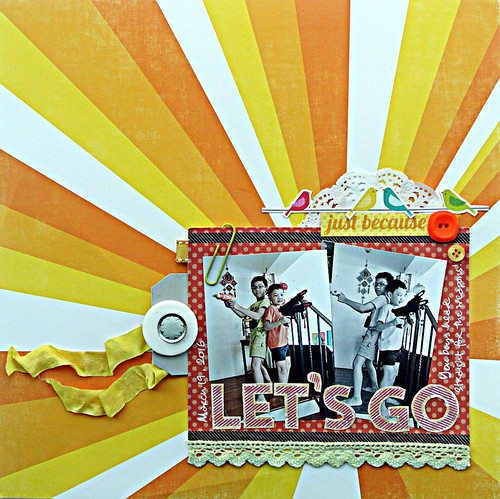
4. Use ONE large photo that tells the story.

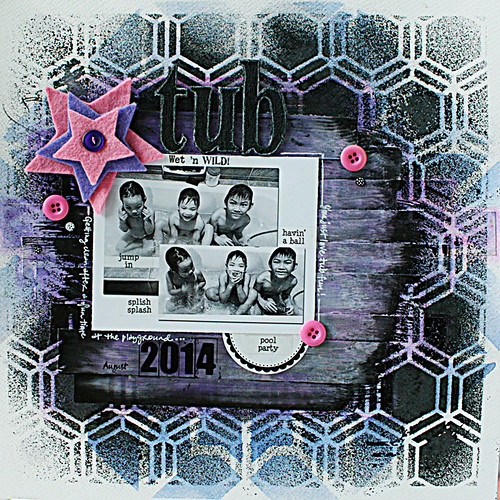
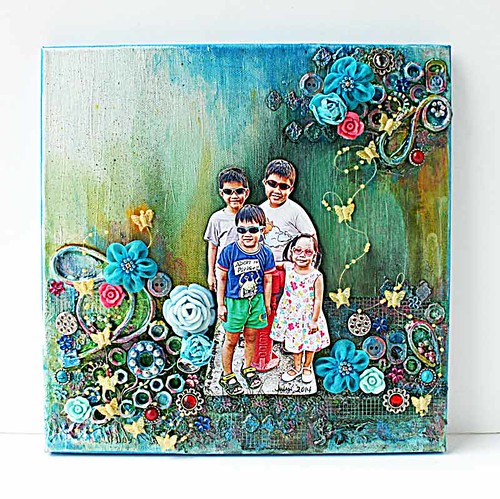
Sometimes you get that one perfect photo that sums up your story succinctly. No, not the one where everyone is smiling sweetly at the camera, the stars are aligned and you get that perfect shot where no one blinked or tried to be funny.

It's the one where almost everything is wrong with the photo but it tells the whole story. You know. Story of my life with The Gangster Gang (aka niece + nephews).

In my photo, the niece looks a little disgruntled, nephew #2 is trying too hard with the oversmiling and of course, nephew #3 is wayyyyyy back across the road (see frame).

Posing-at-the-fire-hydrant
Posing at the fire hydrant
5. Create a fun little "scene".

Gather all your fussy-cut cute elements and create a fun little fantasy "scene"...it's so much fun to play with scale and proportion to create your "scene"! :)

You-only-live-once
You only live once
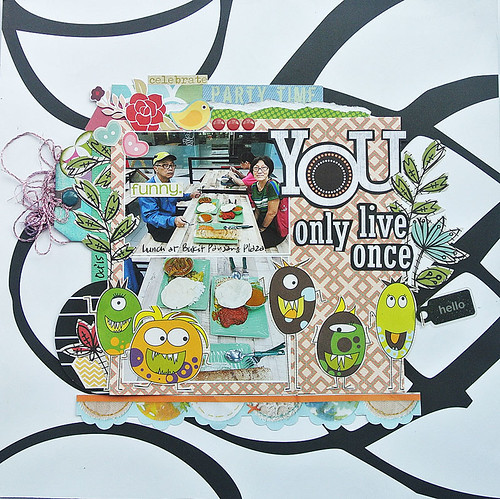
6. Incorporate an uncooperative subject, an apt title and fun monsters!

Yep, this was way back when dad hasn't quite understood that "the camera eats the food first"...check out his "not-so-happy" face about having to take a photo before eating as opposed to mum's happy face. Of course, the title is quite apt since they were indulging in rather unhealthy food. And, those monsters are clearly playing the devil's advocate! Hehehe!


It-was-a-tiara-wearing-kind-of-a-day
It was a tiara-wearing kind of day...

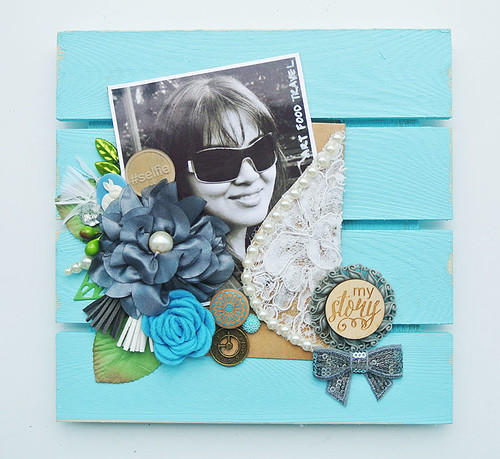
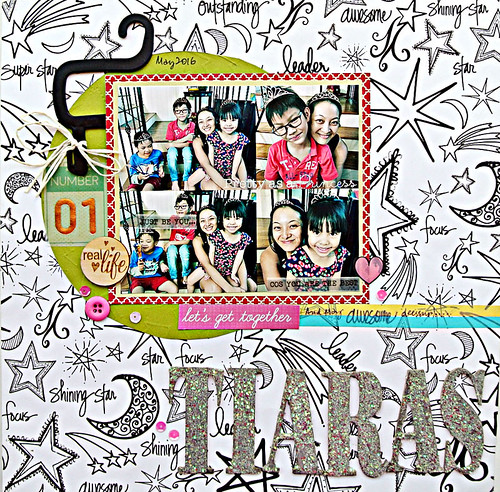
7. Make your subjects wear tiaras so that everyone can look pretty!

Well, you know me and my maximalism...of course I would have multiple tiaras to "dress" up my subjects. And the nephews enjoyed their "pretty" moments. *LOL*

The-need-for-self-preservation
The need for self-preservation
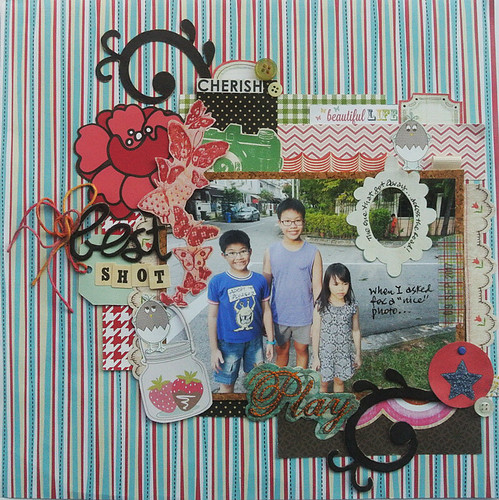
8. Put your subjects in cliche poses.

Nephew #2 and #3 were playing with their guns and drill-made-to-be-a-gun as usual so I got them to do the classic Charlie's Angels gun pose...you know, for a bit of fun! ;)

There you have it...how to incorporate humour in your layouts (Part 2)....which one made you laugh out loud??


Share/Bookmark

Pin It

Tuesday

The lazy person's mixed media canvas


The-lazy-person's-mixed-media-canvas

Well, putting up a gallery wall of "new" artwork is a lot harder than I first anticipated (which explains why you haven't seen the completed gallery wall yet..*winks*) so I've had to employ a lazy person's technique of "updating"a piece (like yesterday's The updated monogram) or doing a hybrid piece of mixing an old completed piece with something completely new.

Like this mixed media canvas....:)

I started with a 12 x 12 canvas which I covered with scrunched up wrapping tissue (from packaging) and gesso. Next I went in with paints, paints with a stencil, gesso and ink splatters. Once I was happy with the messy textured background, I decided to paint a mouth on it. 

That's when the project stalled for a bit because I enjoy drawing eyes a lot, the mouth...eh not so much. For 2 weeks, this incomplete mouth stared at me, taunting me, "Are you gonna finish painting me or am I too much a challenge???" (Grrrr...don't you just hate it when your artwork gets sarcastic on you? *LOL*)
Mixed-media-proect-inspired-by-2018-Pantone-Colour-of-the-Year---ultra-violet
Mixed media box inspired by Pantone 2018 Colour of the Year- Ultraviolet

Then I remembered that I traced the shape of the mouth from an earlier project that I did and I wondered..."Hmmm..could I do a hybrid assemblage piece???"


Well, you know what happened next....


I just glued the painted mouth-on-box lid on my canvas and my mixed media canvas is complete. :)

What do you think of my lazy person's mixed media canvas?


Share/Bookmark

Pin It

Monday

The updated monogram


The-updated-monogram

So I'm finally tackling the decorated monogram stash (previously on my wall before the revamp)...should they go back up on display as is or do they need a redo? That is the question.


For this particular monogram, I decided to change up the embellishments. Okay, you got me. I dropped the whole thing on the floor and the original pink bloom fell off... 


Adding-to-my-monogram-collection
Adding to my monogram collection

Yep...here's the original version with the large pink bloom that fell off (this was done in 2015)...and while waiting for the hot glue gun to heat up, I thought to myself, "Why not just change up the embellishments for a "new" look?" *winks*


I went for the monochromatic look so I just added more white embellishments with little pops of green.


And of course, the old version was missing bling...so I just had to incorporate a few here.


I think the updated monogram is more reflective of my current aesthetic..and maximalist clustering style..*LOL*

What do you think?


P/s: Meanwhile, security has been heightened in Singapore this week as US President Donald Trump and North Korean leader Kim Jong Un meet for the first-ever US-North Korea Summit. I'm just hoping for no traffic jams. :)

Share/Bookmark

Pin It
>
Related Posts Plugin for WordPress, Blogger...

LinkWithin

Pin It