Showing posts with label guest designer. Show all posts

Friday

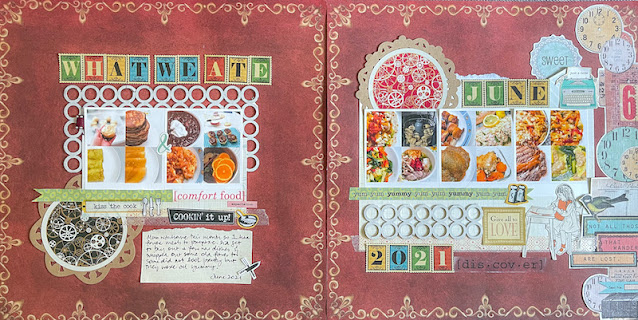
Double page spread for my guest designer stint at Stick It Down


This month I'm guest designing over at Stick It Down and here is my double page spread which features what the Yams ate in June. :)


It doesn't feature ALL the food I've made...just the ones I remembered to take photos of...before they got eaten. *winks* 


I did try to whip up some new-to-me recipes to keep the creative juices flowing. Yep, even the ugly donuts get to be in the family scrapbook. *LOL*


I kept the pages relatively simple by using the same patterned paper and repeating elements on both pages for cohesiveness.

Happy weekend friends! :)


Share/Bookmark

Pin It

Tuesday

Christmas cakes 2020


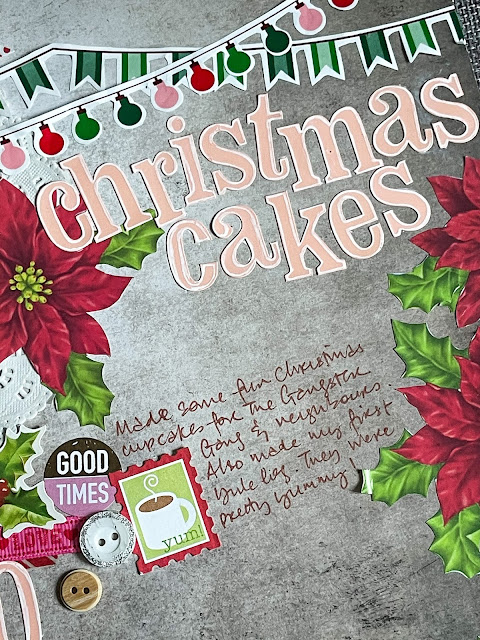
This month I got invited to be guest designer over at Stick It Down and here is my page! :)


I decided to document my Christmas cakes since I put in so much effort to make them. *winks*


The poinsettias and banners were fussy-cut from some wrapping paper I got last Christmas (perfect for all my Christmas 2020 layouts).


 The titlework was created with stickers. I did outline the letters with a white gel pen for a little more interest and dimension.


In case you missed the post about my Christmas cakes, I made chocolate Christmas tree cupcakes with M & Ms and a Yule log. :)

Share/Bookmark

Pin It

Monday

Guest designer this month at Let's Get Sketchy


Hello friends! This month, I got to join the lovely team at Let's Get Sketchy as their guest designer. :)


I went a little bold with my colours to really draw the eye to the photos.


Yep...Nephew #3's birthday. :)


I went in with lots of stickers and diecuts.


In case you were wondering...the cake was chocolate with cream cheese frosting.


Hope you can find time to play along with Let's Get Sketchy this month!


Share/Bookmark

Pin It

Friday

Guest designer at Stick It Down


Hello friends! This month I got to guest design alongside the awesome design team at Stick It Down.


Here is the sketch if you are so inclined to play along. :)

As always, I took liberties with the sketch (What's new right? Hehe). I recently got a coupon for fifty 4R prints at Harvey Norman so I went for four 4R photos on this layout. Instead of putting 3 diagonal strips of patterned papers, I used patterned paper as my base and used 3 strips of plain cardstock.


Nephew #3 and niece S were very excited to meet their cousin L for the very first time at CNY. And of course, they wanted to carry the baby. :)


Yes, I'm still going strong with my repurposed CNY decorations on my layout. *winks*


If you don't already know, I'm working my way through my sticker stash too. :)


Happy weekend friends!


Share/Bookmark

Pin It

Monday

Guest designing for Stuck?! Sketches...


Layout-for-Stuck-Sketches

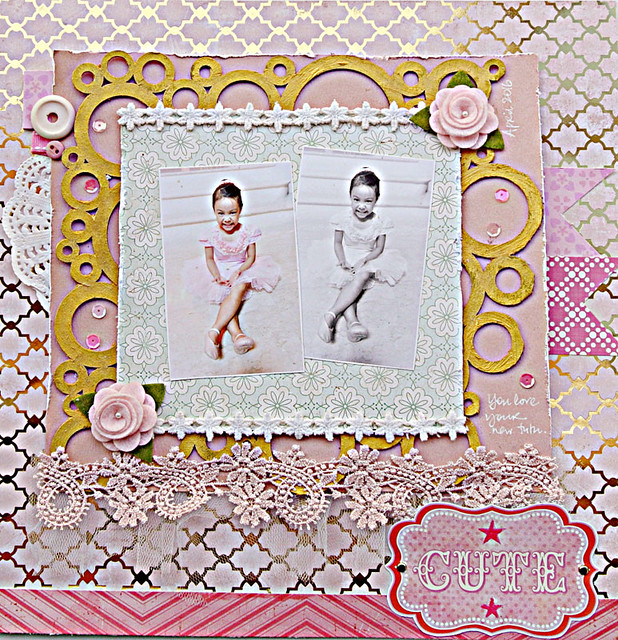
So I was invited to be the guest designer for the May 15 sketch over at Stuck?! Sketches. :)


I decided to go the pretty route for this layout....because of this sweet photo of my niece in her new tutu dress. Yeah, she's like my real-life doll. I totally "staged" this photo...*winks*


Trying to work through my chipboard collection too...[Can you believe I still have a lot of chipboard from my 2013 design team stint with Blue Fern Studios? ]


I love adding the tulle and the lace for a dreamy feel.


Here's the sketch...come play along! 

Share/Bookmark

Pin It

A mixed media girl on canvas for the Mixed Media Monthly Challenge


Mixed-media-girl-for-MMMC-by-Yvonne-Yam

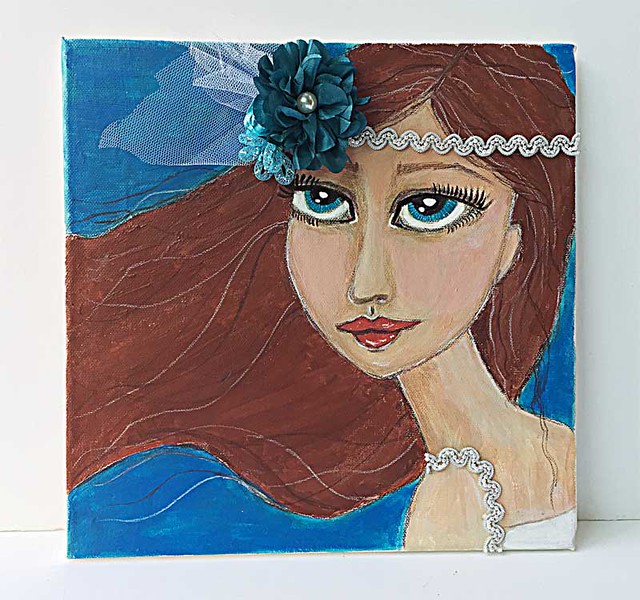
Hello friends! The fabulous team at The Mixed Media Monthly Challenge are celebrating their first year anniversary and invited me to join in the fun! :)


My mixed media girl on 12x12 canvas was painted with acrylic paints and the details were done with Prismacolor pencils.


You can create a project for any of the past year's challenges...I did #12.:)

Share/Bookmark

Pin It

Thursday

A quick mixed media card with Maya Road embellishments


Mixed-media-card-by-Yvonne-Yam-for-Maya-Road

I loved the pretty embellishments Maya Road sent me and thought they would look great on a quick mixed media card. *winks*


I chose from my stack of residual-misted backgrounds, picked out some embellishments and went to work with my hot glue gun!  :)


Not too shabby for 15 minutes of work, eh?

This card was created as part of my guest designer stint this month at Maya Road. I also created a layout and a mixed media canvas [click to see the post if you missed them].


Share/Bookmark

Pin It

Monday

When art imitates life....*winks*


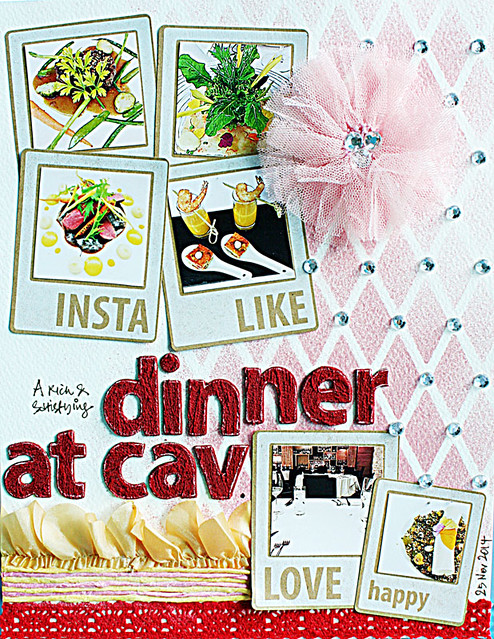
Dinner-layout-by-Yvonne-Yam-for-Maya-Road

Some say art imitates life. And I agree. These days, my approach to designing a project is much like decorating a room....pick out a few colours, then layer the textures....probably because of my latest obsession with HGTV. *LOL*


After misting the background design, I thought it resembled "wallpaper" so I added some "hardware" to make it pop a little more. The bling coordinated well with the tulle bling bloom.


The chipboard letters were coloured with Art Anthology stone effects paint and I layered the trims with cording for textured interest.

This layout was created for Maya Road.


Share/Bookmark

Pin It

Thursday

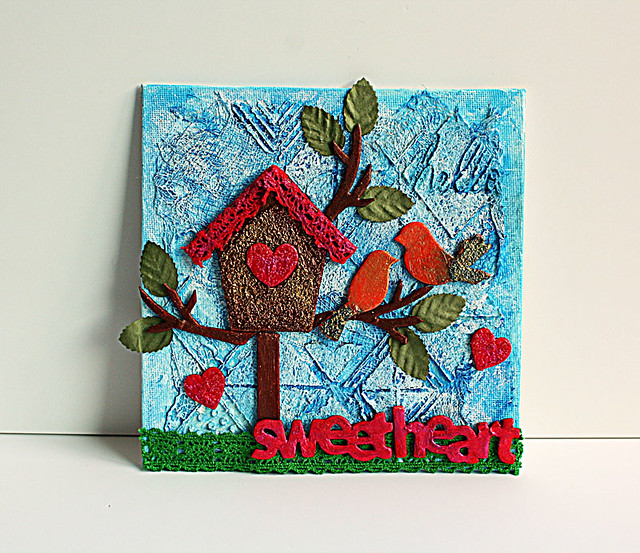
Hello sweetheart mixed media canvas for Maya Road....a tutorial


Hello-sweetheart-mixed-media-canvas-by-Yvonne-Yam-for-Maya-Road

Hello friends! This month I am the guest designer over at Maya Road. Yay!  :) Here is the first of three projects I created for them...a 6x6 mixed media canvas.


I quite enjoyed the process of created something cutesy for a change...*winks* I've included a short tutorial to share how I created this project.


I started by adhering some medical gauze with gel medium to the canvas. Then I used The Crafter's Workshop stencil with some Golden fiber paste.


When that was dry, I coloured with some Faber Castell gelatos, blending the colours with some water. Then I applied some Liquitex heavy gesso to really bring out the textures of the gauze and fiber paste.


For the Maya Road chipboard pieces, I first painted them with gesso then with Golden and Daler Rowney acrylic paints.


Next I added some texture to the chipboard pieces using Golden glass bead gel. And when that was dry, I highlighted the textures with ColourArte Silks for some beautiful shimmer. Then I added some Maya Road vintage lace trim.


The last step was to assemble all the components together.

What do you think?

Share/Bookmark

Pin It
>
Related Posts Plugin for WordPress, Blogger...

LinkWithin

Pin It