Tuesday

Happy merry everything! :)


Upcycled-Xmas-tin-box

Just wanted to wish all my bloggy friends..."Happy merry everything!" :)

Thank you so much for stopping by my blog in 2013 and leaving me such sweet comments. I'm taking a little bloggy break to enjoy the last few days of the year! See you in 2014! :)


P/s: This upcycled tin box is filled to the brim with my fave embellishments...washi tape, chipboard, fabric buttons, twine and other cute stuff.  And I would like to send it to ONE of you.  Just leave a comment and I will announce the lucky winner on 7th January 2014.

Share/Bookmark

Pin It

Monday

It's a lovely time of the year! :)


Snowmen-Christmas-cards

Hello friends! Are you enjoying this time of the year? 


This year, I've been really good. Really good. All the packages and cards that I sent out have reached their destinations! *High Fives All Around* 


And it's been really lovely to receive cards and little gifts in the mail too! Thank you sweet friends! :)


Share/Bookmark

Pin It

Thursday

I've been checking you out...*winks*


March2013

This year, I got to spend my birthday with my family in Taiwan. I had my eye on one of those cuties in a cake store....but my family members had other ideas. ..*winks*


My mother wanted a chestnut cake [pictured in glassine bag] while my father thought he scored a great deal - cake with ice-cream and a drink. We laughed hysterically when it came...it was a small piece of cake with a scoop of ice-cream and a cup of milk tea! [pictured at bottom of layout]


Okay, there are no people pictures because we were laughing so hard that all the pictures came out blurred...*LOL*


Playing along with the challenge at Once Upon A...Sketch.


Share/Bookmark

Pin It

Tuesday

I may have a new fave colour combo...


Coral-mixed-media-canvas

It pays to reorganize your craft supplies...when you find new "old" stash! *winks* I found a tub of pretty coral paint. :)


Coral, white and silver may be a new fave colour combo! :)
Playing along with the gift challenge at 13 Arts. I used gift-wrapping tissue.

*Edited* This canvas was placed 3rd at 13 Arts.


Share/Bookmark

Pin It

Monday

The story about the green piece of cloth...


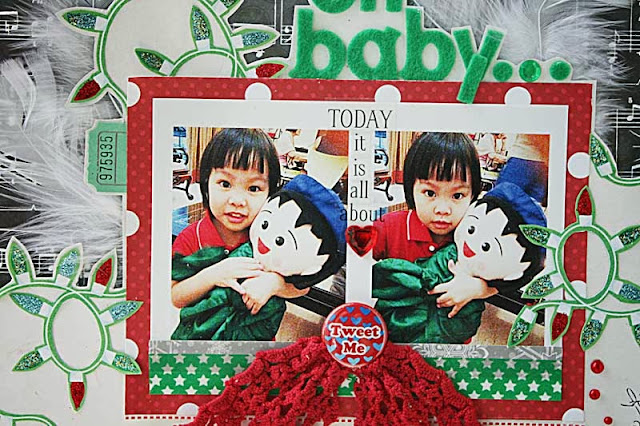
Oh-baby

So the other day, I totally "sold" the wonders of a green piece of cloth to my niece S. First, I tied it around her shoulders as a cape...then around her waist for a skirt.... After that, I wrapped her doll in it and called it a "baby"....


Her face says it all eh? She was sooooo happy with her "baby". Kids are easy to entertain when they are two! *LOL*


I'm playing along with the team over at Scrap Africa as this month's guest designer. Come play along! :)


Share/Bookmark

Pin It

Friday

Upcycled plate for SRM Stickers


Altered-plate

So back in October, I envisioned a wall full of decorated pie plates when I did my first one. That seems like an uphill task since I'm only on plate #2... *LOL*


This time round, it features nephew #1 & 2 posing sweetly for the camera back in January [with some sort of bribery involved of my part for sure...since they are both looking at the camera AND smiling...rare feats for children...*winks*]


I LOVE that I managed to use little bits from my "save-it-for-a-rainy-day" stash...scraps of ribbon and twine and felt blooms. Then I added some SRM Stickers and buttons from Purple Pumpkin to complete my pie plate. :)
P/s: Happy weekend friends!

Share/Bookmark

Pin It

Wednesday

A play with modeling paste, glass bead gel and gelatos!


Walk

So nephew #1 makes a rare appearance on the weekly walk...usually reserved for littlest nephew and niece so that auntrazzi can take cute photos...*LOL*


Playing with modeling paste, glass bead gel and gelatos...


Playing along with the sketch challenge at ScrapFriends and the mood board at Scrap Around The World.


*Edited* This layout made Top 10 at Scrap Around The World.

Share/Bookmark

Pin It

Tuesday

Gift-wrapped boxes with Xyron!


Gift-wrapped-Xmas

Nothing says Christmas like gift-wrapped boxes! :) [No guessing how many chocolates were eaten while gift-wrapping....dark chocolate has antioxidants! *winks*]


Start by measuring your boxes and cutting your patterned papers [Studio Calico Magical and Crate Paper Bundled Up Jack Frost].


Then run it through the Xyron 3" Sticker Maker for an even application of adhesive. Adhere to boxes.


Paint chipboard pieces with gold paint. Run the chipboard pieces through the Xyron 3" Sticker Maker.


Adhere chipboard to boxes.


Embellish with bloom,trim [Maya Road Antique Pearl Center and Satin Scallop Edge Trim -Crimson] and leaves and your decorated box is complete!


Here are my decorated boxes!


Hope you've enjoyed my gift-wrapped boxes as part of 30 days of Holiday Project Ideas with Xyron. :)


P/s: My US and Canadian friends...Xyron is celebrating 100,000 Facebook fans with awesome giveaways this week - 18 prizes worth $1000 each. Seriously. Go enter now. If you get lucky, you will share some goodies with me right? Pretty please....


Share/Bookmark

Pin It

Monday

The outdoor girl


Outdoor-girl

My niece Sophie is always happy when she's outdoors. Her face lights up the moment you suggest a walk. :)


Here is the outdoor girl, posing for photos before we head out for a walk. :)

Playing along with the December challenge at Inkido and The Studio using the sketch from Sketchbook 365


Share/Bookmark

Pin It

Saturday

Upcycled boxes for Blue Fern Studios


Decorated-box1

Taking a break from all the holiday projects to share 2 upcycled boxes for Blue Fern Studios. :)


For the first box, I covered it with patterned papers, added a gold painted Blue Fern Studios Ring Panels chipboard, then added pretty trims and blooms.

Gold-box

My second box is a little more ornate. :)


I used the same Rings Panel chipboard but I added pearls to the centres for more texture and interest. :)

These are sitting pretty in my mother's wardrobe, holding some treasured momentos. :)

P/s:  I love using my Xyron 5" and 9" Creative Stations when it comes to adhering patterned papers to boxes. Nothing like an even layer of strong adhesive! :)


Share/Bookmark

Pin It

Friday

A decorated Christmas tree and coordinating canvas


MadewithloveDecemberprojects

Today's share is a decorated Christmas tree and coordinating canvas [I have been rocking the coordinating sets this holiday season eh? *High fives all around*] for Made With Love.


I adhered the negative chipboard frame to a 6 x 6 canvas with gel medium and then covered it with a layer of gesso. After that, I misted with Dylusions ink sprays. Then I adhered all the pretty trims and blooms.


I adhered some wrapping tissue around a styrofoam cone. Then I misted with Dylusions ink sprays. After that, I went crazy with the trims and blooms.

Please check out what the rest of the Made With Love team did this month.. Gen, Jeanette, Pooi, Priscilla and Sam.


Share/Bookmark

Pin It
>
Related Posts Plugin for WordPress, Blogger...

LinkWithin

Pin It