Saturday

The one about the island cake


So I watched numerous YouTube videos on how to make the island cake and finally decided to just make it for my sister's Chinese birthday.


Now I mentioned in a previous post on my recent cake adventures the problems I encountered when I made this cake but it all worked out at the end.


Except for the part where everybody thought the cake looked weird, the flavours were great. I had a vanilla cake layer and a chocolate cake layer and I used a lychee pastry cream filling with lychee pieces. The whole cake was iced with chocolate ganache and the jelly was lychee-flavoured to tie everything together. It wasn't a flavour combo that was featured in any of the videos I watched but just something I came up with because I wanted to finish whatever I had in my fridge. *winks*


Playing along with Let's Get Sketchy.


Share/Bookmark

Pin It

Thursday

This week's mish mash card from the scrap pile


Presenting this week's mish mash card from the scrap pile....


The card base was created ages ago with residual mists from another project...that never got picked...until now *winks*. 


If you think this looks like some random stuff put together, it is! I really wanted to use the card base and the cute fox wax seal. That's the way I roll! *LOL*

P/s: Apologies for falling behind on the blog visits...CNY is next week and I have baked nothing. Yep. Just lots of spring-cleaning and getting back to the whole food prep thing. And of course, this year's #the100dayproject started on January 31st and this gal is 1 day behind. I will get my act together. *triumphant music plays in the background*


Share/Bookmark

Pin It

Monday

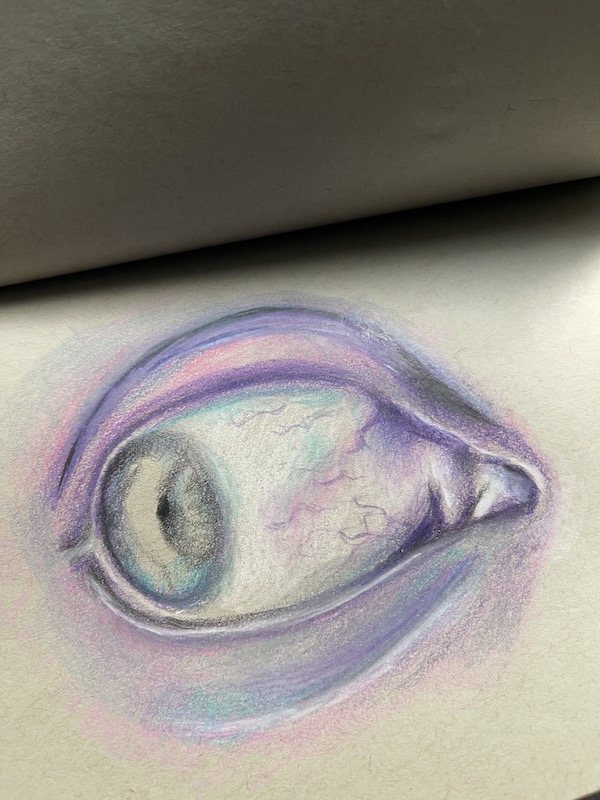
Mixed Media Monday - eye drawing


Happy Monday friends! In 2021, I've scheduled in art time every day so  I've been getting some drawings done! Like this eye.


And of course, giving some love to neglected art supplies like my Prismacolor Premier Colored Pencils. :)


Share/Bookmark

Pin It

Friday

My sister's birthday party 2021


So back in early January, we celebrated my sister's birthday with the whole family...marking a new year, and new beginnings for her. :)


As usual, it was hard to get the Gangster Gang (3 nephews + 1 niece) to pose nicely for a photo. Yep,,,this would be the best one. *LOL*


Luckily for me, my sister obliged me by posing with each of the dishes I made for her birthday party. Well, you know there was no way I would be able to get all the food on the table, arrange it nicely for a photo shoot and take some lovely IG-worthy foodporn photos before family members start eating the stuff right. This will do. *winks*


Since this was a double-page spread, I tied the pages together with the same patterned papers, doiley, lace trim, chipboard and washi tape - the green vine and the pink text bits.


Did you spot the cute little birdies? 


Playing along with More Than Words


Share/Bookmark

Pin It

Thursday

This week's mish mash card and a little life update


Hello friends! This week's mish mash card was inspired by the lazy bear from a post-it notepad!  Yep...this year will be a shop-my-own-stationery-stash kind of year because let's be real, this gal has a lot of stuff. *LOL*


This bear represents the lazy part of me still in denial that we are in a brand new year...and the rain cloud and sunglasses reflect the current weather we have in Singapore as well as my productivity levels - sometimes I'm so dazzling (*winks*)) and at other times, all I want to do is slow down and listen to the rhythm of the falling rain aka do nothing. ;)


We will be celebrating the Chinese Lunar New Year in 2 weeks so every other day I work on cleaning a different part of the house whilst cooking lunch/making snacks for weekdays. (If you are curious, you can check out what I make on IG). 

Definitely working on getting more systems in place in the household to boost efficiency. Last year, I printed and laminated simple signs that read "clean" and "dirty" to put in laundry baskets because family members were using the "smell" test to determine if the laundry was clean or dirty. Ewww... After 4 months, I'm glad to say that everyone is on board. I also placed baskets all over the 2 living rooms for the family to place their bags because I implemented the "no bags on chairs" rule. So far so good except for Mummy Yam who occasionally flouts the rule but is doing much better after stern warnings. *hehehe*

I will be working on the CNY baking this weekend. But the government has announced that each household can only have 8 visitors per day during the festive period. And we can only visit 2 households per day. We usually have like 30 people in our home on the first day. So this CNY will be a relatively quiet one because when my brother comes over with his family, we can only have 3 other guests (luckily nephew #1 lives with us). Meanwhile, vaccinations are underway with the frontline workers and elderly getting priority. 

Tell me what's happening in your neck of the woods. 

Share/Bookmark

Pin It

Wednesday

Fun Sunday decorating and eating sugar cookies


Nephew #3 and the niece had a fun time decorating and eating sugar cookies last month. They said it was "more fun than playing the game on Playstation".  *winks* (They only have ONE game to play and it is a really lame one....hahaha)


Check out the intense concentration....*LOL*


The niece took a long time picking out the exact sprinkles she wanted for her own cookies. But when she was asked to make more for the rest of the family, she just threw them on! *hehehe*


And yes, I'm still trying to use up my Christmas wrapping paper!

Playing along with The Studio Challenges.


Share/Bookmark

Pin It

Friday

Your weekend project - a cute decorated paper bag (a tutorial)


Hello friends! Here's your weekend project - a cute decorated paper bag! :)


Start with a sturdy paper bag of your choice.


Measure and cut patterned papers to fit the front, back, bottom and sides of the paper bag. I usually cover just the front and back of the paper bag but I am on an ongoing mission to use up my patterned papers so I went with my paper stack from 7Gypsies that I've had for years.


Adhere cut papers to the paper bag with an adhesive of your choice. I went with my Xyron Creative Station for an even layer of adhesive.


Start playing around with your elements until you are happy with the layout design. Then adhere the pieces.


Add handles to the bag. 


I like to finish off the decorated paper bag by adding some texture.


There you have it - a cute decorated paper bag to add to your stash. Perfect to pull out for that last minute gift!

Happy weekend friends!:)


Share/Bookmark

Pin It

Thursday

This week's cafe eye drawing


Yesterday, I had 2 hours to kill before a dinner appointment so I popped into a Starbucks, ordered a camomile tea and zoned out for a bit in my coloured pencil world. *winks*


This was 2 hours into the drawing...


And I finished it today. :)


Share/Bookmark

Pin It
Tuesday

Christmas cakes 2020


This month I got invited to be guest designer over at Stick It Down and here is my page! :)


I decided to document my Christmas cakes since I put in so much effort to make them. *winks*


The poinsettias and banners were fussy-cut from some wrapping paper I got last Christmas (perfect for all my Christmas 2020 layouts).


 The titlework was created with stickers. I did outline the letters with a white gel pen for a little more interest and dimension.


In case you missed the post about my Christmas cakes, I made chocolate Christmas tree cupcakes with M & Ms and a Yule log. :)


Share/Bookmark

Pin It

Monday

Make Stuff Monday - a pretty decorated paper bag


Hello friends! Today's Make Stuff Monday is a pretty decorated paper bag! :)


I started with this Kiehl's paper bag. I haven't gotten this in ages because I usually bring a bag with me when I go shopping. But recently, with all the online shopping, the paper bags in my stash have been increasing. So I guess you can expect to see more decorated paper bags from me this year. ;) 


Then I covered the front, back and sides with pretty patterned paper.


And then just added bits from my stash, some stuff from happy mail and upcycled items.... :)


I think it turned out quite pretty eh? *winks*

Happy week ahead friends!


Share/Bookmark

Pin It
>
Related Posts Plugin for WordPress, Blogger...

LinkWithin

Pin It