Tuesday

9 Christmas project ideas


Okay friends. I'm in full panic mode now. Other than the random Christmas tag I made a few weeks ago, I have done nothing for Christmas. Nothing. No cards, no gift bags, no decorated boxes. Which means people in my life will be getting New Year cards (if they are lucky) but my best bet would be Valentine's Day cards, I reckon. *LOL*

But wait. I'm pretty great at making quick projects [modesty is obviously not this girl's strong suit *winks*] and I do have at least 2 weekends to really get my act together. So I dug through my archives to seek some inspiration for projects...here are 8 Christmas project ideas. 


1. A Christmas wall hanging

An easy project using a CD case, washi tape, some diecuts and decorations from the previous year's Christmas cake.

Upcycled-Christmas-gift-box-for-Xyron-by-Yvonne-Yam
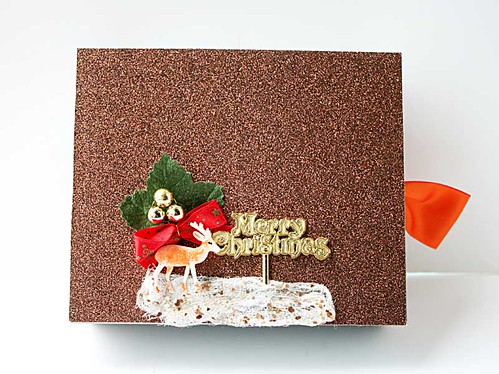
A Christmas gift box
2. A Christmas gift box

This was super quick to put together. Glitter cardstock and embellishments from the previous year's Christmas cake.

5-minute-Christmas-card
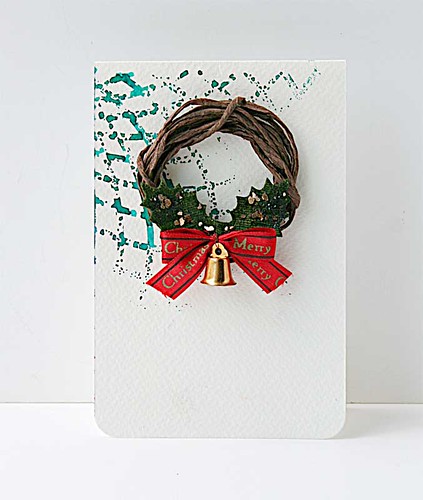
The five-minute Christmas card

3. The five-minute Christmas card

A little residue mist on a watercolour card base, some twine, Golden gold mica flakes and embellishment from an old Christmas card.
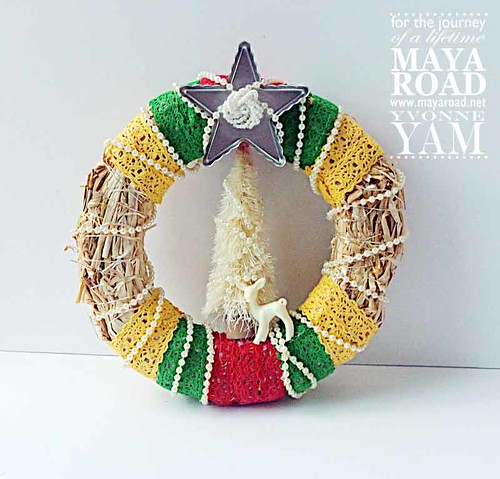
Christmas-wreath-by-Yvonne-Yam-for-Maya-Road
My first Christmas wreath

4. A Christmas wreath

Nothing like adding cute embellishments to a wreath with a hot glue gun.

Gift-wrapped-Xmas
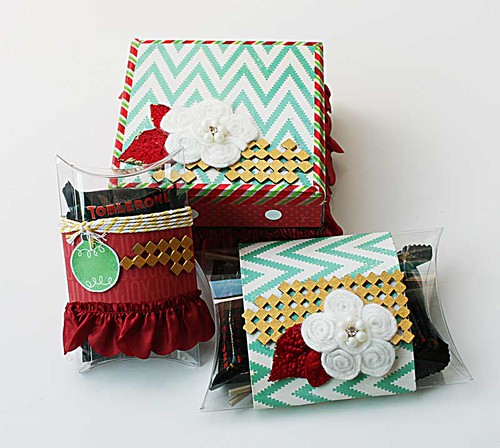
Gift-wrapped boxes 
5. Gift-wrapped boxes

I kept to traditional Christmas colours and used the same gold painted chipboard to achieve cohesiveness among the trio of gift boxes....even though every one of them was filled with Toblerones....yum!

Heidi-Swapp-Xyron-swap-project
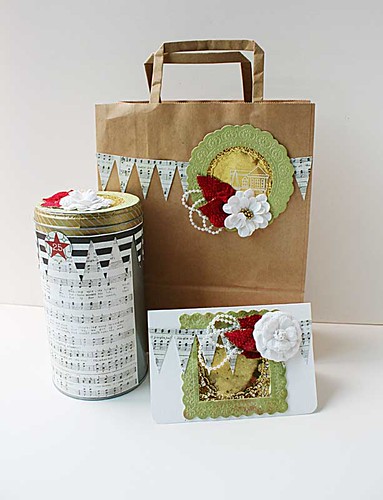
Holiday gift set
6. A holiday gift set

Wow. I wonder who received this set from me...*winks*
Repeated elements across the items keep them coordinated...give this to a special someone.:)

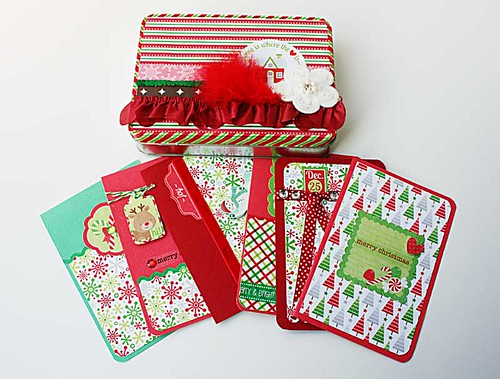
Upcycled-tin-box-of-Christmas-cards
Upcycled tin of Christmas cards
7. Upcycled tin of Christmas cards

Apparently, I was so ahead of the game in the past that I could actually give cards away...haha!
Decorate an old tin box and fill it up with handmade Christmas cards and envelopes. 

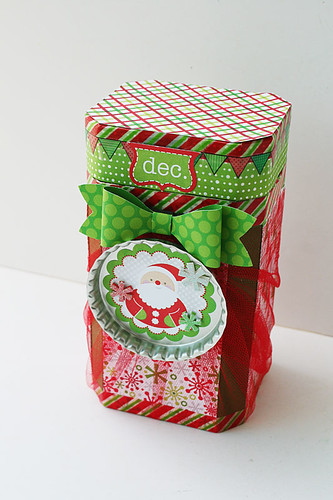
Upcycled-X'mas-box
Upcycled Christmas tea tin

8. Upcycled Christmas tea tin

Decorate an old tea tin with Christmas embellishments and fill it up with yummy cookies!

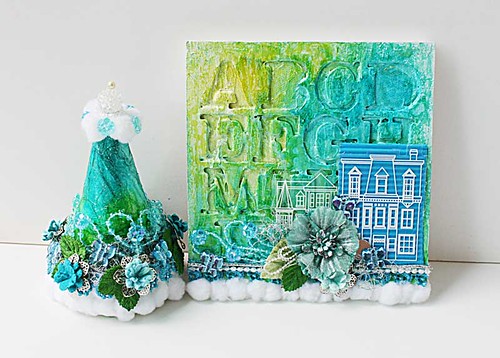
MadewithloveDecemberprojects
Decorated Christmas tree and canvas
9. Decorated Christmas tree and canvas

Not enough space to go all out in your Christmas decorations? How about a small decorated tree and canvas to add a festive cheer to a small nook? 


There you have it. 9 Christmas project ideas that are totally doable before Christmas. :)

Share/Bookmark


Pin It

Monday

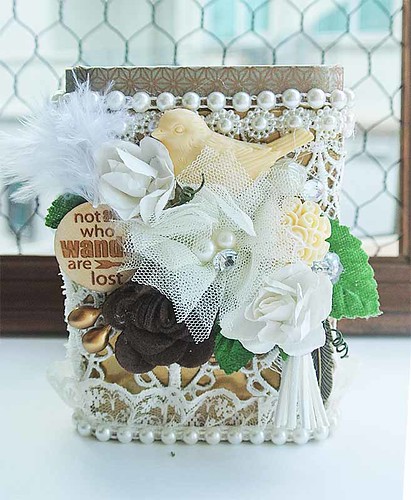
The overdone tea tin


The overdone tea tin

Yes, these days I seem to be overdoing it a lot on my projects. I blame it on the new hot glue gun. It heats up super quick and I don't have to eat a can of spinach [a la Popeye] before I can squeeze the trigger to dispense the glue. *LOL*


Hence, this overdone tea tin. 

After an uneven spray of gold paint, my tea tin needed a bit of a cover-up job so I decided to wrap it in peekaboo lace. Then of course, I had an overzealous application of glue which resulted in the gold paint peeling off [I write this calmly now but I was freaking out!] so I needed a bigger cover-up. 

And you know how it went after that...the embellishments ganged up on me and beckoned me to use them. 

"Use me, I'm pretty!" 
"Hey, how about me? I'm good-looking too!"
"I'm blingtastic...stick me on!"

 Who can say "no" to talking embellishments right?! *winks*


It turned out quite pretty and overdone but I actually like it. :)


P/s: Hope you have a great week ahead friends! I will play catch-up on your blogs this week.:)


Share/Bookmark

Pin It

Tuesday

Let's eat! :)


Let's eat

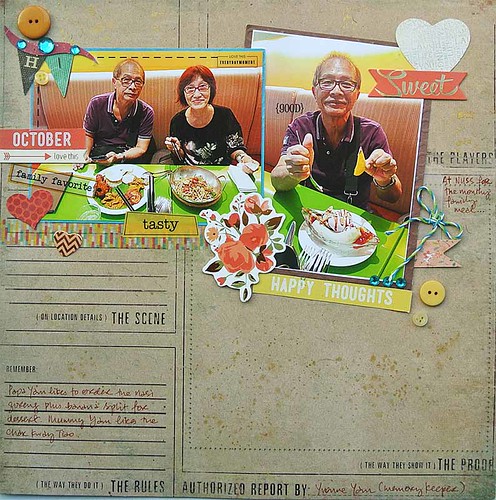
Every month, we get to eat at the club's cafe (to use up the issued dining voucher). 


We all have our faves - mum would order the fried kway teow & dad would order the nasi goreng and a banana split [The photos were totally staged...mum even rearranged the food so that you can see the prawns on her dish...oh yes, my parents are cute! *LOL*]


Still working through the scrap pile...managed to add a little washi tape, stickers and bling to the mix too. :)


Can you see those gold splatters? Finetec pearl watercolors are so fine indeed! *winks*

Playing along with Stuck?! Sketches.


Share/Bookmark

Pin It

Monday

Mixed media girls from my art journal


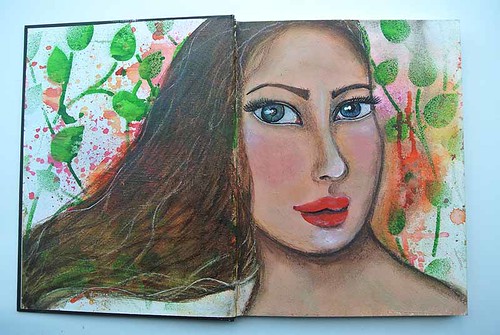
Mixed media girl from my art journal1

It's been a while since I last shared my mixed media girls from my art journal. As you can tell, I like to do my backgrounds first before drawing in my girls. 

Here, the background was created with mists and a leaf stencil from The Crafter's Workshop. Her hair was painted with Liquitex transparent burnt umber ink and texturized with Prismacolor pencil. Her face was painted with Daler Rowney acrylic paints, Posca paint markers, Faber Castell gelatos and Rembrandt soft pastels.

Mixed media girl from my art journal2

On this girl, the background was created with The Crafter's Workshop stencils and mists (a mix of brands)...the gold splatters are Finetec pearl watercolors (current obsession). The girl was drawn with Rembrandt soft pastels and Faber Castell pastel pencils. The black spots on her face appeared when I sprayed my fixative...apparently that requires skill which I currently do not possess...*LOL*

Happy week ahead friends! 


Share/Bookmark

Pin It

Wednesday

A shabby chic stationery caddy


Stationery caddy

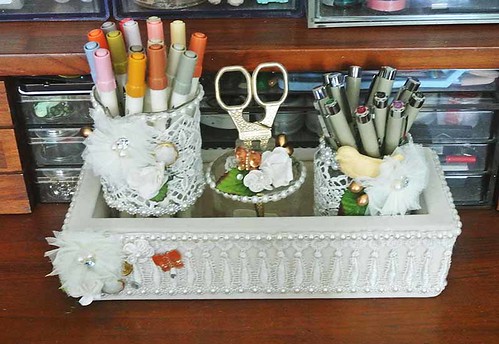
Even though I love mixed media, some days all I need are a pair of scissors, pretty embellishments, packaging materials/containers and a hot glue gun. And I'll be pretty happy.:)


I started with this packaging container for canned abalone. Which I covered with lace and pearls.


And added some pretty embellishments. 


Then I thought I should decorate more containers to put into my container....so I went with a jam jar.


And then a chipped glass beaker from old French press....


Then a decorative glass jar completed my shabby chic stationery caddy. I love how it turned out even though I would need 10x more containers to fit my collection...*LOL*


Share/Bookmark

Pin It

Monday

A cardboard Christmas tag


Cardboard tag by Yvonne Yam for Maya Road

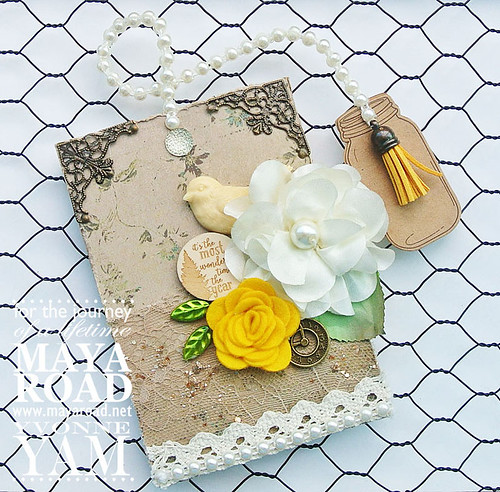
Why yes, this may be my first Christmas project of the year! Yay...go me! *High fives all around*


And yes, this is currently my fave colour combo so I'm using it for my Christmas tag! *winks*


I love how the yellow and green pop off the neutral base. :)


The Golden gold mica flakes kind of got "forgotten" after I reorganized my stash of mediums but now that I have rediscovered it, you will be seeing it a lot more often!


Hope you have a great week ahead friends! :)


Share/Bookmark

Pin It

Thursday

Mixed media on the cheap....the cheatsheet


Art supplies can be quite an investment especially when you are just starting to dabble in mixed media. While I encourage you to buy the best supplies you can afford (not necessarily the most expensive) because as a newbie, it can be quite discouraging to struggle with both technique and challenging supplies, there are some ways you can save money, using some supplies you might already have at home. Here is my mixed media on the cheap cheatsheet. :)

1. Make your own "gel medium".
Gel medium is my fave type of adhesive because it is non-sticky, dries clear and can take lot of wet media once it's dry. If you don't have gel medium, you can make your own at home with one part white glue and one part water.

2. Don't throw out the disposable cutlery.
Personally, I hate to eat with disposable anything...but sometimes, to go is the only way to go and I get stuck with used-once cutlery like plastic forks and knives. I use them in place of plastic palette knives to spread paint and mix colours. They are a little flimsy but at least you get to use them a few times before they break and you have to throw them away.


3. Keep your hairspray nearby.
Don't want to splurge on a fixative? Hairspray works well as a fixative for powders.

4. Find objects around the house that can be used as a mask/stamp.
Stencils are great for creating interesting backgrounds but it is quite an investment to build up your stash. Why not look for interesting objects in your home that can serve as a mask/stamp? Toilet roll tubes can be cut into fun shapes that can be used as both a mask and a stamp. If you are good with a penknife, create and cut out designs and use it as a stencil.


5. Create interesting effects with common at-home items.

You don't need fancy mediums to create spectacular effects - you can experiment with common household items like salt, bleach and rubbing alcohol. Try sprinkling salt when your paint is still wet. Dust them off when paint is dry and you get little stars on your background.  Use bleach with an old toothbrush to remove colour from parts of your background. Use acrylic paints, watered down gesso and then add some rubbing alcohol (follow the order) for a really interesting background. I love using my correction pen when my white paint pen refuses to cooperate....it's great for outlining and highlights.


6. Old makeup brushes make great paintbrushes.

Acrylic paints can be really hard on paintbrushes especially if you let the paint dry on them. If you have some old makeup brushes or ones that you get free with makeup, use those instead. I like to use natural bristles for my facial makeup so all the synthetic makeup brushes I get free goes straight to my art supply pile. 
Image via www.liquitex.com

7.  Buy super heavy gesso.
Gesso is a must-have if you are dabbling in mixed media but if you only have budget for one type   of gesso, go for the super heavy gesso.
     a. You can thin it down with water to get regular gesso.
     b. You can thin it down further with water to get an even lighter consistency.
     c. You can use it with stencils for a slightly raised effect (in place of light modeling paste).

8.  Create your own paint with old makeup.

I love buying makeup like blushes and eyeshadows (I am vain...lol) but it drives me crazy that I never ever finish using them before their two-year expiry date. To make them into watercolours, mix them with a little gum arabic. To make them into acrylic paint, mix them with gel medium. Or just use them like chalk and spray a fixative after.

9. Make your own mists.
Those beautifully displayed rainbow of colours can add up to a pretty penny and the truth is, you don't really need that many colours (you just want them...lol).

If you already have acrylic paints at home, why not make your own bottles of mists? Get some spray bottles from the dollar store, mix your acrylic paints with some water and add a little bit of airbrush medium (it thins the paint and prevents clogging at the nozzle). 

There you have it, 9 tips for mixed media on the cheap. Which one will you try?


Share/Bookmark

Pin It

Tuesday

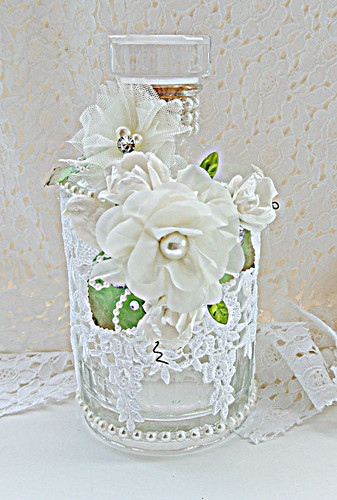
The decorated bottle....a tutorial


The-decorated-bottle5

I love transparent glass bottles. Their see-through nature means they don't take up a lot of visual space and offer a myriad of possibilities when it comes to decorating them. Here is a quick tutorial on how I decorated this bottle.


I started with this lovely Japanese whisky bottle [which came back with me from a recent trip because it was just tooooooooo pretty! *winks*] and removed all the labels.  

There are many ways to remove labels from bottles/jars  but using a heat gun/hair dryer is one of the fastest and least messy ways. All you need to do is move your heat source over the labels which loosens the adhesive and the labels peel right off, without leaving any of the sticky residue behind. 


Next I selected some pretty lace that would still allow me to see through the glass bottle...and adhered it with a hot glue gun. This is my choice of adhesive for this project because it dries fast and if you make a mistake like glue something on crooked, you, can just rip it off and start over again.


After that, I glued flat-back pearl strips (from Maya Road) along the top and bottom of the bottom.


Then it was time to audition embellishments for my bottle. I decided to keep to a neutral palette for classy look.


A cute resin bird tucked in under the bloom and resting on a leaf...


Stick pin leaves, pearls and bling for added texture and interest while keeping to the neutral colour palette.


I was so tempted to just keep adding embellishments at this point...*winks*


What do you think?


Share/Bookmark

Pin It
>
Related Posts Plugin for WordPress, Blogger...

LinkWithin

Pin It