Friday

Your weekend project: decorated box and gift bag (tutorial)


Decorated-box-and-gift-bag

How about decorating a sturdy box and gift bag this weekend? *winks*

[Apologies for the crappy photo...it's gloomy rainy season here in my part of the world, the Nikon is still at the doctor's (okay, I only brought it in last Friday) ...so the colours are a little off. ]

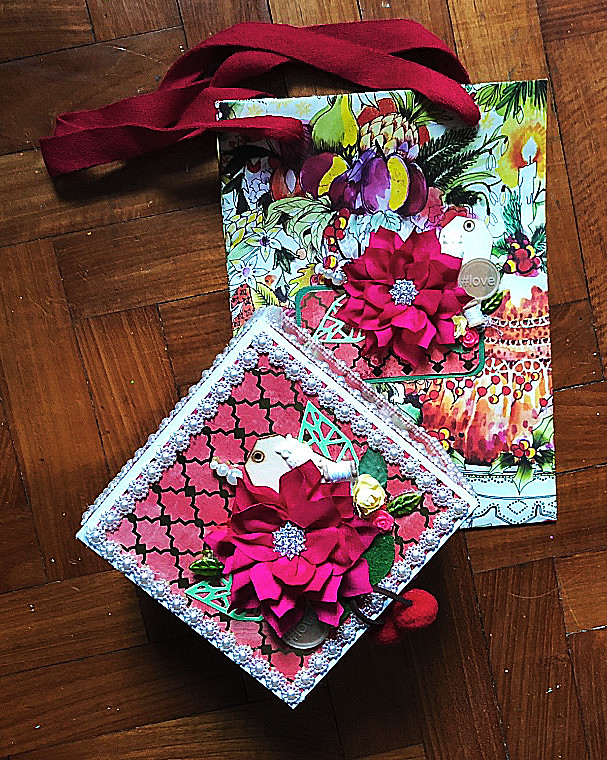
I started off with a sturdy cardboard box (Yep, I have 3 of these Google router boxes.. See the upcycled router box for my previous decorated box) and a floral printed paper bag from Crabtree & Evelyn. I really like the colours on the paper bag so I used those as the main colours for my decorated box and gift bag combo.

1. I selected a pink and gold-foiled patterned paper from a DCWV patterned paper stack and cut out 6 pieces for the box. After that, I cut out some to cover up the brand on the bag. I broke up the pattern on pattern overload with a mat of green cardstock. 

2. I ran the papers through my Xyron Creative Station for an even layer of adhesive. 

3. After that, I went in with my trusty hot glue gun and Maya Road pearl trim. This step is not difficult but just a little time-consuming....but so totally worth the effort!

4. Then comes my fave part - embellishing! I did take some time to choose my embellishments because I needed at least 2 of each to create a cohesive decorated box and gift bag combo.

5. I used the same elements on both the box and the bag but tweaked the arrangement a little.

6. I really liked how the set turned out - very pretty and girly.  I'm thinking the recipient will be pretty happy with them...even if there was nothing else in the box...*lol* Just kidding...of course, I would put some nice stuff in the box. 

P/s: Happy weekend friends! It's my sister's birthday on Sunday so you know I'll be cooking and baking because the Yams love a good celebration! I will share pictures next week (hopefully).


Share/Bookmark

Pin It

Thursday

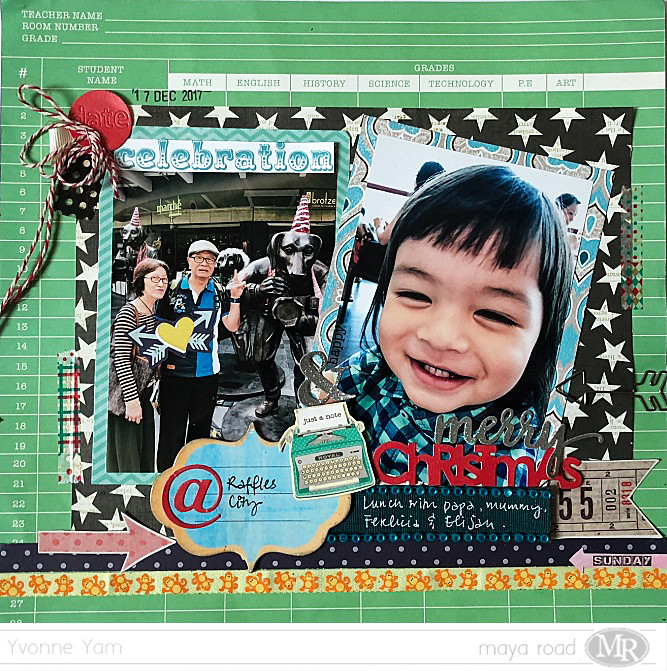
Have you noticed that I like to add subtle bits of humour to my layouts?


Layout-for-Maya-Road-by-Yvonne-Yam

People who flip through my scrapbook albums always end up laughing out loud because I like to add subtle bits of humour to my layouts. It could be the photos I used to tell the story or the embellishments I used to highlight certain aspects of the photo. Can you spot the fun bits here???


Doesn't it look like my nephew E has foxy ears? *winks* Well, since I couldn't get the two people in the background out of the shot (they were paying customers in a cafe), I might as well just "use" them for a fun shot. ;)


Check out the fussy-cut heart and arrows on my parents' chests in the photo. Hehe...my parents still hold hands when they go out. :)


This layout was created for Maya Road and first appeared on the Maya Road blog.


Share/Bookmark

Pin It

Wednesday

Workspace Wednesday: Reorganzing and decorating in progress


Hello friends! I'm in the midst of revamping my creative workspace to make it a tad more efficient so I thought I might just bring you along for the ride. *winks*


So there was this air conditioning unit just above my desk area that was recently removed (I survived for 6 months without air-conditioning which is quite a feat in sunny and humid Singapore...*lol*) and since I had to repaint the wall, I decided that it was time to revamp my creative workspace - reorganize my supplies and change up the artwork.


So this is my desk as at 8am this morning - a freshly painted wall (painted on New Year's Eve) with no artwork. I'm actually looking forward to creating some new inspirational pieces for my wall. And maybe frame up some of my sketches. Ot you know, put up some artwork my friends send me *hint hint*.


Of course I know curious minds really want to see what's on my desk....

I have 2 boxes that I'm in the midst of decorating. Okay, I've merely just covered them with patterned paper...but that's a start, right? Then I have my mini Kikki K planner for sketching and colouring on the go. I'm still very much a digital calendar kind of girl so all my planners are for other stuff, rather than planning *hehe*. I also have 2 brand new Kipling 100 Pen Cases that my bestie got me from the US. I've had my eye on these for a while now but it would cost me like US$100 to have a piece shipped to me. These two cost me US$40. You know I want them all right??? In case you were wondering, you can't really put like 100 pens in them, maybe like 88 very slim pens. *lol*


Share/Bookmark

Pin It

Tuesday

The album with lots of photos and tags


The-album-with-lots-of-photos-and-tags1

Happy 2018 friends! :)

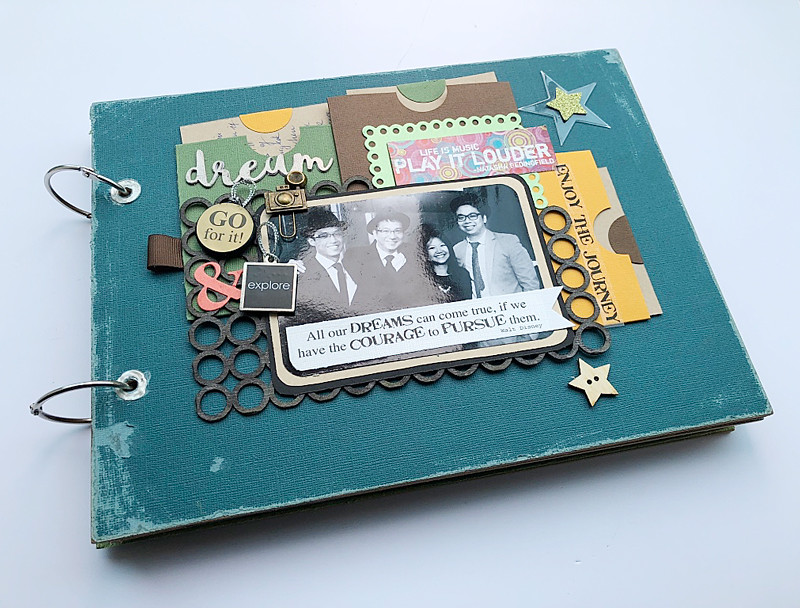
So I accepted a seemingly simple project in November/December 2017 - a 4-page scrapbook album + cover with space for the givers to write personalized notes to the recipient. 

Not only did they take 3 weeks to send me the photos but the photos were mostly badly-composed ones taken with mobile phones.  That came unedited. Plus there were 50+ photos! And of course, they wanted it right after Christmas.  *dramatic sad music plays in the background* 


So I spent a few days thinking about the design of the scrapbook album since I wanted to use resources I had at hand and of course, decide which photos I wanted to use. Plus, the recipient was a dude which meant I couldn't use feminine elements. That was until the client said they wanted to fit as many photos in as possible. 

Seriously, at this point, I was ready to throw in the towel and say to the client, "I think you should get somebody else to do this..." because they haggled on the fee and just wanted to pay for a 4-page album.


But of course, the client was my sister-in-law and her colleagues. Yep. The family card came into play. So the show must go on. 


I went with pockets and pull-out tags for all the pages.  I kept the decorations simple and flattish - stickers and die-cuts to reduce bulkiness.


Some pull-out tags had more photos and space for the givers to write their personalized notes.


Now it's way easier to do a scrapbook album for people you know than it is for a bunch of strangers. Because I had no context for the photos at all. 


But since they supposedly like my style, I just did it my way - fun stickers and die-cuts with a little sense of humour. *winks*


Yes, there was great satisfaction in getting some of my stash used up. All my Xyron sticker machines were used to facilitate the completion of this project. 


Final count for photos included in album: 40.
Number of times I had to go to the store to print photos: 3.
Number of hours I spent editing photos: lost count.
Number of hours I spent working on the album: 50.
Sense of achievement and relief now that it's over: priceless.

Hope 2018 has been good to you so far! 


Share/Bookmark

Pin It

Friday

The last decorated box of 2017


The-last-decorated-box-of-2017

Well, time seemed to have gotten away from me this week. And last week. *hangs head in shame*

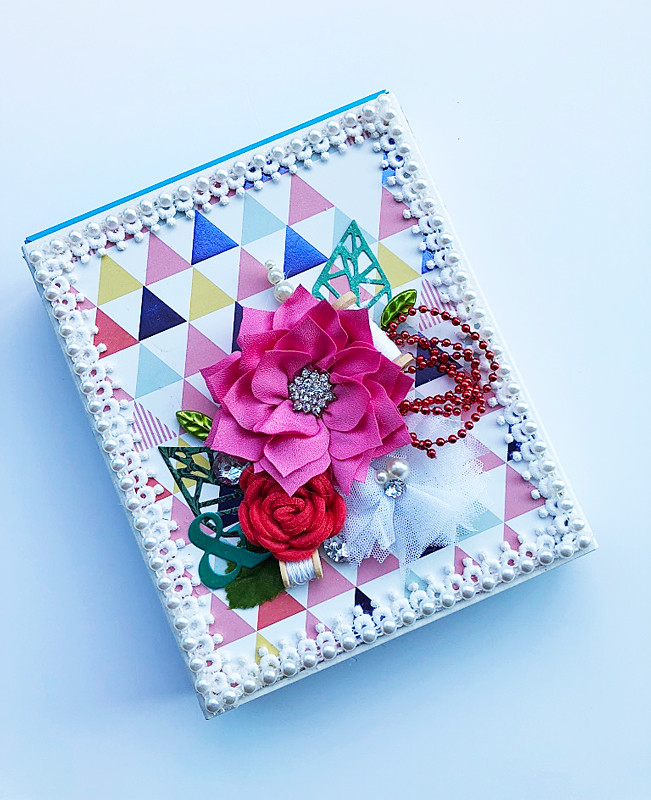
I've been spending every free moment decluttering, organizing and spring-cleaning my home. But I did want to share with you the last decorated box of 2017. :)


Yep, it's one of those Kikki K planner boxes...you know, because I'm a planner collector too. What can I say? I like stuff. *LOL*


A piece of DCWV patterned paper and a clustering of my fave embellishments from Maya Road. :)


As always, my fave leaf die-cut makes an appearance. Have you noticed how often I've used it this year? *winks* 


Just wanted to say a big "thank you" to you, friends, for always stopping by my blog and leaving me some love. Much appreciated. Really. :)

Happy holidays! Enjoy the rest of 2017...see you in 2018!

Share/Bookmark

Pin It

Thursday

Packing on the paper scraps...on a layout


Packing-on-the-paper-scraps

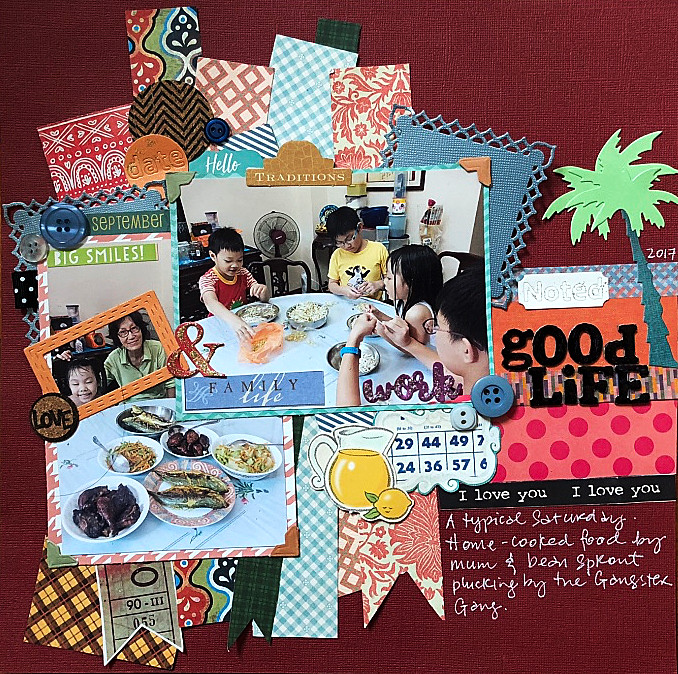
Yep, it's that time of the year again..when I take stock of my patterned paper scraps, realize that this is NOT the year I finish using up my paper scraps, then proceed to pack on the paper scraps on a layout in a feeble attempt to make the scrap pile just a little bit smaller. And failing miserably of course. *LOL*


So, this is what a typical Saturday looks like at home - a home-cooked lunch by mum and making the Gangster Gang (nephews + niece) do a little monotonous work like plucking bean sprouts....while I manage QC (quality control) of course.*winks*


Playing along with Stuck?! Sketches.


Share/Bookmark

Pin It

Tuesday

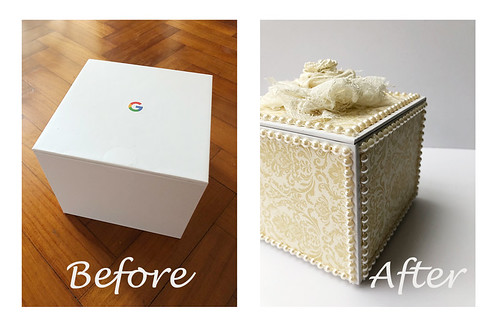
The upcycled router box (tutorial)


An-upcycled-router-box
So the other day my dad got me a new wireless router for my room and of course, I was more excited about the sturdy box the router came in...*LOL*

Now, don't get me wrong, I love high-speed WIFI for sure but every time my dad tries a new router, it kind of messes with the chi a little and I lose connectivity for a while.


Let's talk about this lovely sturdy box that is all white and only has the Google logo on the top of it. Yep, so totally meant for decorating. :)


I measured and cut out patterned paper for all 6 sides of the box, ran the papers through my Xyron Creative Station and glued them on the boc.


Next I glued Maya Road pearl trim along the edges. There were 6 sides to the box and after my last mishap with the glue gun, you know I went SLOW with the gluing...*hahaha* It took like 2 hours! [Okay, I injured the index finger on my right hand the day before so it's all plastered up and that slowed things down considerably.]


I decided to make a big bloom with some remnant fabric and lace.


A little twisting and gluing of the fabric and lace and you have a decent-looking bloom. 


The last step is to glue the bloom to the lid of the box. 


I think this box turned out pretty elegant eh? *winks*


Share/Bookmark

Pin It

Friday

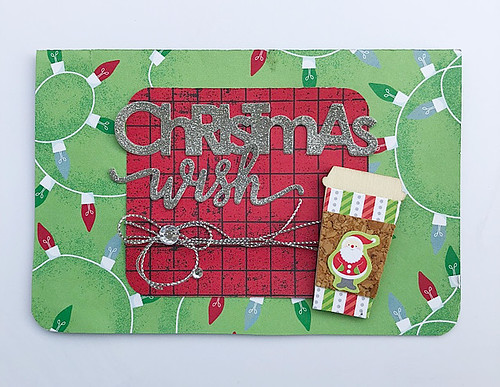
A Christmas card for the Coffee Lovers Winter Blog Hop


A-Christmas-card-for-the-Coffee-Lovers-Blog-Hop

So, the Christmas presents/cards have been given out/mailed this week. It was not looking so good earlier...*LOL* I even had time to whip out a Christmas card for the Coffee Lovers Winter Blog Hop. :)


This card came together quickly...I went with this Maya Road wood coffee cup as my "focal" point and just pulled together matching patterned papers.


Next I went into my diecut box for the sentiment and added some silver twine and bling for texture.


Happy weekend friends!


Share/Bookmark

Pin It

Monday

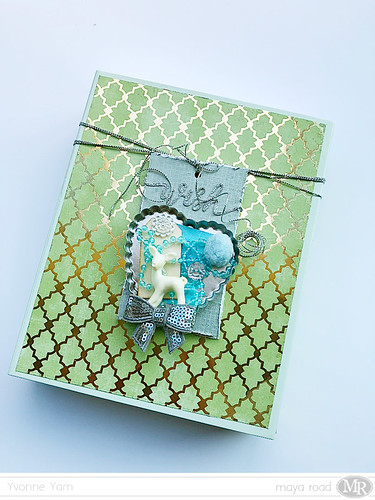
Tag on a gift box


Tag-on-a-gift-box-by-Yvonne-Yam-for-Maya-Road

Sometimes when you are pressed for time, all you need is a decorated tag to "dress up" your gift box. [Says the person who is still frantically wrapping Christmas pressies at the moment. *LOL*]


Never mind that I bought the gifts months ago and started decorated my gift boxes months ago...I am not ahead in the game my friends. Anyone in the same sorry state? *panic mode*


Just a super quick tag on a gift box project for Maya Road. It's a great way for the recipient to re-use the gift box and the tag. :)


Share/Bookmark

Pin It
>
Related Posts Plugin for WordPress, Blogger...

LinkWithin

Pin It