Thursday

This week's eye from the sketchbook


This-week's-eye-from-the-sketchbook

Hello friends! Just sharing this week's eye drawing from my sketchbook. :)


Here are the tools I used...

They are mostly Holbein Artists Colored Pencils except for the 2 flesh toned ones from Prismacolor Pencils (I lost my beloved Holbein one in a cafe). I also use a Prismacolor colorless blender, Stabilo All Pencils in black and white and my Posca Paint Marker in white for highlights.


Share/Bookmark

Pin It

Tuesday

Repurposing happy mail packaging: 2 cards!


So last month I received some happy birthday mail from my bloggy pal Lizzy Hill. Her packages are always wrapped beautifully so I often repurpose the decorative bits in my projects. I mean, if you were very careful not to rip the packaging, you could use re-use each of them in its entirety. But I am totally hopeless at opening packages. Seriously. *too excited* My bestie says I need to invest in a letter opener because my opened mail always look like my dog ate part of it. Except for the fact that I do not have a dog currently. *LOL*


Repurposing-happy-mail-packaging

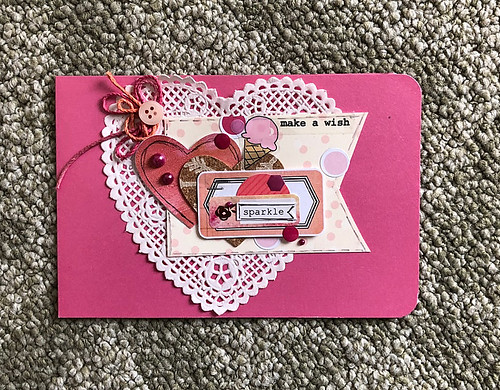
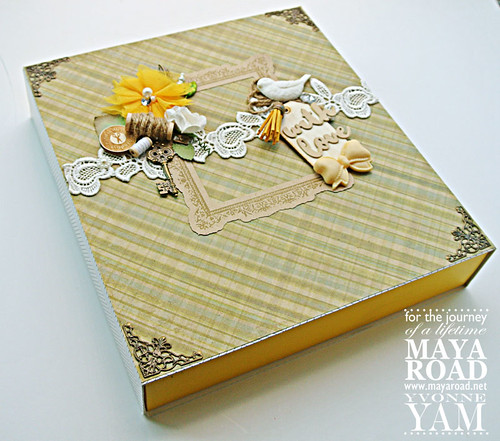
Sorry for the digression but let's look at card #1.

The original doiley that was part of Lizzy's design was torn so I added a heart-shaped one to extend the design and make it a little more cohesive.


I added some texture with faux pearls, twine and a button.


I also added an ice-cream sticker and a "make a wish" sentiment sticker to turn it into a birthday card. 


I used a pink card base to make it super girly. :)


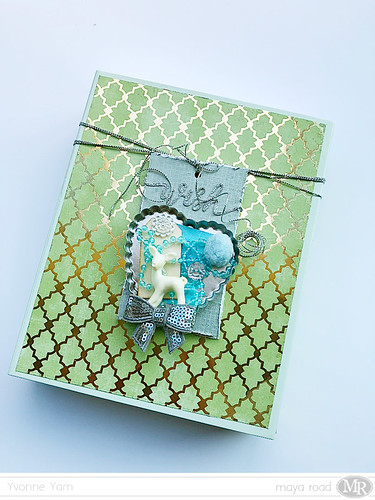
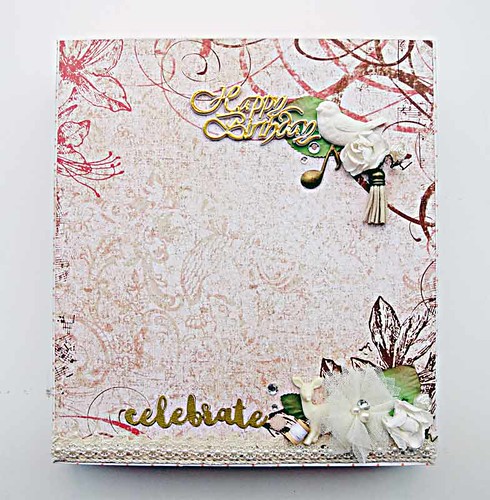
Now on to card #2. This time the original doiley wasn't torn so I glued the whole piece on a card base. The doiley was a little big for my card so I glued part of it to the back of the card. 


You know me, I NEED my texture so I looped some twine and added a button and faux pearls (yep, trying to finish up my faux pearl stash).


I finished by adding a birdie sticker and a birthday sentiment.


There you have it. Repurposing happy mail packaging into 2 birthday cards that my bestie asked for. 

"Just simple ones will do, " said my bestie.
"I don't do simple." I exclaimed.

And of course, I just shamelessly built on Lizzy's original designs and sort of made them my own???*winks* Don't tell my bestie, okay? 


Share/Bookmark

Pin It

Monday

6 ways to decorate a Kikki K box


I really love the pull-out boxes that Kikki K products come in. The pull-out portions are usually in a contrasting colour from the box which make them fun to decorate using patterned papers. :) Here are 6 ways to decorate a Kikki K box... (yeah, I can't believe I've only bought 6 things from Kikki K either...lol..there must be some missing boxes! *winks*)


The-last-decorated-box-of-2017
The last decorated box of 2017

1. Go bold and bright!

This particular box has a bold blue pull-out drawer so I picked a bold geometric patterned paper as my base and added coordinating textural elements.

Tag-on-a-gift-box-by-Yvonne-Yam-for-Maya-Road
Tag on a gift box

2. Add a decorative tag.

Sometimes it's fun to add a removable decorative tag. Like this one which features a heart-shaped bottle cap on a tag! :)


Altered-box-project-for-Maya-Road-and-Xyron-swap-by-Yvonne-Yam
An altered box for the Maya Road/Xyron swap

3. Try a muted colour palette with one bold colour.

Here the bold yellow really stands out against the muted colour palette.


Upcycled-giftwrap
Upcycled gift wrap (a tutorial)
4.  Play with textures.

Mixing up the textures create interest in a subtle colour palette.


Altered-box-for-LESSology
Look! I actually used a stamp! *winks*

5. Create a "scene" with your patterned paper.

Extend the design of your patterned paper by adding dimensional elements to it to create a "scene".

Quick-postal-friendly-decorated-box-
Quick postal-friendly decorated box

6. Keep it flat and postal-friendly.

Simple fussy-cutting makes for a relatively flat and postal-friendly box.


There you have it. 6 ways to decorate a Kikki K box. Which one is your fave?


Share/Bookmark

Pin It

Tuesday

Card with scraps on a bag


Decorated-box-and-gift-bag

So I made a card with my paper scraps and discovered that the bag of the card was a little torn. *sad music plays in the background*


At this point, I had a couple of options:
1. Replace the card base
2. Use it as a box decorator
3. Make it into a large tag
4. Add it as a card to a paper bag


I went with option #4 because I love that the kraft paper bag is slightly larger than the card and created a sort of mat for my card design. :)

What about you? Have you ever completed a project that you could not use as it and had to alter it somehow?

Share/Bookmark

Pin It

Monday

When this cutie came for a visit


When-this-cutie-came-for-a-visit

So the other day my cousin, her husband and this cutie came for a visit. :) 


Of course, he made a beeline for the stairs...because apparently toddlers cannot resist stairs! *winks*


We also played dress-up...he got to don his cousin's angel wings....


And played "cupid" for a few minutes (you know, just enough for me to take some photos...*LOL*)


I really wanted the photos to stand out in this layout so I went with a subtle colour palette with some pops o blue and green.


Playing along with Stuck?! Sketches.


P/s: Happy week ahead friends!

Share/Bookmark

Pin It

Friday

The mish mash card from my paper scraps...


The-mish-mash-card-using-my-paper-scraps

It sounds silly but I get immense satisfaction from using up my littlest bits of paper scraps. :) 


Like when I was thinking of a sentiment for this card...and used the "what's up" text from the branding strip of a Basic Grey patterned paper. Zero waste baby! *winks* 


Sometimes a girl just wants to use her flamingo chipboard with her fussy-cut sheep so she does! *LOL*


Share/Bookmark

Pin It

Thursday

Someone is Discipline Monitor...*winks*


Someone-is-Discipline-Monitor

So my niece S is now in primary school. And gets to wear some fancy sash (like some beauty queen...hahaha) because she is Discipline Monitor. Yep, they start the "indoctrination process" the moment they go to school. *LOL*


Of course, the Discipline Monitor was caught playing and messing up my lanterns during Chinese New Year. Evidently, not very disciplined, I must say....(the irony...;)


Does it look like I'm trying very hard to fit in my paper scraps and embellishments? 


I'm playing along with the fun recipe challenge over at The Studio Challenges which is to incorporate as many of the following as possible:


Mists
Stamping
Ribbon

Stitching

Purple
Flowers
Wood veneers
Aqua colour
Enamel Dots
A heart


How many did I incorporate???


Yep. All. Yay. Go me! :)


Share/Bookmark

Pin It

Tuesday

This week's quick decorated paper bag


This-week's-quick-decorated-bag

Well, after Christmas, the decorated bag pile has dwindled a fair bit and it's time to make more! *winks*


I started by measuring and cutting patterned paper to fit my sturdy black YSL paper bag.


My highly neglected Martha Stewart punch was used to create some pretty detail along the top edges of the patterned paper. The papers were then ran through the Xyron Creative Station for an even layer of adhesive.


I glued on some pretty trim at the bottom edges for extra texture and interest.


Then I created an embellishment cluster using some  Maya Road goodies.


There you have it ...a quick decorated paper bag to add to my pile! 


Share/Bookmark

Pin It
>
Related Posts Plugin for WordPress, Blogger...

LinkWithin

Pin It