Thursday

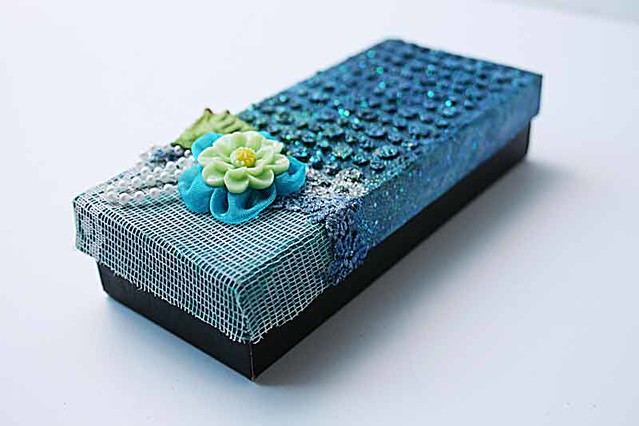
I went a little mixed media crazy on the lid of this box....


Upcycled-mixed-media-black-box

So my sister has been handing me these black gift boxes [sadly, no gifts in them...:(]. Now, you know I LOVE a good sturdy box because it can take my "abuse" better right? *winks*


I gave the lid of the box a clear coat of gesso because I wanted to see how the Silks acrylic glazes look wqrk on a darker background. Then I added a remnant piece of vintage lace and a white floral trim to the base of the box lid. For the top portion, I used the The Crafter's Workshop stencil with Liquitex sand resin and coloured with Silks acrylic glazes.


The beauty of using a glaze is that you can see the layer underneath it...I actually only used two metallic glaze colours - teal and blue. To add sparkle, I added Jo Sonja's clear glitter paint.


Then embellish! :)

Playing along with Mixed Media Monthly Challenge.

Share/Bookmark

Pin It
Tuesday

Making the things that store your things pretty...:)


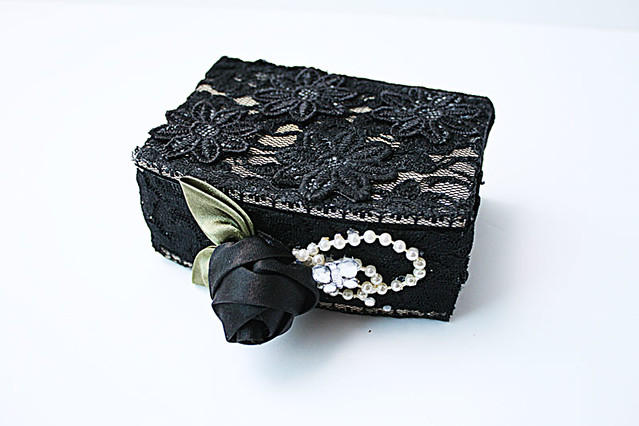
Altered-drawer-for-LESSology

So my craft space is constantly evolving to fit my at-the-moment needs [okay, you caught me... obsessions]. And I've been trying to make the things that store my things [aka storage units] pretty too.


And with my lace obsession, of course it involves lace...*winks*


Before it got "dressed up", it was a plain wooden drawer from Daiso that was black and cream. And oh-so-boring. *LOL*


I covered it with remnant lace and added a satin rose over the knob. Then I added pearls and bling. If you haven't noticed, I LOVE the butterfly bling and use it a lot on my projects.:)


 I'm going to be storing the rest of my butterfly bling in this drawer now. After all, it is properly "labelled" with a butterfly bling. Perfect for LESSology Challenge #39: Fluttering Butterflies


Share/Bookmark

Pin It

Monday

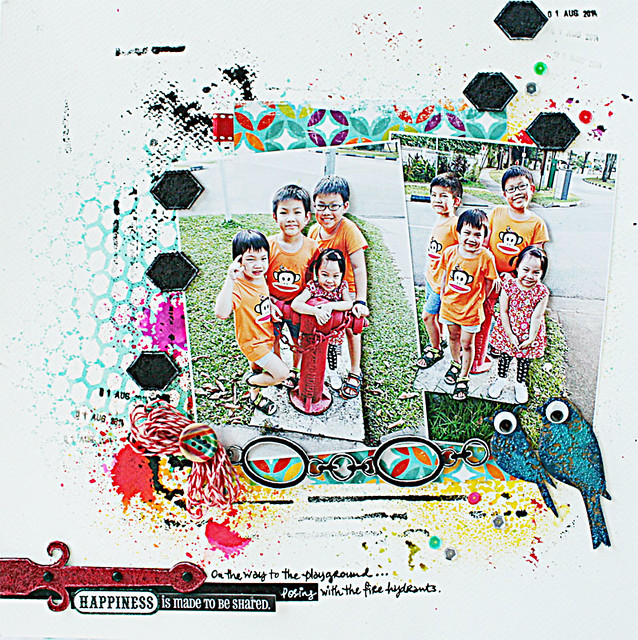
Three boys, one girl and a fire hydrant...:)


Three-boys,-a-girl-and-a-fire-hydrant

Apparently the Gangster Gang [aka nephews + niece] can no longer walk pass a fire hydrant without convening for a photo shoot...and we have to walk by 2 to get to the playground...*winks* 


I printed two of the same photos and fussy-cut one so that I can pop it on 3D dots for a shadow effect. I prefer my layouts to be relatively flat so I make my own 3D dots using foam + Xyron Creative Station.


The background was created with The Crafter's Workshop stencils and mists.


I had fun colouring the chipboard pieces with a Sharpie, coating it with Art Anthology stone effects paint and then outlining with a white pen.:)


The chipboard birds were covered with Golden glass bead gel, then painted with Silks glazes and given googly eyes. :)

Playing along with Blue Fern Studios.


Share/Bookmark

Pin It

Thursday

Mixing the new with the old...


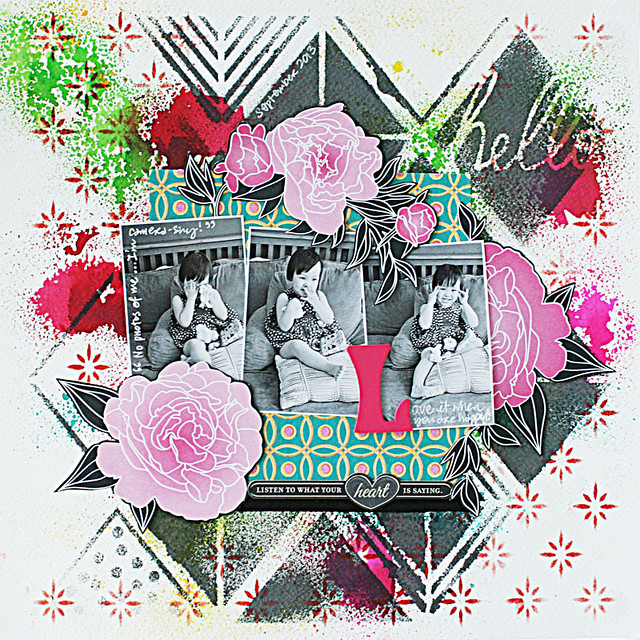
Layered-stencils-layout-by-Yvonne-Yam-for-The-Crafter's-Workshop

I'm determined to finish my bag of paper scraps this year [yes..it's just one bag...a big one though..*winks*]. So you'll be seeing me mixing the new with the old.


The new would be the entire summer collection of stencils from The Crafter's Workshop...[So lucky I get to design for this awesome company!] :)


The old would be patterned paper scraps I've amassed over the last few years...


Since I've stopped buying patterned papers, I think it might actually be doable...*winks*.


P/s: My bloggy pal Helen Tilbury is having an awesome giveaway on her blog. Go check it out! :)


Share/Bookmark

Pin It

Wednesday

The need to "lace-cify" everything...


Upcycled-storage-unit

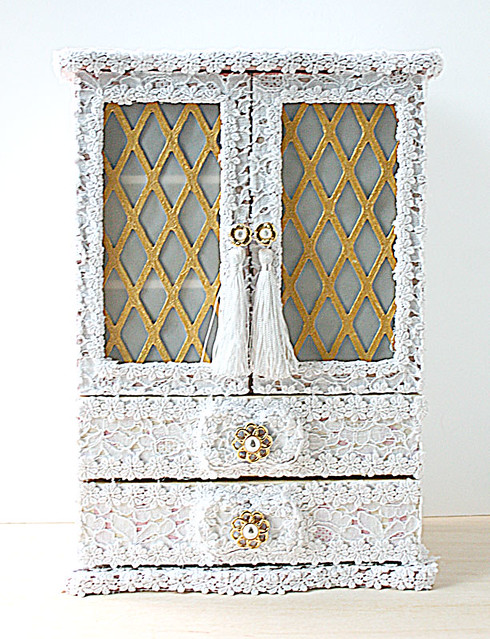
So you know how I'm a tad obsessed with lace...with the urge to "lace-cify" everything? *winks* Apparently, an old Hello Kitty storage unit could not escape from me and my lace...[sinister music plays in the background...]

My mother came home with this old Hello Kitty storage unit that had seen better days. Even my niece S, the Hello Kitty fanatic, wasn't terribly excited about it because it looked so dull and old.


Initially, I wanted to spray-paint it...but the thought of having to disassemble and reassemble parts promptly killed that idea [ahem...me=lazy bones...*LOL*].  I went straight to measuring and cutting the lace fabric and putting the pieces through my trusty Xyron 5" Creative Station. I actually like the pink bits peeking through the lace...[that's my story and I'm sticking to it...*winks*]


I removed the glass panels and replaced them with chipboard "grilles" and vellum. 


The door knobs were decorated with vintage buttons and tassels.


I added some lace trim to the edges with a hot glue gun...[as if there was not enough lace...*winks*]


So what do you think?

P/s: I intend to use the Hello Kitty glass panels for another project. :)

Share/Bookmark

Pin It
Tuesday

Slide and pose...


Slide-and-pose

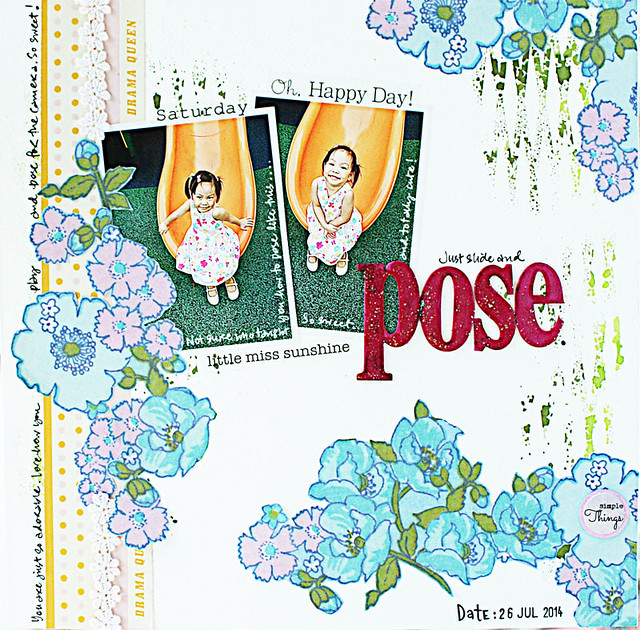
As you know, my niece S, is totally a girly girl. When I'm "roughing" it out with her brothers, she's usually on the sidelines watching. She loves to play...but on her own terms of course.


Last Saturday, I was taking photos of her coming down the slide...and she checked to make sure her hair accessories were in place before posing for the photos...[I kid you not! *LOL*]. 


A super quick layout using already-cut scrap papers...[The goal is to finish them up this year..*winks*]

Playing along with Let's Get Sketchy.

Share/Bookmark

Pin It

Monday

The new playground


New-playground

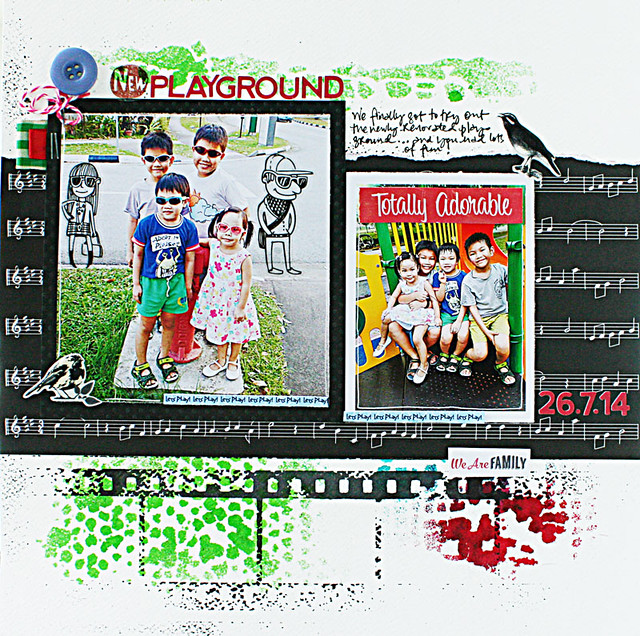
After months of waiting, The Gangster Gang [aka nephews + niece] finally got to test-drive the new playground...


But first, a group shot at the fire hydrant...yes they were "photo-bombed"...*winks*


And a "sweaty" shot at the new playground...


The background was created with residual mists and new The Crafter's Workshop stencils. 

Playing along with Let's Get Sketchy.


Share/Bookmark

Pin It

Friday

The almost ruined mixed media canvas....a tutorial


Mixed-media-canvas-by-Yvonne-Yam-for-The-Crafter's-Workshop

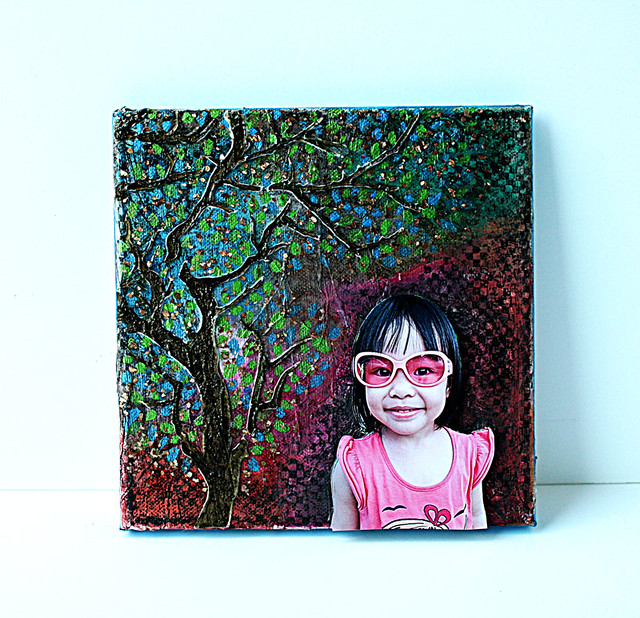
I grew up believing that a real artist is one who can draw and paint. Now that I'm dabbling in mixed media, I really think that we can all be artists....with the right "tools" of course...*winks*. Scroll down for the tutorial on how I created this mixed media canvas for The Crafter's Workshop.


I started with scrunched up wrapping tissue which I adhered with Liquitex matte gel medium [If you don't have this, you can substitute with 2 parts white glue and 1 part water]. After a layer of gesso, I added colours using Derwent Inktense blocks and water [If you prefer pastel colours, you can use Faber Castell gelatos instead.]. 


 Then I stamped along the edges using a Stampers Anonymous stamp and Ranger Archival Ink. 


Next I applied Liquitex Light Modeling Paste through The Crafter's Workshop stencil. Now I love light modeling paste because the texture is light and fluffy, easy to spread, dries fairly quickly and holds peaks...perfect for a little texture on my tree trunk.

Then I added colour to my trunk and branches using Art Anthology Sorbet paint. This dimensional paint adds texture and sparkle. After that I painted in my leaves using Daler Rowney Pearlescent Liquid Acrylics and a small paintbrush. [You can use any acrylic paints for this but I love the shimmer in these.]


I "finished" my tree with Golden gold mica flakes and painted the edges of the canvas with blue paint.


Here's a closeup so you can see the textures.


My intention was to include an inspiring quote but I totally "ruined" it and had to salvage the canvas by adding a photo of my niece on it...Good save, eh? *High fives all around.*

P/s: Happy weekend friends!


Share/Bookmark

Pin It
>
Related Posts Plugin for WordPress, Blogger...

LinkWithin

Pin It