Hello friends! Just wanted to share an eye from my sketchbook today. :)
Tuesday
Monday
This week's fun card from the scrap pile...
So I'm almost done with the revamping of my creative workspace...except for the art on the walls. But as usual, I got sidetracked when sorting out my scrap bits and just had to make a card. *winks*
My inspiration came from the lollipop chipboard that I've been hoarding for ages (I think it was from Crate Paper??). Well, my motto for 2018 is " Use it or lose it!" ...some tears might be involved. *lol*
Hope this week's fun card from the scrap pile is sending a cheer your way....happy week ahead friends! :)
Thursday
One photo layout format: 15 ways
So apparently I have a default photo layout format when it comes to layouts. I like to put my photos side by side, tilted at different angles (sometimes) and then throw embellishments at them. Check out the 15 layouts I pulled from my archives....focus on the photos and you will notice my default format. *winks*
![]() |
| The one about the lemon curd tarts |
![]() |
| How many paper scrap pieces did I use? |
![]() |
| The Gangster Gang on Christmas Eve |
![]() |
| Let's eat |
![]() |
| Can you tell that I'm working through my patterned paper stash? |
![]() |
| Let's make pancakes today |
![]() |
| Someone had an ice-cream birthday cake |
![]() |
| So we won tickets to see Kooza |
![]() |
| Working off the cheese tart at the playground |
![]() |
| Someone finally has a pair of Oakley |
![]() |
| Everybody loves cheesecake |
![]() |
| Back together again |
![]() |
| The queue for chocolate chip cookies |
![]() |
| The one about the four-layer cake |
![]() |
| The need for self-preservation |
There you have it - one photo layout format on 15 layouts.
Do you have a default photo layout format?
Tuesday
This week's paper scraps on a card
Well, the quest to finish up the patterned paper scraps in my multi-slot folder continues in 2018. Let's just say that the pile hasn't exactly dwindled by a lot despite my valiant attempts to use up those paper scraps. *lol*
Here is this week's paper scraps on a card. I'm working on my birthday card stash....flattish cards that are postal-friendly. :)
I even took the Glossy Accents out to play. *winks*
Monday
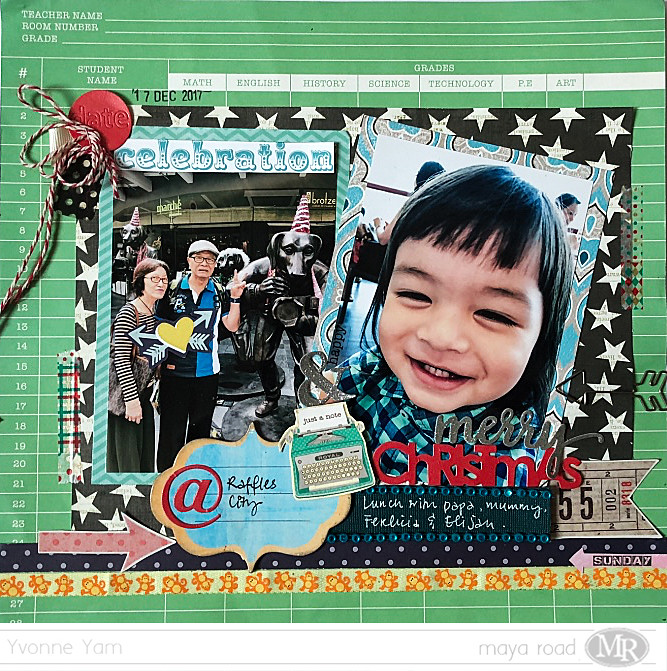
How to tell your story with your photos and embellishments
Well friends, you know how I like to tell my story through my photos and embellishments, without copious amounts of journaling. And this layout is a perfect example. :)
First, a little backstory...
It was a few days before Christmas and my sister was fretting over the need to get Christmas gifts for 30 or so colleagues. She didn't want to spend a ton on gifts obviously and the things that were within her budget were a little lame. *winks* I suggested baking some cookies and giving them a thoughtful package of cookies and tea.
Of course, this was the Thursday before Christmas *insert dramatic music* and so all the baking and packing had to be done that very night so that she could distribute them the next day.
Then there were some challenges...you know, real life drama. *lol*
1. I have the tiniest oven ever *seriously*so we can only bake a tray of 12 cookies at one time.
2. One cookie and a tea bag seemed really miserable so we were looking at least 2 cookies per person.
3. Did I have enough tea bags? [We used up all my travel stash!]
4. How should we package them? [We used Ziplog sandwich bags which were decorated with Christmas stickers from my SRM Stickers stash.]
5.Can we get it done before my bedtime? [I need to be sleeping by 10pm because collagen production is between 10pm to 2 am...*winks*]
Evidently, we made it...since I even had time to take photos..hehehe.
While the photos do tell a bit of the story, I did have to add some fun stuff because you know I love to incorporate some form of humour, right?
Here is the closeup photo of our production line....
I did the baking, mum did the oven watching and my sister did the packaging. Yam family power! :)
I added the festive vibe by using Christmas patterned papers, washi tape and bling.
So, tell me, isn't this a fun way to tell a story?
P/s: Happy week ahead friends!
Friday
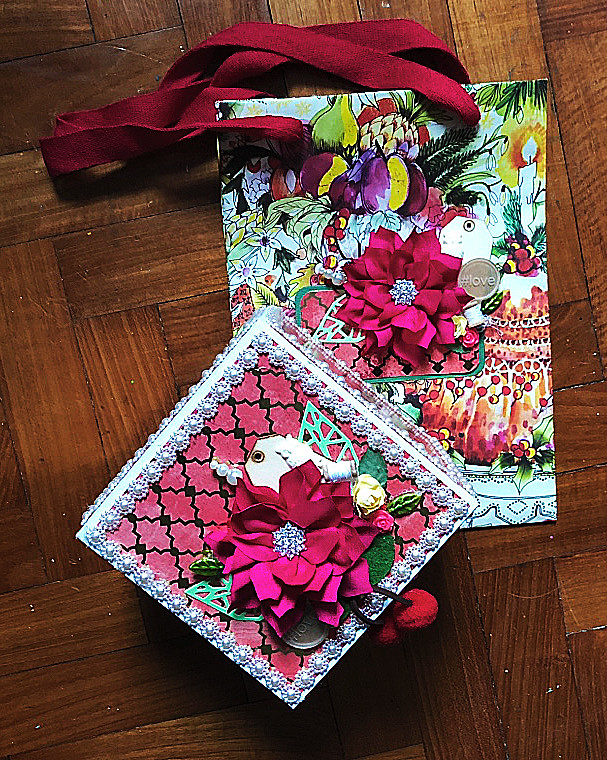
Your weekend project: decorated box and gift bag (tutorial)
How about decorating a sturdy box and gift bag this weekend? *winks*
[Apologies for the crappy photo...it's gloomy rainy season here in my part of the world, the Nikon is still at the doctor's (okay, I only brought it in last Friday) ...so the colours are a little off. ]
I started off with a sturdy cardboard box (Yep, I have 3 of these Google router boxes.. See the upcycled router box for my previous decorated box) and a floral printed paper bag from Crabtree & Evelyn. I really like the colours on the paper bag so I used those as the main colours for my decorated box and gift bag combo.
1. I selected a pink and gold-foiled patterned paper from a DCWV patterned paper stack and cut out 6 pieces for the box. After that, I cut out some to cover up the brand on the bag. I broke up the pattern on pattern overload with a mat of green cardstock.
2. I ran the papers through my Xyron Creative Station for an even layer of adhesive.
3. After that, I went in with my trusty hot glue gun and Maya Road pearl trim. This step is not difficult but just a little time-consuming....but so totally worth the effort!
4. Then comes my fave part - embellishing! I did take some time to choose my embellishments because I needed at least 2 of each to create a cohesive decorated box and gift bag combo.
5. I used the same elements on both the box and the bag but tweaked the arrangement a little.
6. I really liked how the set turned out - very pretty and girly. I'm thinking the recipient will be pretty happy with them...even if there was nothing else in the box...*lol* Just kidding...of course, I would put some nice stuff in the box.
P/s: Happy weekend friends! It's my sister's birthday on Sunday so you know I'll be cooking and baking because the Yams love a good celebration! I will share pictures next week (hopefully).
Thursday
Have you noticed that I like to add subtle bits of humour to my layouts?
People who flip through my scrapbook albums always end up laughing out loud because I like to add subtle bits of humour to my layouts. It could be the photos I used to tell the story or the embellishments I used to highlight certain aspects of the photo. Can you spot the fun bits here???
Doesn't it look like my nephew E has foxy ears? *winks* Well, since I couldn't get the two people in the background out of the shot (they were paying customers in a cafe), I might as well just "use" them for a fun shot. ;)
Check out the fussy-cut heart and arrows on my parents' chests in the photo. Hehe...my parents still hold hands when they go out. :)
This layout was created for Maya Road and first appeared on the Maya Road blog.
Wednesday
Workspace Wednesday: Reorganzing and decorating in progress
Hello friends! I'm in the midst of revamping my creative workspace to make it a tad more efficient so I thought I might just bring you along for the ride. *winks*
So there was this air conditioning unit just above my desk area that was recently removed (I survived for 6 months without air-conditioning which is quite a feat in sunny and humid Singapore...*lol*) and since I had to repaint the wall, I decided that it was time to revamp my creative workspace - reorganize my supplies and change up the artwork.
So this is my desk as at 8am this morning - a freshly painted wall (painted on New Year's Eve) with no artwork. I'm actually looking forward to creating some new inspirational pieces for my wall. And maybe frame up some of my sketches. Ot you know, put up some artwork my friends send me *hint hint*.
Of course I know curious minds really want to see what's on my desk....
I have 2 boxes that I'm in the midst of decorating. Okay, I've merely just covered them with patterned paper...but that's a start, right? Then I have my mini Kikki K planner for sketching and colouring on the go. I'm still very much a digital calendar kind of girl so all my planners are for other stuff, rather than planning *hehe*. I also have 2 brand new Kipling 100 Pen Cases that my bestie got me from the US. I've had my eye on these for a while now but it would cost me like US$100 to have a piece shipped to me. These two cost me US$40. You know I want them all right??? In case you were wondering, you can't really put like 100 pens in them, maybe like 88 very slim pens. *lol*
Tuesday
The album with lots of photos and tags
Happy 2018 friends! :)
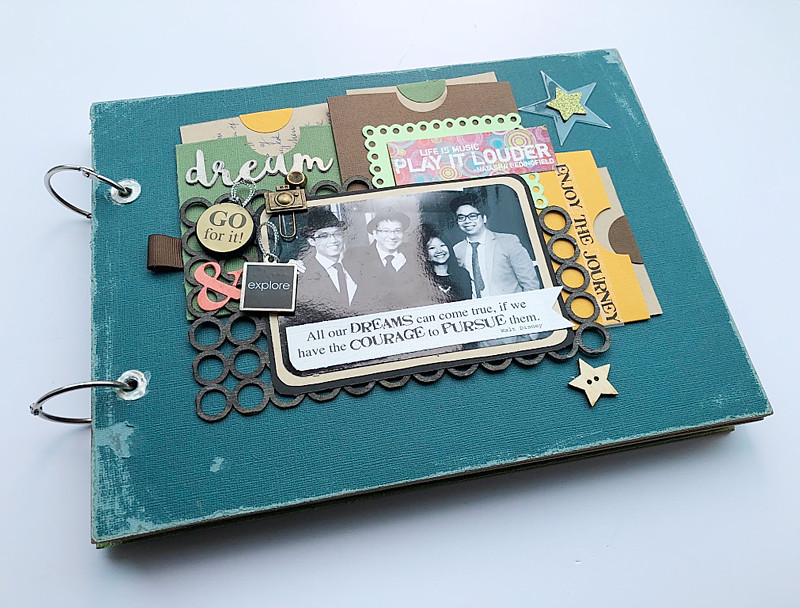
So I accepted a seemingly simple project in November/December 2017 - a 4-page scrapbook album + cover with space for the givers to write personalized notes to the recipient.
Not only did they take 3 weeks to send me the photos but the photos were mostly badly-composed ones taken with mobile phones. That came unedited. Plus there were 50+ photos! And of course, they wanted it right after Christmas. *dramatic sad music plays in the background*
So I spent a few days thinking about the design of the scrapbook album since I wanted to use resources I had at hand and of course, decide which photos I wanted to use. Plus, the recipient was a dude which meant I couldn't use feminine elements. That was until the client said they wanted to fit as many photos in as possible.
Seriously, at this point, I was ready to throw in the towel and say to the client, "I think you should get somebody else to do this..." because they haggled on the fee and just wanted to pay for a 4-page album.
But of course, the client was my sister-in-law and her colleagues. Yep. The family card came into play. So the show must go on.
I went with pockets and pull-out tags for all the pages. I kept the decorations simple and flattish - stickers and die-cuts to reduce bulkiness.
Some pull-out tags had more photos and space for the givers to write their personalized notes.
Now it's way easier to do a scrapbook album for people you know than it is for a bunch of strangers. Because I had no context for the photos at all.
But since they supposedly like my style, I just did it my way - fun stickers and die-cuts with a little sense of humour. *winks*
Yes, there was great satisfaction in getting some of my stash used up. All my Xyron sticker machines were used to facilitate the completion of this project.
Final count for photos included in album: 40.
Number of times I had to go to the store to print photos: 3.
Number of hours I spent editing photos: lost count.
Number of hours I spent working on the album: 50.
Sense of achievement and relief now that it's over: priceless.
Hope 2018 has been good to you so far!
Subscribe to:
Posts (Atom)
>