Wednesday

Masking your stamps with Savannah O'Gwynn


My guest today is sweet Savannah O'Gwynn of Savannah Land 2. Savannah is a whiz at stamping along with mixing and matching patterned papers. She makes the cutest cards with the sweetest sentiments that she creates from combining stamp sets. Her style is fun and fresh and draws "Awwws" every single time I visit her blog. Today, she shares with us her fave technique - masking and stamping stamp sets. She is also hosting an awesome challenge with a fabulous prize for one lucky player! 

But first, let's admire a sampling of her body of work...


Yvonne_Yam's Savannah album on Photobucket


My name is Savannah O'Gwynn, also known as Sav. My love of all things crafty started at a young age. I began to stamp and create my own cards back in 2009 and started my blog {www.savannahland2.blogspot.com} shortly after that. I create videos each week to share fun techniques, tips, and tricks that I use for each of my designs. My style has changed these past few months-- I used to be very layered and used LOTS of embellishments/etc. I was Fun/Graphic mostly. I do dabble in other styles every so often (like CAS or Shabby/Chic)... but my new favorite styles are Freestyle/Collage and CAKS (cute and kind of simple)! My favorite craft is creating cards and gift card holders-- it brings great joy to see the appreciation, love, and surprise as the recipient opens up a handmade card. I also enjoy singing and leading worship with my husband. Music and crafts are my life :)


My fave technique: mixing and matching stamp sets (specifically sentiment sets) to create my own sentiment/
I know that this technique is a bit labor intensive but the result is totally worth it. You can maximize your stamps by using this technique! This technique is really simple...


1. Use masking tape (or clear tape, blue painters tape, etc) to cover parts of the stamp that you don't want to use 2. Ink up your stamp 3. Remove tape (and check to make sure the part of the image/word that you want to use is the only part with ink) 4. Stamp.


Watch this video showing my technique of masking to create my own sentiment.

My challenge is to create anything using the MASKING technique-- when I say masking, I'm talking about masking sentiments and images to create your own design or word. 


I'm giving away one of my favorite stamp sets from Paper Smooches, Hope and pink ribbons (5 1 yard lengths). I had a friend at the age of 23 go through a double mastectomy, as well as other friends and family members with cancer. So this set means a lot to me since Kim donates 50% of each Hope set sold to the National Breast Cancer Foundation.

___________________________________

Ready to play along? Please link your newly created creations featuring the masking technique to create your own design or word via Inlinkz [located at the end of the post] by Friday August 9. 11.55pm (GMT +8).

As always. please leave a little love for my guest Savannah. :)


Share/Bookmark


Pin It

Tuesday

Another messy background....and a challenge winner!


Click

So I had a little fun creating this messy background...Prima masks, Golden fiber paste, Neolcolor II crayons. Daler-Rowney liquid acrylics and gesso....


Used my patterned paper scraps and distressed the edges to create textured layers....a really great way to use up those oddly shaped scraps while keeping your page relatively flat.. *winks*


Littlest nephew J.... still cheeky as ever...:)


Playing along with the challenges at Inkido and Sketchbook 365

___________________________________________

Thank you to those who played along with my guest Tone-Lill's challenge. She picked a winner...


Tone-Lill also wanted to give away a second RAK to ...


Congratulations to Pallavi and Suman, please email me your mailing details. :)


Share/Bookmark

Pin It

Monday

Upcycled tea tin with Blue Fern Studios chipboard


Upcycled-tea-tin

If you didn't know by now, I love lace. The sheerness. The embroidery. Yum.
I started by adhering pretty pink patterned paper from Bo Bunny on upcycled tea tin, then covered it with lovely lace from Craftpon Etsy Store


Then I added some Prima trim and bling...and coloured my Blue Fern Studios chipboard with mists and mediums to match. A few pink paper blooms...and I have a pretty upcycled tea tin. Should I give it away? *winks*

P/s: Can't wait for you to meet this month's guest blogger! :)


Share/Bookmark

Pin It

Thursday

A cool use for a sock hanger...


Shine-tag

Do your new socks come on these plastic hangers? They are perfect for hanging your tags! :)


Quite a number of layers on this tag...
1. Tag was coloured with Faber Castell gelato.
2. Then covered with a layer of Golden glass bead gel.
3. A layer of Golden fiber paste was applied with a Crafter's Workshop template.
4. That layer was painted with Daler-Rowney liquid acrylics.
5. Blooms cut from lace and adhered.
6. Dress form chipboard was painted in gold, then layered with Golden gold mica flakes.
7. Sentiment was painted in gold, then Golden glass bead gel was randomly applied.
8. Adhere dressform and sentiment.
9. Attach sock hanger to tag using ribbon. Punch hole in tag and loop several times to secure. 
10. Adhere button to complete the tag!


Do you have interesting ways to use your packaging? Then come play along with LESSology Challenge #27: Packaging Central!


P/s: Come play along with my guest Tone-Lill's challenge....it ends on Friday!


Share/Bookmark

Pin It

Wednesday

Q&A: All about misting...


Back in May, I asked if you had any burning craft-related questions. I'm slowly working on my responses....you asked some tough questions. *winks* Here's the first question...by Julie Tucker-Wolek.


I use a variety of mediums to create the "misted" look on my layouts, depending on how much "control" I want. Here are some of the mediums I like to use...:)


1. Bottled mists from Maya Road, Tattered Angels and Mister Huey.

These are the 3 brands I use because I can get them locally from my LSS. 

Maya Road is my fave go-to mist bottle brand. The colours are rich and vibrant and a little goes a long way. 

Mister Huey has a lovely colour range but it's more pricey for me because I tend to use a little more of it.

I only use Tattered Angels when I want a subtle effect. They have more shimmer in them and take a little longer to dry. They work better if you apply thin coats and wait for each coat to dry before adding more colour. 


This look was achieved using Maya mists and an Artistcellar stencil.


2. Faber Castell Gelatos.

These can be used as both a dry medium [apply a little and rub with finger] and as a wet medium [mash it up into a paste and add water to a mist bottle]. Add more colour for a vibrant look OR more water for a muted finish. It is a super versatile medium and comes in very pretty colours. The coolest thing about this medium is that it can be used on a variety of surfaces including wood. Plus it works well with the other mediums in the Faber Castell mixed media family.


Wood-album-main-cover
Gang wood album


The base colours of this wood album were coloured with gelatos and water. No need for a layer of gesso! What a time-saver!


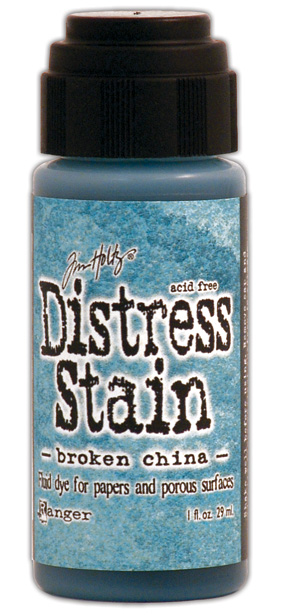
3. Ranger Distress Stains.


The colours are light and great for creating soft washes of colours over large areas. The key really is to add the secret ingredient - Ranger Distress Stain in Picket Fence. This particular stain is a white opaque formulation...[like adding milk to tea] that gives a little more "life" to the rest of the Ranger Distress Stain family. And when you mist water to blend the colours...that's when the real magic happens...you get really cool mottled effects. 

The effect on the canvas was created with wrapping tissue and Ranger Distress Stains.


4. Derwent Intense Blocks/Pencils.


The colours are super vibrant because they are ink-based. Colour your surface, then mist with water and let it drip. Not enough colour? Just add more. You can work it when it's wet OR dry. For more precision, use the pencils instead of the blocks.

Art-journal-page
Journal page


The background of this journal page was created with Derwent Inktense Blocks and blended with water.


5. Daler-Rowney Liquid Acrylics/inks

I love these because the rich pigments  in them make the colours very vibrant even though they are very fluid. The pearlescent ones are shimmering bottles of goodness. Drip a few colours over raised surfaces [created with masks and fiber paste] and watch the colours blend...mist some water...you never know what you get..:)


Cupcake-mixed-media-tag
Cupcake tag

The background on this tag was created with a stencil, fiber paste and Daler-Rowney Pearlescent Inks.


6. Daler-Rowney watercolours

These are very light and great for creating subtle backgrounds especially if you are playing with pastel colours. Probably the easiest medium to control with a brush and water. the soft effects are very pretty. For best effect, blend your colours before applying them to paper.


The background was created using an Artistcellar stencil and Daler-Rowney watercolours.


7. Caran d'Ache Neocolor II Artists' Crayons


My latest "toy"...*winks* I love the soft look when I mist water on the coloured areas.  It's easy to colour with it because it is softer than a pencil but harder than a pastel so there is a certain degree of control. It is awesome for building layers on mixed media projects. :)


A-moment-in-time
A moment in time


The background of this layout was created with the negative print of a stencil, Neocolor II and misted water.

I like to do a few backgrounds at a time because I don't like to waste mists or have to take out my "misting" box..*winks* so probably a couple of minutes for each background. It doesn't need to be precise. 
People choose patterned papers to work with when they start a project....I choose from my ready-made custom backgrounds! *LOL* 

There are really many ways to create interesting backgrounds using bottled mists or mediums misted with water. My suggestion is to buy a few colours in each medium to try out...see what you like. There is no need to buy ALL the colours. I tend to buy complementary colours so that I mix the mediums to achieve different effects.

Has this been helpful?


Share/Bookmark

Pin It

Tuesday

The one with the ice-cream cake, messy background and Blue Fern Studios chipboard..:)


Boys-will-be-boys-layout

So I have been having a fabulous time experimenting with mediums on chipboard since I got my happy mail from Blue Fern Studios. There are so many things to do to chipboard besides leaving them naked...*winks*


You can colour them with Ranger distress stains and crackle paint in rock candy for a cool well-weathered effect.


You can just paint them a solid black with liquid acrylics OR even work in a tonal effect. 


Just a layout of my dad and his grandsons on his birthday. Based on the July sketch at Blue Fern Studios. :)


P/s: Come play along with my guest Tone-Lill's challenge - it ends on Friday! :)


Share/Bookmark

Pin It

Monday

The result of a new printer..*winks*


Delightful-sunshine-layout-for-Purple-Pumpkin

These days, I've been printing larger pictures rather than my usual card-size photos. The untimely demise of my printer meant a new printer...and the smallest size I can print now is 4x6. Which means I need to create photo collages if I need to print anything smaller.... 


Hence, the in-your-face picture of nephew #1 and me...*LOL* 


This layout was based on the July sketch challenge at Purple Pumpkin. You don't need to use Purple Pumpkin products to play along...so come join in the fun! :)


P/s: Come play along with my guest Tone-Lill's challenge....it ends on Friday! Happy week ahead friends! :)


Share/Bookmark

Pin It
>
Related Posts Plugin for WordPress, Blogger...

LinkWithin

Pin It