Happy weekend friends! Hope you get to do something you enjoy this weekend (like eat a yummy cupcake)! :)
Friday
Happy weekend friends!
Happy weekend friends! Hope you get to do something you enjoy this weekend (like eat a yummy cupcake)! :)
Thursday
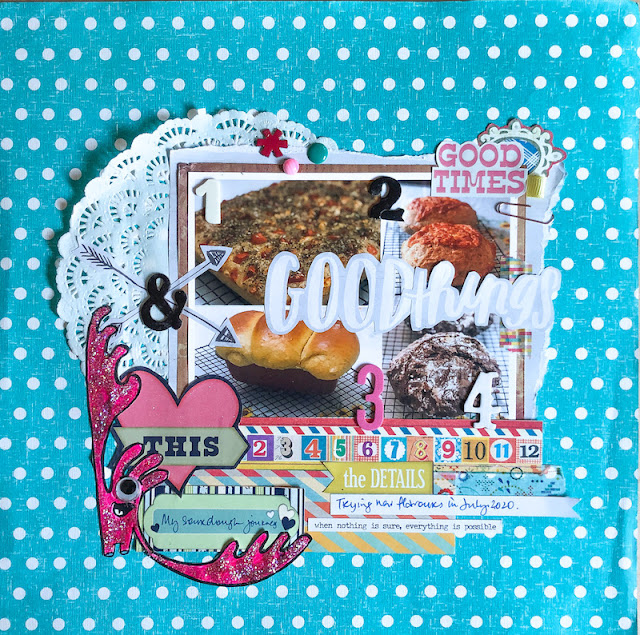
July 2020 - sourdough experiments
So you know that I started my sourdough journey last month and baked my first two loaves of sourdough bread. This month, I got a little more adventurous and experimented with more recipes using my sourdough starter :)
1. Focaccia with oregano, tomato and mozzarella cheese.
2. Cheddar cheese bread with oregano and paprika
3. Hokkaido milk bread
4. Chocolate bread with raisins and walnuts
I know that some sourdough experts say you should stick to ONE type of bread till you master it because sourdough breads can be very finicky - change in temperature, strength of starter, type of flour and length of fermentation can all affect the outcome of your baked sourdough bread. But you know me, always a maverick...why can't I learn how to make the "perfect" sourdough bread by experimenting with different flavours, right? It can be so boring eating the same type of bread. And you know my family has some really picky eaters. *winks*
I have been having fun with my sourdough experiments. The long wait for each outcome is actually making the stay-at-home period a little more bearable.While most bakers want large holes in their sourdough breads, I want small holes so that my butter or jam doesn't fall through the holes. *LOL*
Playing along with Stick It Down.
Wednesday
Workspace Wednesday - Behind the scenes
Hello friends! Today I thought I would share some "Behind the scenes" photos...you know, real life photos...like how my desk usually looks like when I'm working on that ONE project (as pictured).
Or how about this photo my mum helped to "stage" for an Instagram post when I made some coconut pandan crepes. Not all are pretty...
But these are the ugly (but still yummy) ones that didn't make it pass the Instagram audition. *LOL*
And these were the good-looking chocolate chip cookies that I got when I spaced them out adequately to bake...
But sometimes this happens when I try to squeeze that ONE last cookie in...(hahaha)
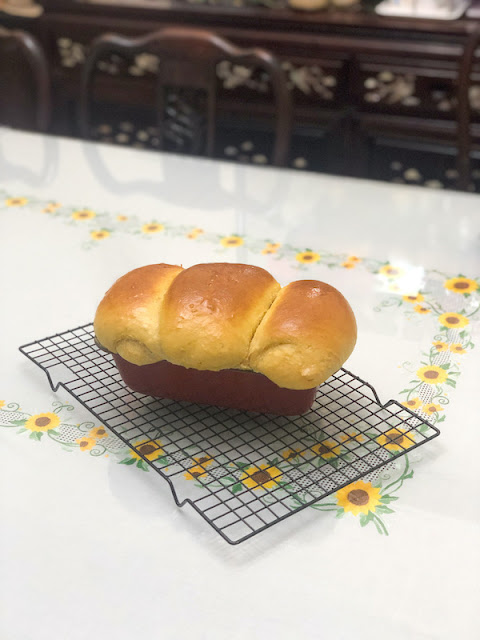
And there's more....like this Hokkaido milk bread I made last week with my sourdough starter. Took 3x longer than a normal yeasted bread (mostly waiting for the bread to proof twice) so by the time this was done, it was like 9pm at night. So after taking this photo....
The loaf was removed from the tin and taken to my bedroom to cool down on my bed with my air-conditioner and fan turned on to speed up the process....while I went to shower and get ready for bed.
Yep, I have my trusty bread box on standby to house the bread too. :)
My family is used to seeing me bring baked food from my bedroom down to the dining room...hehehe.
So friends, the pretty stuff we see on social media is really just the "highlight" of that moment in time. Reality is sometimes a bit less finessed and maybe a little more boring. I mean the highlight of my day today was when my levain grew 3x. Check out those bubbles! *winks*
Hope I've made you smile a little today. ;)
Tuesday
This week's quick Christmas card with the fussy cut Santa
So your gal here has been working hard on her Christmas projects in her bid to finish using up those fussy-cut Santas. *winks*
Meet this week's quick card Santa. The Santa and string lights are fussy-cut elements. The rest are stickers! So this came together really quickly. :)
Yep, this year's cards are all 6x3 because I'm trying to use up my stack of 6x6 cardstock and patterned papers...(trying being the operative word...it's going to take a long long long time...*LOL*)
Happy Tuesday friends!:)
Monday
Make Stuff Monday - a quick gift box using food packaging
Hello friends! Today's Make Stuff Monday is a quick gift box using food packaging. :)
Here is the original box - a red plastic box.
If you are wondering what gochujang is, it is a Korean spicy chilli paste that can be used as a marinate for meats or as a sauce to marry all the ingredients in a mixed rice bowl (bibimbap). One of my fave ways to use it is making spicy Korean chicken wings in my air fryer. You should see how Papa Yam and nephew #1 devour the wings!*LOL*
I kept the design simple and pretty flat.
I just cut patterned paper for the front and back panels and unified them with the Christmas lights.
P/s: We are having spicy Korean wings for dinner tonight. *winks*
Friday
7 (more) fun things to do to your photos on your projects
 |
| The one about the meat lover |
1. Make a collage with your photos and fun elements to help tell your story.
Here I went with some fun "monsters", text and textural elements to convey how excited nephew #1 gets when he is about to feast on meat! :)
 |
| What to do with leftover wallpaper - project #1 |
2. Print fun elements on your photos.
My Canon Selphy Square Qx10 allows me to choose frames, text and overlays to print on my photos. The frames create "mats" for my photos and I can even add speech bubbles to convey sentiments.
 |
| I just wanna have cake! |
3. Frame your photos to really draw the eye to the focal point(s).
Here I "framed" my photos to draw the eye to the different funny facial expressions.
 |
| A page from the recipe planner: Choc chip cookies |
4. Treat your photo like patterned paper.
There is no need to tiptoe and just decorate around your photo. Treat it like a piece of patterned paper and add your journaling (in my case, recipe) on top of it. Especially when space is limited.
 |
| The last time we had a family outing |
5. Angle your photos to fit more across the page.
This is a great design element and also allows you to incorporate photos that are not "perfect" and may not match up nicely if you use a standard grid format.
 |
| Tutorial Tuesday: How to work with patterns on a layout |
I have "signages" for family and friends to hold up and text props as part of table decor when I take my birthday photos. Then when I scrapbook my photos, I just add on to them to "extend" the story without huge blocks of journaling (which none of my family members actually read..hehe).
 |
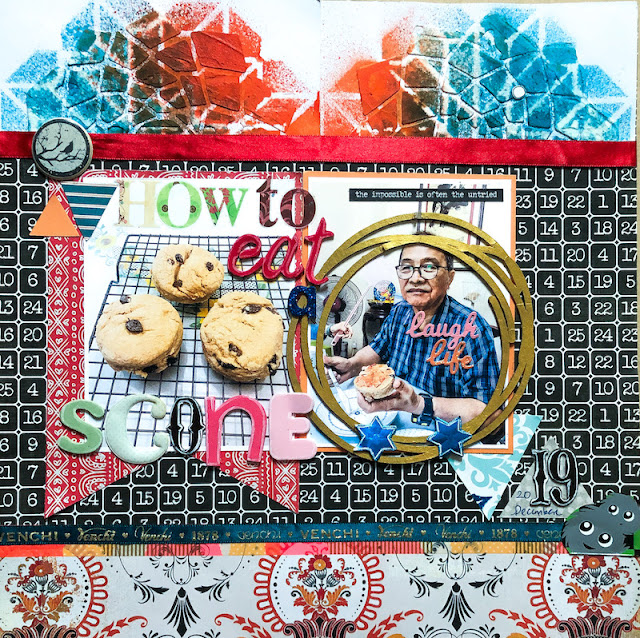
| How to eat a scone...according to Papa Yam *winks* |
7. Use your photos to journal your story.
Sometimes all you need is 2 photos to tell a hilarious family story. Like how my dad applies jam to the bottom of the scone to "save" time and get to the eating part fast. *LOL* Since I had that photo of him, I incorporated a closeup of the scones and made the titlework part of the journaling as well.
There you have it. 7 (more) fun things to do to your photos on your projects. :) Which do you use on your projects?
Happy weekend friends!
Wednesday
This week's decorated paper bag
Sometimes I make a project just to use some cute supplies. Can you guess which were the ones that inspired this project? *winks*
If you guessed those cute embroidered elements (hedgehog, acorn, mushroom), give yourself a pat on the back!
Seriously though...how cute are they?! They are embroidered paper clips from Kikki K. I removed the paper clips to use for other project/s.
Love that my stash is decorated paper bags is growing again....they are really handy for last-minute gifts.
Tuesday
This week's quick Christmas card from the scrap pile
Well I had to get a quick Christmas card done sinceI had all my Chistmassy stuff out right? And if that Santa looks a little familiar...it's because I used him on yesterday's Christmas-inspired mini decorated folder project too! You know how I needed to finish fussy-cutting the whole sheet of Santa faces even though I only needed ONE for my project, right?
Suffice to say, expect to see more Santa faces in future projects! *LOL*
Happy Tuesday friends!:)
Monday
Make Stuff Monday - a fun Christmas-inspired decorated mini folder
Hello friends! I' was feeling a little down over the weekend and decided to cheer myself up by making some Christmas projects! For this week's Make Stuff Monday, I challenged myself to make a fun Christmas-inspired decorated mini folder, :)
I even decorated the back of the folder! Yay...go me! *high fives all around*
Here's a full view of the front and back of the folder.
If you were observant, you would have noticed that there seems to be a large pocket holding some of the elements....
And you would be right! I decorated a yellow envelope with flat elements so that I can tuck in a card for the recipient. And I made a tag which the recipient can use to attach to a gift for someone else. You know how much I love the idea of re-gifting so that love gets spread around.
Here is a look at the interior which I also spruced up a little...can I get another "high five"?
I kept it simple because it will be loaded with some Christmas goodies anyway. :)
P/s: If you were wondering, "Hey, this gal must have made a dent in her Christmas stash..look at how much stuff she incorporated in this project!", then you must NOT know me very well. Because I have stuff to last me for years! *LOL*
Thursday
Using Valentine-themed stickers on food travel pages
I have a few of sheets of Bo Bunny Valemtine-themed stickers in my sticker stash for years. I've used a few in layouts featuring some couples in my life. But recently I discovered another way to use them...in my food layouts...ehh..because I have that kind of passion for great food! *winks*
I love when food is plated up in a visually appealing manner...it gets me excited to eat! If you were wondering where the "physical attraction" text came from, it was from the packaging of a sunscreen.
I went with two 4x6 photos so I didn't really have much "space" to decorate except on the photos. :)
Anyway, these pages are from my travel planner. And I'm still on last year's Sydney trip because I took a gazillion food photos (no skipping of meals when you are on Aussie soil!). This was dinner at a seafood restaurant in Darling Harbour.
This place offers a really yummy sticky date pudding - well-balanced and not too sweet. :)
Let's not dwell on the fact that this gal had 2 desserts at dinner, shall we? *LOL*
Subscribe to:
Comments (Atom)
>


