Showing posts with label Christmas 2020. Show all posts

Friday

Friday's walk down memory lane - 2020's Christmas projects featuring Santa!


Hello friends! Just wanted to take you on a walk down memory lane - to last year's Christmas projects featuring Santa! :) If you got some happy mail from mail, can you spot which bits you got? *winks*

I had a blast last year incorporating that Santa face on my Christmas projects. And truth be told, I was tempted to buy a patterned paper that I could fussy-cut out and use on this year's projects...but I decided to just use up all the Christmas bits I already own instead. I think that stretched my creativity in a different way. :)

Happy weekend friends! 


Share/Bookmark

Pin It

Tuesday

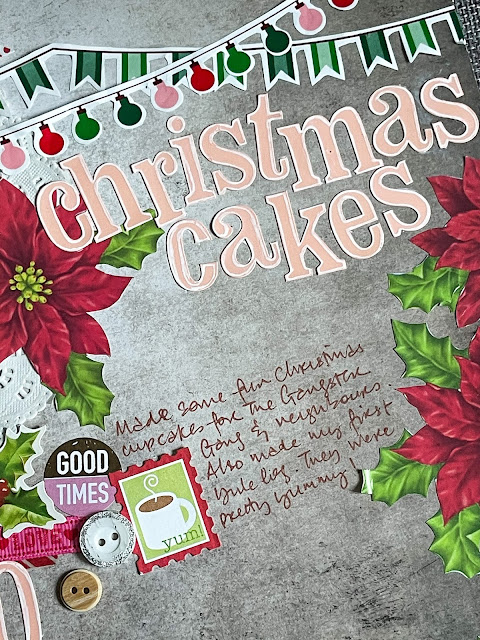
Christmas cakes 2020


This month I got invited to be guest designer over at Stick It Down and here is my page! :)


I decided to document my Christmas cakes since I put in so much effort to make them. *winks*


The poinsettias and banners were fussy-cut from some wrapping paper I got last Christmas (perfect for all my Christmas 2020 layouts).


 The titlework was created with stickers. I did outline the letters with a white gel pen for a little more interest and dimension.


In case you missed the post about my Christmas cakes, I made chocolate Christmas tree cupcakes with M & Ms and a Yule log. :)


Share/Bookmark

Pin It

Thursday

My first box of decorated Christmas cookies


Last December, I wanted to make some homemade edibles as a Christmas gift for my cousin. It was my first time making sugar cookies and decorating them.


Of course, I had to challenge myself by making different flavours too. Because you know how much I love to up the ante for myself, right? *winks*


And I bought the colourful sprinkles and decided that the snowflake cookies should be all white. *LOL*


Playing along with Let's Get Sketchy.


Share/Bookmark

Pin It

My first attempt at sugar cookies *winks*


Would you believe that your gal here has never made sugar cookies and made them pretty? *dramatic music plays in the background*

So I made my first batch on Sunday and got some "assistants" to try out the consistency of my royal icing....


Nephew #3: working hard on spreading his icing....


The niece was very pleased with her creations. And of course my assistants were paid handsomely - they ate all the cookies they decorated! *LOL*


So I thought I might attempt a Christmas cookie box as a gift for my cousin. But of course, nephew #1 ate most of the remaining undecorated cookies so I had to make and bake some more. 


I also got a food container box from Daiso for my Christmas cookie gift box. Well, I found out that the decorating part was way way way harder than I thought and I had to simplify to get a somewhat decent box of cookies. Alright, brace yourself. Don't forget that this gal is new to sugar cookies and decorating them....


Tada! My first decorated box of Christmas cookies! Hahahaha!:) They don't look that great but they are quite yummy! :)


Here they are all wrapped up and as I am typing this, digesting in the stomachs of my cousin, her husband and their son.:)

Happy holidays my friends! I know this is a tough year with many of us unable to spend the festive season with friends and family. But this difficult time will pass. Let's just stay safe and protect those around us. 

Meanwhile I'll be taking a bloggy break...see you in 2021! 


Share/Bookmark

Pin It

Monday

Handmade gift #2 - home-baked chocolate chip cookies


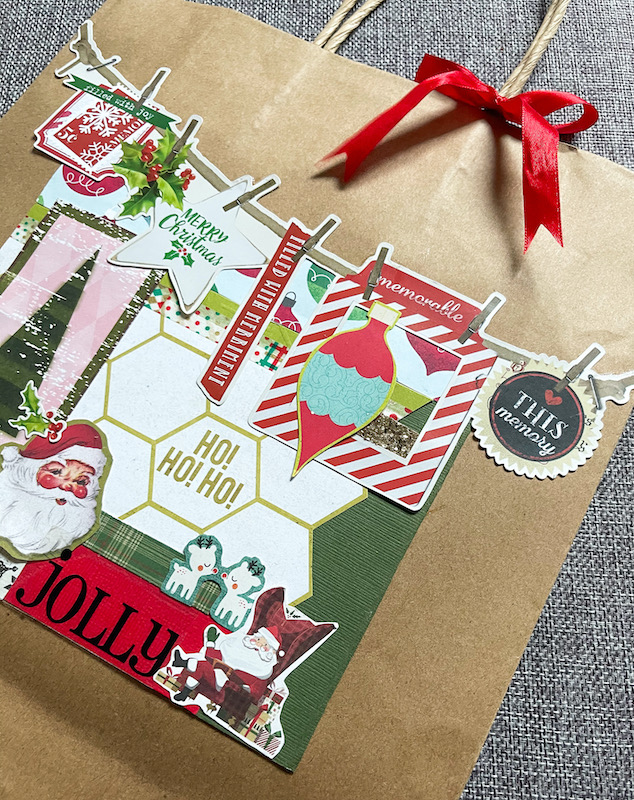
Hello friends! 2020 has been such a challenging year so I am spreading a little festive cheer with some home-baked sweet treats...nicely packaged in one of my Christmas packaging of course. Pictured is the reworked decorated paper bag featuring Santa.


I even took out my Christmas oven gloves to help me out with the festive baking. Aren't these cute? I found them in mum's stash months ago and now I can finally use them! *happy dance*

Today I'm sharing my current fave chocolate chip cookie recipe. Please note that lots of patience is required to make this.

1 cup unsalted butter (227g)
3/4 cup organic raw sugar
3/4 cup brown sugar
2 cold eggs 
300g all-purpose organic flour
26g bread flour
1/2 teaspoon baking soda
2 tsp organic sea salt
2 tsp cinammon 
chocolate chips & walnuts (or nuts of your choice)
organic sea salt for sprinkling

1. The first thing you need to do is get your butter out and into a pan. Because you need to melt the butter till you get burnt butter. Which takes a long time. And a lot of stirring. And a lot of.."Why did I even start this?" Until you start smelling the toastiness of the burnt butter. Then you will be like, "Omg. This is going to be the best cookie ever!"

Even so, you're going to have to wait. Because you need to transfer the burnt butter into a container and put it into the refrigerator until it solidifies again. Which takes like maybe 90 minutes.

2. During the wait, you could prepare your other ingredients and put them in the refrigerator as well. Because this recipe requires everything to be cold.


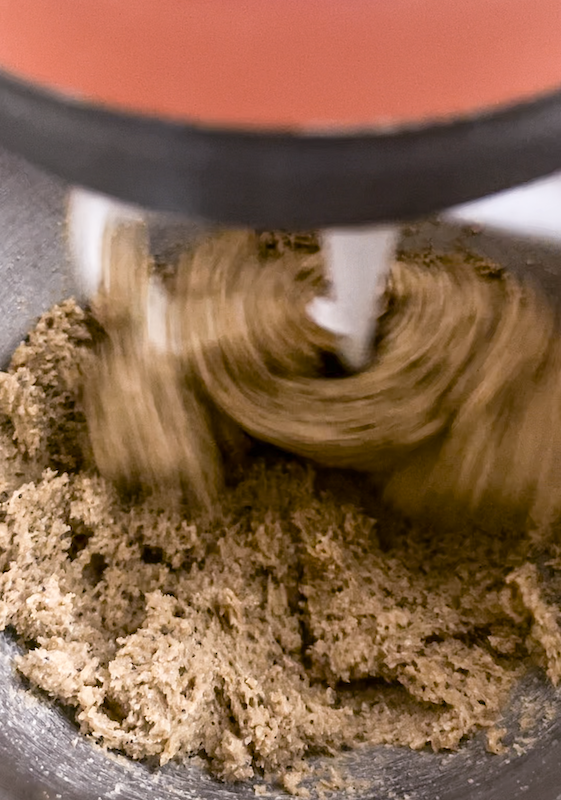
3. Once your butter is ready, cream the butter and sugars in the bowl of a stand mixer. You could totally do it with a wooden spoon and get a good arm workout. But I would recommend using a stand mixer/handheld mixer because you already lost some precious time with the burnt butter. *winks* Once the mixture is light and fluffy, add in the cold eggs, one at a time.

4. Next, add in half the dry ingredients until well-incorporated, then finish off with the remaining dry mixture. Do not overmix. I usually stop when I still see little bits of flour because I find that it is easier to mix in the chocolate chips and nuts when there's still some flour unincorporated.

5. Add in the chocolate chips (I went with dark chocolate and white chocolate) and nuts. I didn't specify an amount because I usually just eyeball the amount. *LOL*


6. Then you need to put the dough in a container, cover it and put it in the refrigerator. Where it will stay for 3 days. Because it got tired after all the mixing...and needs to rest. Okay, you can bake them after 1 hour but it gets more yummy after 3 days. My suggestion is to bake some to get you through the 3 day wait and then bake the rest after 3 days.

7. Three long days later, get your cookie dough out of the fridge and preheat your oven to 350F/180C.  Place your cookies out on a baking tray and bake for 12-14 minutes depending on your doneness preference and how big your cookies are. I like mine crispy on the outside and soft on the inside. And I like the size of cookies I get when I use my ice-cream scoop. They are easy to handle and pack.


They do spread a little so leave some space for them when you bake.


For a little more depth of flavour, sprinkle some organic sea salt on top.

There you have it...my current fave chocolate chip cookie recipe. :)


Share/Bookmark

Pin It

Friday

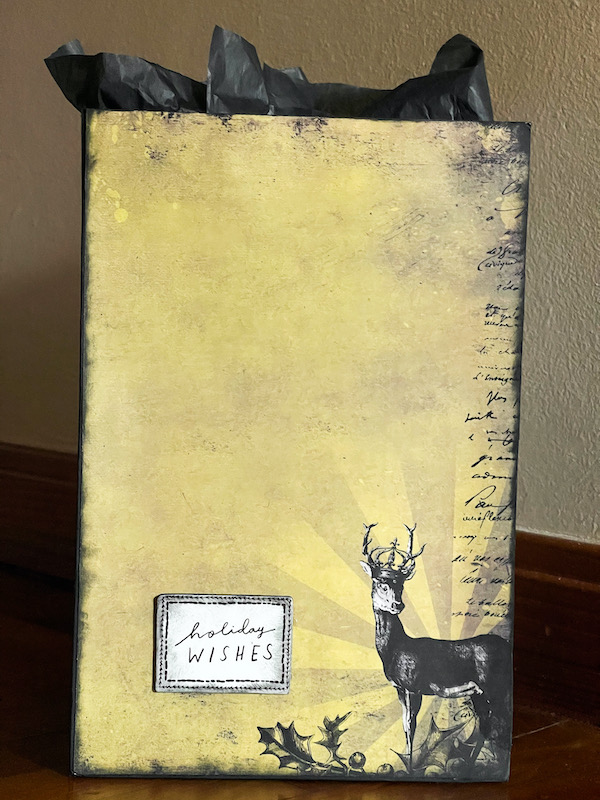
A quick decorated Christmas gift bag for the minimalist


Now that all the fussy-cut Santa faces have been used up, it's time to move on. Today's project is a decorated Christmas gift bag for the minimalist. 


I cut two sheets of the same patterned paper to fit the front and back of the paper bag (eh...I might have done a little shopping lately...okay, it was just yesterday! *LOL*) Then I ran the sheets through my Xyron Creative Station for an even layer of adhesive before adhering them to the bag. After that, I inked the edges of the patterned paper  so that the edges blended in with the black paper bag. I finished by inking a chipboard sticker for a cohesive overall feel.


I love it when I get one of those wide paper bags because you can put loads of stuff in them. You just have to reinforce the bottom with some cardboard. And fluff up the top with some wrapping tissue (recycled of course). This bag folds flat for easy storage too. Perfect for someone in your life who may not appreciate a lot of cutesy, colourful stuff. Yep...no Santa face for this minimalist! *hahaha*

Happy weekend friends! 


Share/Bookmark

Pin It

Thursday

Surprise ! Extra Santa projects!


Last week, I shared what I thought was the last Santa project as I wasn't sure if I could share the last few projects since there were going to be on actual mail packages. I did manage to take some pictures before I addressed the packages. So you get to see them. I mean, in case you had some Santa withdrawal (is it only me? *winks*)


This one was the largest package so I had a little more space to play with.  I made sure to leave space for actual stamps. I always ask for stamps at the post office. :)


I wanted to make it look nice and festive without covering the whole package and confusing the mailman. *LOL*

While leaving me enough space to write the recipient's name and address. 


The sweet lady at the post office took great care to paste the stamps around my design so I hope the recipients enjoy their parcels. Or at least the stamps of Singapore's cityscape. Parcels which they might receive possibly in 2021 since apparently I was supposed to send out mail by mid-November to even score a pre-Christmas delivery. I have a totally valid excuse:  It's 2020's fault. *LOL*


Share/Bookmark

Pin It

Friday

All my Christmas 2020 projects featuring Santa!


Okay friends, clearly your gal here did not clearly think things through when she said she wanted to photograph ALL her Christmas 2020 projects featuring Santa in one huge pic. Because it was hard. There were some dimensional stuff, some flat stuff and lots of cards. And even though she eventually got them all set up on the stairs, there was THE problem of her blocking the light source from the back causing a shadow on the projects. 

Well, that was a long-winded way of telling you why the shot is at this weird angle. *LOL*


But the projects are done! And it's time to pack them up and send them out! Yay! *high fives all around*


Do you remember these projects? *winks*

Do you have a fave?

Happy weekend friends!:)


Share/Bookmark

Pin It

Thursday

This week's Santa project - the LAST one!


Well my friends, this is it. The very LAST of the Santas on a project. In full disclosure, I have 5 more Santas but they are going on the packages that are going postal tomorrow but I won't be sharing them here for privacy (and possibly surprise) reasons. *winks*


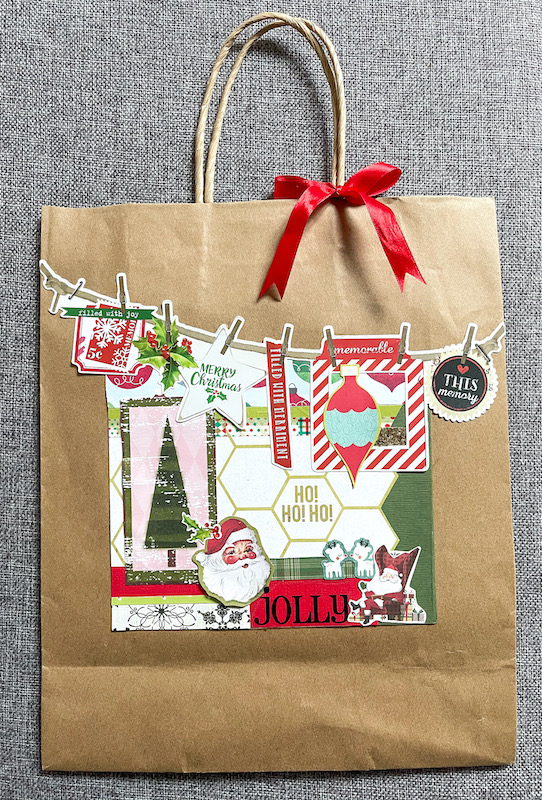
Anyway, this one really is a mish mash of my Christmas scrap supplies. :)


I've kept it flat for easy storage and transport.


But I did try to incorporate some texture with the bit of glitter paper and the ribbon.


So yesterday I went downtown to check out the Christmas Decor in Orchard Road (our version of California's Rodeo Drive but much much shorter..hehe) and it was dismal at best compared to years past. Guess the retailers have really been hard hit this year and are low on budget. 

What about you? Are you all prepared for Christmas? (Asked the gal who still has her Christmas decor in the storeroom..*LOL*)


Share/Bookmark

Pin It
>
Related Posts Plugin for WordPress, Blogger...

LinkWithin

Pin It