
Hello friends! It's that time of the year again - when I start altering mooncake boxes! *winks* Read on for a quick tutorial.

1. I started with a sturdy box with shiny gold sides. Since I like the gold sides, I just covered the lid of the box with plaid patterned paper.
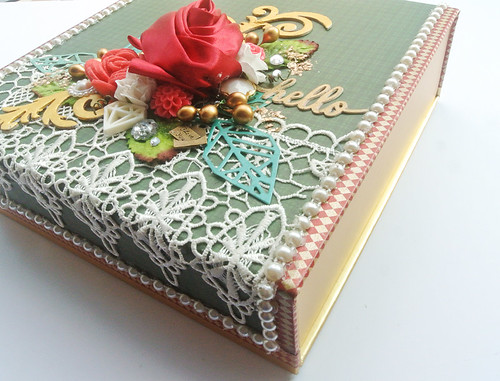
2. To create cohesiveness between the box and the patterned paper, I added some washi tape with gold details along the edges of the box.
3. To add a bit of elegance, I glued down some pearl trim.
4. Next, I gessoed and painted some chipboard swirls.

Then I added some lace trim to form the "mat" for my embellishment cluster.

And then build up my embellishment cluster with chipboard, diecuts, fabric and paper blooms, papr leaves and bling.

I finished with some gold mica flakes.

Hope you are having a great week so far!

7 comments:
*sigh* what you do with boxes makes my heart happy! I loveeeeeeeeeeeeeeeeeee this! LOVING those pearls!!!!!!!!!!!!!
Absolutely gorgeous!! I love the details you added!! It looks amazing!! And fabulous tutorial, too!! Have a great day!! Big hugs :)
Lisa
A Mermaid's Crafts
Ooooh so beautiful !!!
Bravo, Yvonne! This is stunning!
Our moon cakes just came in a plastic bag. I can't believe how beautifully you decorated that fancy moon cake box. I guess I need to find another moon cake seller in Hawaii 😄.
This is stunning love the makeover !!
cheers
This is my favorite of your mooncake box transformations!
Post a Comment
Thanks for visiting my blog and taking time to leave a comment. I really appreciate it. Have an awesome day!:)
Cheers, Yvonne.