Tuesday

The decorated bottle....a tutorial


The-decorated-bottle5

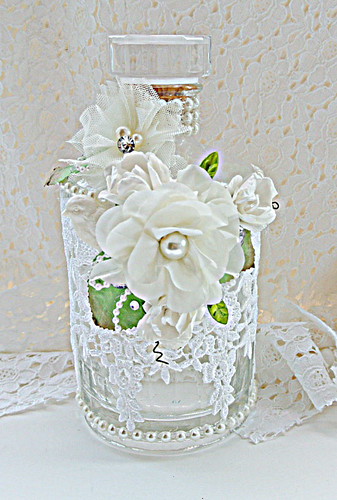
I love transparent glass bottles. Their see-through nature means they don't take up a lot of visual space and offer a myriad of possibilities when it comes to decorating them. Here is a quick tutorial on how I decorated this bottle.


I started with this lovely Japanese whisky bottle [which came back with me from a recent trip because it was just tooooooooo pretty! *winks*] and removed all the labels.  

There are many ways to remove labels from bottles/jars  but using a heat gun/hair dryer is one of the fastest and least messy ways. All you need to do is move your heat source over the labels which loosens the adhesive and the labels peel right off, without leaving any of the sticky residue behind. 


Next I selected some pretty lace that would still allow me to see through the glass bottle...and adhered it with a hot glue gun. This is my choice of adhesive for this project because it dries fast and if you make a mistake like glue something on crooked, you, can just rip it off and start over again.


After that, I glued flat-back pearl strips (from Maya Road) along the top and bottom of the bottom.


Then it was time to audition embellishments for my bottle. I decided to keep to a neutral palette for classy look.


A cute resin bird tucked in under the bloom and resting on a leaf...


Stick pin leaves, pearls and bling for added texture and interest while keeping to the neutral colour palette.


I was so tempted to just keep adding embellishments at this point...*winks*


What do you think?


Share/Bookmark

Pin It

Friday

The laksa and matchstick story...


The laksa and matchstick story

Back in August, my sister and I made our first attempt at laksa, a popular spicy noodle soup of Peranakan cuisine, supervised by mum. :)


The spicy broth requires a gazillion ingredients that need to be cut into millions of pieces [I am exaggerating here of course! *winks*], pounded in a mortar, grinded in a food processor and then stir-fried for an hour before it gets to simmer in coconut milk for another hour.


It was a lot of hard work and even tears for my poor sister...until my mum got her to put the wooden end of a matchstick between her teeth. Apparently, the match head absorbs all the vapours before they get to your eyes... so no more tears when cutting onions! *LOL*


I'm still working hard on dwindling that scrap pile! 


Playing along with Stuck?! Sketches.


Happy weekend friends! :)


Share/Bookmark

Pin It

Wednesday

Standard operating procedure: make a tag....*winks*


Standard operating procedure

These days, the standard operating procedure when I receive a box parcel is to make a tag or two....you know, after I put away the goodies from the box of course. *winks*


Somehow, cardboard boxes inspire me to make shabby chic tags. :)


I had a monochromatic tag using neutrals in mind when I chose the kraft patterned paper and added the beige lace [from an old bra of course...*haha*].  But an orange flower beckoned me..."Use me please!" and you know how I am when my craft supplies talk to me right? *LOL*

Hope you are having a great week so far!


Share/Bookmark

Pin It

Monday

A little love for my sister....:)


A little love for my sister

My sister has been really sweet to me of late...leaving sweet (chocolate) and salty (chips) treats on my desk. So I decided to return the favour in a less fattening way...with her fave toiletries from L'occitane. Of course, they needed to be prettied up in a decorated brown paper bag. *winks*


Nothing like diving into my scrap pile for the right pieces! Since I wanted to send a little love, I thought the "love" printed fabric would be appropriate. Then, I found a fun speech bubble and some fussy-cut cute elements (deer, mushroom and tree). I also added some twine and a button. To finish, I used a Maya Road "Question Mark" clip to add a little mystery as to the contents of the package. ;)


It was a fun and quick project to make...and I'm sure my sister will recycle the bag to send a little love to someone else. :)

Happy week ahead friends!


Share/Bookmark

Pin It

Thursday

Another 9 ways to give a new lease of life to household items


Last year, I wrote 2 "Tips" posts for giving a new lease of life to household items. It's time for a new edition! Here are another 9 ways to give a new lease of life to household items. :)

Amazing-mixed-media-canvas-for-LESSology
Inspired by a piece of wrapping tissue
1. Use pretty wrapping tissue and broken/tacky accessories on a mixed media canvas.

Upcycled-perfume-bottle
Upcycled perfume bottle
2. Turn an old perfume bottle into an accessory holder.

Come-join-me-for-afternoon-tea6
Come join me for afternoon tea

3. Decorate a clear marker box and create a one-of-a-kind invitation.


Altered-zipper-bottle-for-LESSology.
An altered bottle
4. Turn an old juice bottle into a statement pen/brush holder.

Let's-have-a-cupcake
Your weekend project: cupcake trinket pin holder
5. Use an old sponge as a base to make a sweet cupcake trinket pin holder.


Mug-shot-project-for-LESSology
Beer can turned mug for paintbrushes
6. Turn a sturdy beer can into an altered mug to store paintbrushes.

A-fabric-tag
Fabric tag
7. Use denim and lace fabric from used clothes to make a tag.

Love-this-princess
The one where the princess refused to smile
8. Use a decorative box cover diecut as a mat for your photo.

Shabby-chic-magnet
A shabby chic magnet
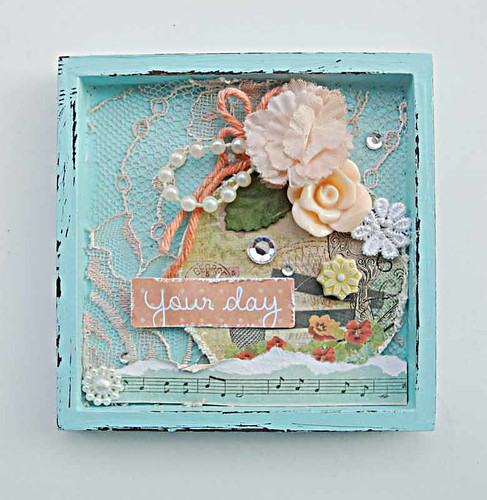
9. Turn a small wood packaging frame into a shabby chic magnet.


There you have it....another 9 ways to give a new lease of life to household items. Which one is your fave? 


Share/Bookmark

Pin It

Tuesday

The cost of messing around...with a finished project *winks*


Decorated-signage-by-Yvonne-Yam-for-Maya-Road

The other day, I picked up this "open" wood sign from my local Daiso store and thought I could make it look a lot prettier with some Maya Road embellishments. :)


I chose some Maya Road embellishments, fiddled with the placement of them a little and then proceeded to adhere them all down with a hot glue gun. All done in 10 minutes.Whoa! I was happy.


Of course, days later, when I was about to photograph my project, it just looked way too plain. Like it needed MORE. 

I spied some lace that I just cut out from an old bra [I did an Amazon bra spree recently and had to purge the same number of brassieres I purchased to avoid massive overload in the undergarment drawer...come on, you understand right? *LOL*] and thought I should add that for a little more visual interest.


It might not have been such a great idea since it took ages to glue it all down and then trim along the letters. So a 10-minute project took over an hour! That's the cost of messing around with a finished project. Now, I think the lace is a little too much texture!  *LOL*

This project was created for Maya Road and first appeared on the Maya Road Design Team blog.


Share/Bookmark

Pin It

Monday

Guess whose birthday it was....


Guess-whose-birthday-it-is

A couple of Sundays ago, we paid a surprise visit to my brother's with a birthday cheesecake for a member of the Gangster Gang. Can you guess whose birthday it was? 


Could it be niece S's birthday? Or nephew #1's birthday? *winks*


Yeah, the shy birthday boy did not want to pose for photos...in fact the rest of the Gangster Gang were far more excited about blowing out the candles and cutting the cake than he was! *LOL*


It was the first time I made a topping for a cake so I was crossing my fingers that my mango gelatin layer stayed intact since I made up my own recipe [less sugar, fewer calories]. On hindsight, I should have gone with a no-bake cheesecake. Oh well, the verdict from The Gangster Gang was that it was "super delicious". :)


Playing along with Stuck?! Sketches.


Share/Bookmark

Pin It

Thursday

The paper towel card...*winks*


The-paper-towel-card

So the other day, after a mixed media session, I found some lovely patterns on my paper towel and thought to myself, "Such a pity to throw it away...maybe I should try to use it on a card or something..." *winks*


I cut the paper towel to size and used dry adhesive on the card base before gluing the paper towel to the card. The paper towel is a little delicate so you have to be careful when handling it to prevent tearing.


Then I added my fave Maya Road embellishments with a hot glue gun.


The paper towel looks like lovely patterned paper, right?


What do you think?


Share/Bookmark

Pin It
>
Related Posts Plugin for WordPress, Blogger...

LinkWithin

Pin It