Tuesday

One hour of fun!


The-one-hour-fun

This year, I've challenged myself to spend <= one hour on a layout and focus more on design and storytelling rather than throw lots of products on a page.


Fortunately I have a huge arsenal of pre-prepared masked/misted backgrounds from which to choose from. :)


Then I rummage through my scrap paper box [I will finish using up those scraps...eventually. *winks*] Add some machine stitching and journaling and the layout is done!


Playing along with Sketchabilities.


Share/Bookmark

Pin It

Monday

How to: create a vintage-inspired mixed media canvas


Vintage-inspired-mixed-media-canvas1

Hello friends! Today I'm sharing a quick tutorial on how to create a vintage-inspired mixed media canvas.


I started with a 6x6 canvas panel, a piece of vintage-inspired patterned paper, a distressing tool and gesso. After distressing the edges of the patterned paper and adhering it to the panel, I applied gesso with some water to "tone" down the colours on the patterned paper.


Next, I applied Golden Fiber Paste with The Crafter's Workshop stencil. You can use any type of modeling paste you have. Personally I love the paper-like fiber texture of this paste. :)


After that, I took a paintbrush and started painting with Silks Acrylic Glazes. I used Mediterranean Blue and Emperor's Gold , pulling the colours from the patterned paper.


Then I embellished with my fave lace trims, blooms and pearls.


You can create more depth of texture with a thicker application of the paste. But I love the subtle sheen of the Silks Acrylic Glazes on a slightly raised surface.


Share/Bookmark

Pin It

Friday

Art journal play....


Stencil-play1

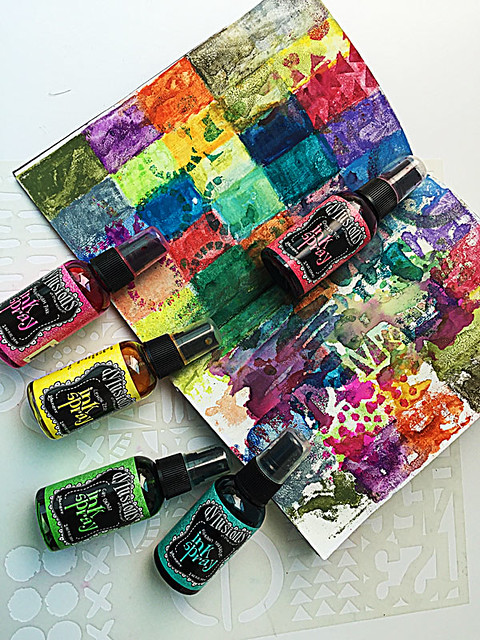
These days, I've been enjoying playing in my art journal. Like this abstract page...lots of masking and misting and stamping.


I  always begin by putting down colours in shapes to get my creative juices flowing... For this particular page, I was thinking of a multi-coloured quilt...so I started adding coloured blocks with water-soluble crayons.


Of course, after one page, I got tired..*winks* so I carefully blended the colours with water, closed my journal pages together and ......[victorious music plays in the background], two pages done! *high five all around*

Art-journal-play-with-TCW-by-Yvonne-Yam2

Then I used The Crafter's Workshop TCW 470 Geometric Art Layers with Dylusions mists. So much fun! :)

Hope you find time to have fun this weekend my friends! :)


Share/Bookmark

Pin It

Tuesday

A salad and cake....


A-salad-and-cake

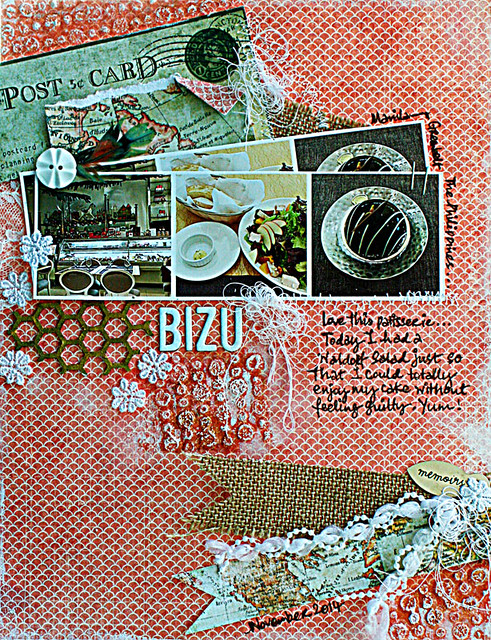
Sometimes I order a salad for lunch just so I can totally indulge in dessert feeling a little less guilty. You know, mix something good with something bad and it balances out right? *winks*


I love this French-style patisserie in Manila for their huge assortment of yummy cakes. I intend to try each and every one of those...I mean eventually of course. *LOL*


I've decided that hoarding map papers are a thing of the past [you know,,,,the whole new year, new resolution thing...*winks*]


I'm slowly getting those travel photos scrapped. I'm officially behind by 18 months or so..wish me luck! 
Playing along with Let's Get Sketchy.


Share/Bookmark

Pin It

Monday

Teaching aid magnets with Xyron


Photo of magnets in use in the classroom taken by my mother

This month, the Xyron design team got to pick their fave Xyron product and create with it. Mine is my trusty 9" Creative Station. I turned my mother's food teaching aids into magnets. [My mother teaches Home Economics in case you were wondering...]


It's a relatively simple project albeit time-consuming. I started with these food picture aids which I fussy cut.


Then I ran them through the Xyron 9" Creative Station with the magnetic cartridge. The magnetic cartridge laminates the front of your feed and adds a magnetic sticker to the back. You could create teaching aid magnets with letters or pictures for young kids.

P/s: My mother is eyeing my magnetic cartridge for some other projects...she says I should order more of them. *LOL*


Share/Bookmark

Pin It

Thursday

Bold colours on a mixed media canvas


Bold-colours-on-a-mixed-media-canvas

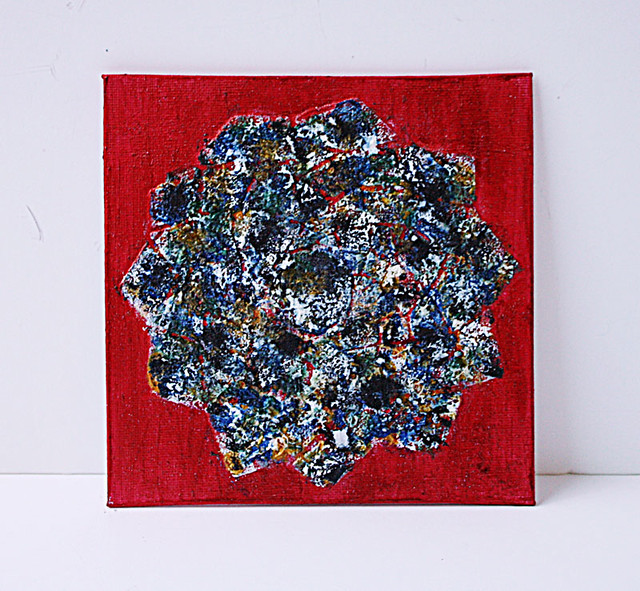
This year, I've been working on canvas panels so that I can frame them in shadow boxes. Even though I've been a little distracted of late by pastels and pretty flowers, I decided to go back to my roots and work with some bold colours. :)


I started with The Crafter's Workshop stencil and Liquitex ceramic stucco. I love experimenting with different textured gels/mediums to get different textural effect on my pieces. 


Then I painted the whole canvas red before adding other paint colours using my fingers. Can you see the cool ceramic stucco texture? Yeah, plain old modeling paste is so passé...try others! *winks*
Playing along with The Mirror Crack'd.


Share/Bookmark

Pin It

Wednesday

The five-minute CAS card


Wishing-you-well-CAS-card


Sometimes when I don't feel like pulling out my art supplies for a simple project, I turn to my trusty stack of residual misted backgrounds....


I choose one that I like...


Add in some sequins to fit a sketch challenge I could possibly enter the card into....and I'm done in 5 minutes! *high fives all around* 

Playing along with CAS(E) this sketch.


Share/Bookmark

Pin It

Monday

The journey to pocket page scrapbooking....


Pocket-pages-altered-spine-album

So the key to getting started on pocket page scrapbooking is really in the album. Love this Simple Stories SN@P! 6x8 burlap binder that I got as part of my design team assignment for my LSS Made With Love . I couldn't bear to cover up the chevron design so I decided to "alter" the spine instead [modeling paste with The Crafter's Workshop, black gesso, burlap, bloom, leather strap from an old shoe].


You can tell that I haven't quite gotten the sizing of the photos quite right...*LOL* 


I didn't have any Project Life Cards so I had to dig into my scrap stash. Yeah, and the corner rounder was tooooooooo far away! *winks*


I love the Basic Pages that came with the album though. Because I could add more dimensional items. I didn't have any reinforcement rings so I added a strip of washi tape on both sides. 


I have to say that pocket page scrapbooking wasn't that easy for me because I had to pare down my embellishments and think "smaller". But it's been a fun journey. :)

If you reside in Singapore, you can get this awesome binder and the supplies for this project at Made With Love Singapore. You can also view this album later this week at the store. 


Share/Bookmark

Pin It

Friday

An abstract piece...

Abstract

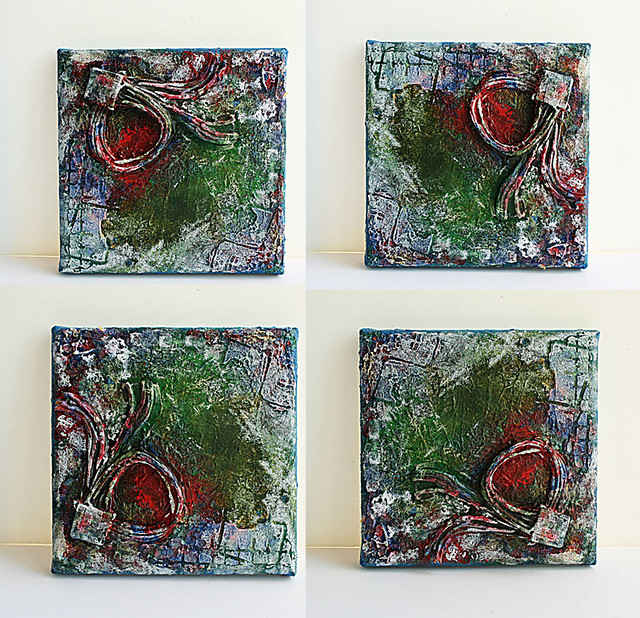
This year, my challenge to myself is to make art that isn't bounded by a fixed display stance. You can rotate it and view it from different angles. Like this abstract canvas featuring old computer parts. 


I started with scrunched up wrapping tissue and canvas which I painted blue. Then I adhered the computer cables with lots of gel medium.

Next I went in with some Maya mists, letting the colours drip between the cables. Then I added some Liquitex ceramic stucco using The Crafter's Workshop stencil.


After that, I used my fingers to apply Art Anthology paints to the piece for some shimmer and random texture.


And then finished with gesso applied with the palm of my hand.


I was inspired by the colours at the ARTastic challenge.

P/s: Happy weekend friends! :)

Share/Bookmark

Pin It
>
Related Posts Plugin for WordPress, Blogger...

LinkWithin

Pin It