Thursday

Happy mail from a sweet friend...thanks Lizzy Hill!


Just wanted to share happy mail from a sweet friend - Lizzy Hill.

She created a pretty little folder (pictured is the front and back of the folder).


A look at what was housed inside the folder.


Here are the goodies I received!

So grateful for a sweet friend who took time to curate a package filled with stuff that I can't wait to use. Thanks Lizzy! :)


Share/Bookmark

Pin It

Wednesday

Another self-portrait from my sketchbook


I haven't been drawing much of late. This was a self-portrait I started back in December 2019 (over a few lunch breaks aka art-on-the-go sessions) and finally added the finishing touches over lunch yesterday. *winks*


I struggled a lot with this one due to my lack of practice...can you tell? *LOL*


Definitely working on mastering hair in 2020. Usually I'm too tired from "fixing" the face...*hahaha*

(Prismacolor Premier Colored Pencils and Uniball Signo White pen on Strathmore toned gray sketchbook.)

Hope you are having a great week so far my friends! :)


Share/Bookmark

Pin It

Tuesday

Tutorial Tuesday: How to work with patterns on a layout


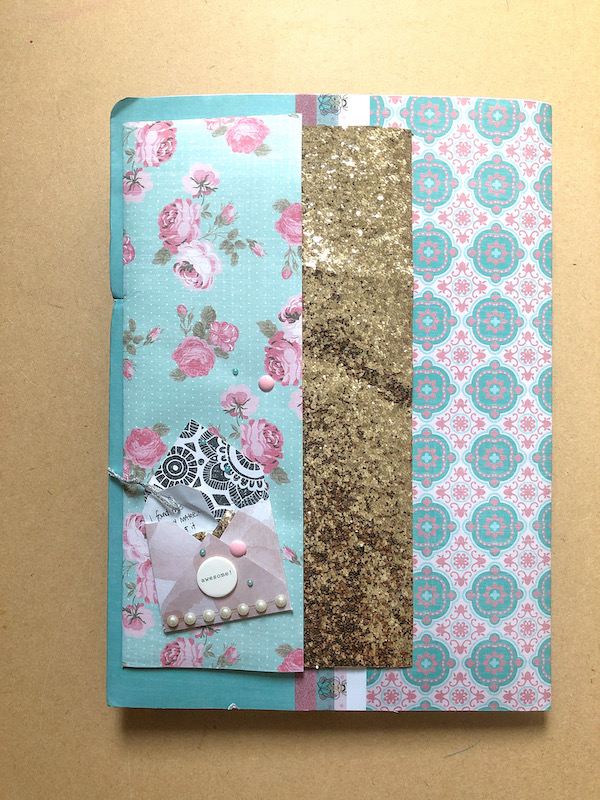
So I've been simultaneously trying to tackle my stack of 12x12 patterned papers as well as my (super fat) single file folder with divided sections of paper scraps. Typically I would pull a sheet of 12x12 patterned paper as my base, then try to piece together the whole things using my scrap stash.


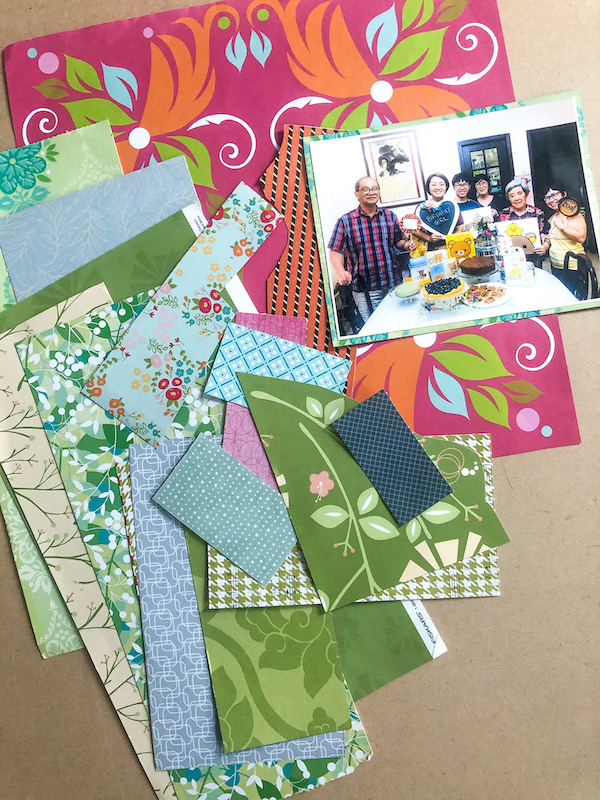
Even though I would usually pull out random pieces from the scrap folder to "build" the layout, this time I pulled out the patterned paper pieces that kind of "go" with the bright patterned paper base I had chosen just to share a little of how my "creative" brain works. *winks*

As for the choice of the patterned paper base, you can choose colours that either match your photos or complement your photos. Don't worry too much about the actual pattern "clashing" with your photos because you can use a mat on your photos to break up the busy-ness of the patterns.

You can apply some tried and tested design rules here...like dark colours recede and brighter colours enliven a layout.

Since we were celebrating my sister's birthday on this layout and we had a cutesy Rilakkuma-themed party, I went with a bold brightly coloured patterned paper as the base for my layout.

Now, you don't have to choose sooooooo many patterns to work with, especially if patterns intimidate you. I really wanted to challenge myself and use up as much scrap stash as possible. :)


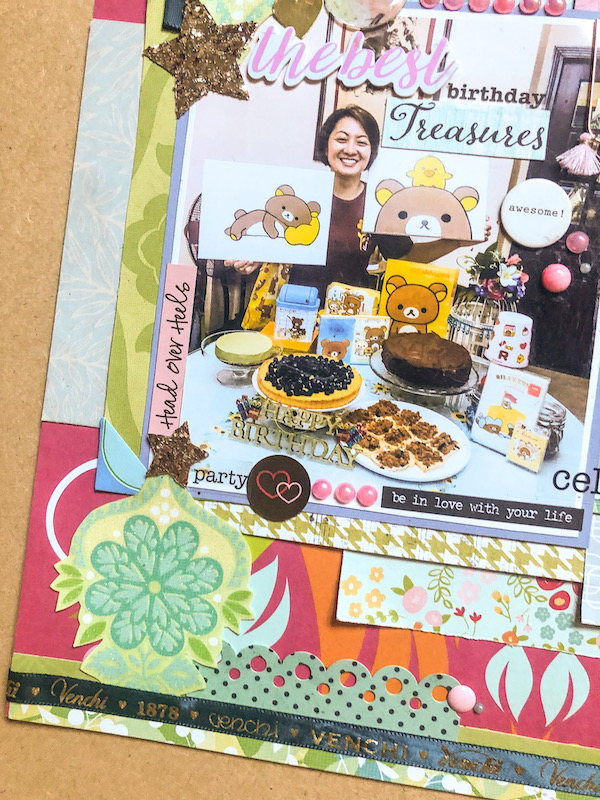
Here was how the layout looked when I incorporated the patterned paper scrap pieces I picked out.

One of the easiest ways to use patterned paper scraps is to cut them into smaller pieces and just tucking them under the edges of your photos to create a "dimensional" mat. You can vary the colours and patterns to achieve a pleasing colour/pattern combo.

On this layout, I used rectangular pieces of scrap paper (because I was lazy..hehe) but you could also round the edges and use a border punch on the papers to create more details and interest to your piece. 

I did, however, fussy-cut the floral pattern to create a visual triangle so that the eye can focus on the photos instead of being distracted by the numerous patterns on the layout. And in case you were wondering, I did use every piece of patterned paper scrap I chose (see photo #2) albeit in smaller bits.


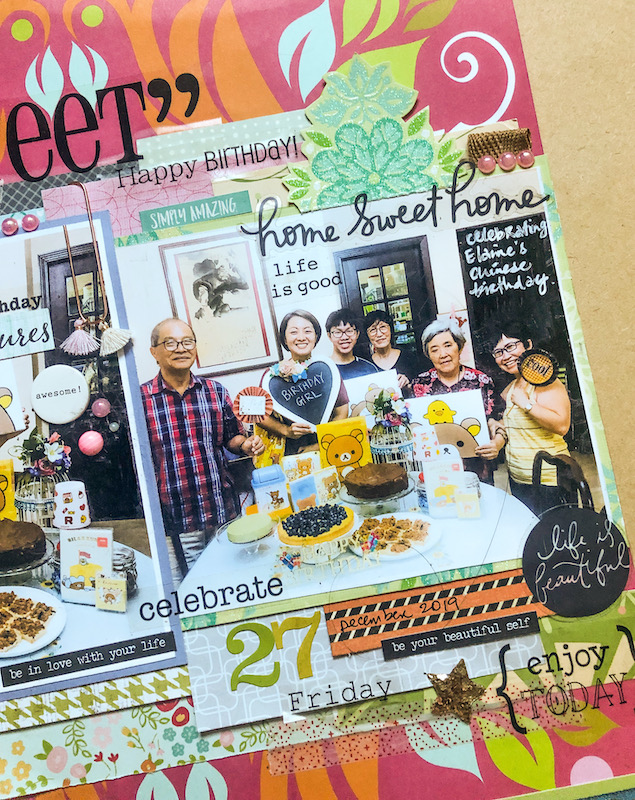
My next step is to "texturize" my layout ...of course, with more patterns (the more the merrier..haha). 

Since the only "dark" colours are in the photos, I grounded the layout by adding a dark green printed ribbon (chocolate packaging) at the base of the layout. I also added word stickers on the photos to guide the eye to the photos. While the human eye loves to look at colours, the human brain loves to read text. Which is why I like to do my journaling on the photos or near the photos.


I used a super large sticker for my titlework... that helped to guide the eye down to the photos.

To "break up" the patterns, I like to do embellishment clusters around the photo edges. Personally I'm drawn to tactile elements so I like to incorporate bits of ribbon scraps (in the form of tabs at the edges), dimensional stickers and chipboard pieces. 


Vary the sizes and colours to create a visually pleasing cluster.

Washi tape is a great way to use patterns on a layout in a less obtrusive way since it is semi-transparent. I like to use washi tape as additional adhesive insurance as well as a "mat" for my clear stickers.


There you have it...how to work with patterns on a layout.  Do you like to work with patterns on your layouts?


Share/Bookmark

Pin It

Monday

Make Stuff Monday: an upcycled decorated bottle


Hello friends! Today's Make Stuff Monday is an upcycled decorated bottle. :)


I started with this XO bottle. Love the details on the bottle....


So I kept parts of it unembellished....*winks*


Of course, I also went overboard with the embellishing on the parts I wanted to cover. *LOL*


The lace stash got slightly smaller so all's good. :)


Share/Bookmark

Pin It

Friday

The one about the bronze medal


So nephew #1 came back with a bronze medal for the International Biomedical Quiz 2019.


He wasn't too happy with his performance and said that he will get gold in 2020. We shall see about that won't we? *winks*


So I actually got up from my chair, walked to the chest of drawers located outside my bedroom, opened the drawer of neglected tools, pulled out a border punch, walked back to my desk, used the punch on a strip of scrap paper, adhered it to my layout, carried the punch and put it back in the drawer of slightly less neglected tools. Go me! *high fives all around*


Playing along with Stick It Down.


Share/Bookmark


Pin It

Thursday

Tutorial Thursday: Yum pan #2


Back in March 2014, I shared my first yum pan (aka badly scratched Tefal pancake pan turned decorative piece).


Well, five years on and another badly scratched pan joins the yum pan family. *winks*


I started by cutting a piece of grey felt and adhering it to the base of the pan.


Then I covered the sides of the pan with remnant lace pieces.


Next I went in with some lace trim to cover up the uneven edges.


Once that was complete, it was time for my fave part of every project - embellishing!

And yes, that is an oyster shell.


Because when I go eat oysters and scallops at a restaurant, I bring the shells back with me. Yeah, these were on a plane with me. From Taipei to Singapore. *LOL*


I love that the oyster shell added a little dimension and sparkle. :)


I received "complaints" that we keep using the same signages for family photos so I made this one - perfect for new year celebrations and birthdays. ;)

What do you think?


Share/Bookmark

Pin It

Wednesday

A quick birthday card with a reworked tag...:)


Yes friends...this girl is reworking her previously handmade tag stash and making something useful to send out to somebody. Which in this case is the bestie's boss.*winks*


Reworked previously handmade tag on a new project in 2020 count: 2
Actual previously handmade tag sitting in a container begging to be used: 40+

Happy Wednesday friends! :)


Share/Bookmark

Pin It

Tuesday

Hello divemaster!


It's my sister E's birthday today! Last year she went to Honduras for her divemaster course and spent a few days in New York (shopping and musicals!) before heading home.


I picked her up at the airport and we went to check out Jewel Changi Airport - the S$1.7 billion mixed used complex located between Terminals 2 and 3. We also stopped for Bak Kut Teh (a Chinese soup dish prepared through many hours of simmering meaty pork ribs in a broth of pepper, garlic and other herbs) since she missed the local cuisine.


Once home, she displayed her shopping haul on the dining table and posed for the obligatory shot for the family scrapbook album. *LOL*


I went with map paper for the base of this layout, then added bits and pieces from my scrap pile to spice it up. :)


Can you tell that I've been trying to use up my sticker stash? *winks*


Playing along with Let's Get Sketchy.


Share/Bookmark

Pin It

Monday

Make Stuff Monday: Upcycled box with reworked tag


Hello friends! Happy new year! Hope 2020 has been good to you so far! :)

So we are welcoming the new year with an upcycled Christmas box that includes a reworked tag from a previous project. Yes, I'm tackling the tag stash....and they are either getting used as they are or reworked into other projects. :)


Here's a look at the Christmas box before the makeover. Really cute but a little on the flimsy side. You know how much I appreciate a sturdy box. *winks* But I added felt pieces on the front and back of both the cover and box to reinforce the box...

Maya-Road-tag
The one where I couldn't wait to play with my supplies
And this was the tag that I reworked into the design of the box.


I added a kraft doiley, a yellow felt bloom and some bling.


Pearl trim all around and some vintage trim along the edges.

I think it turned out quite pretty. What do you think?


Share/Bookmark

Pin It
>
Related Posts Plugin for WordPress, Blogger...

LinkWithin

Pin It