Showing posts with label scrapbooking. Show all posts

Tuesday

How to create a double page spread...a tutorial


A double page spread is a great way to either fit in more photos or incorporate larger photos while still having space to embellish your spread in a pleasing manner. However, it can be intimidating because you are working on covering a much larger surface and you want the pages to relate to each other in a cohesive manner.

If you are new to creating double page spreads, the easiest way to start is to use the same base paper - either the same colour cardstock or 2 sheets of patterned paper of the same design.

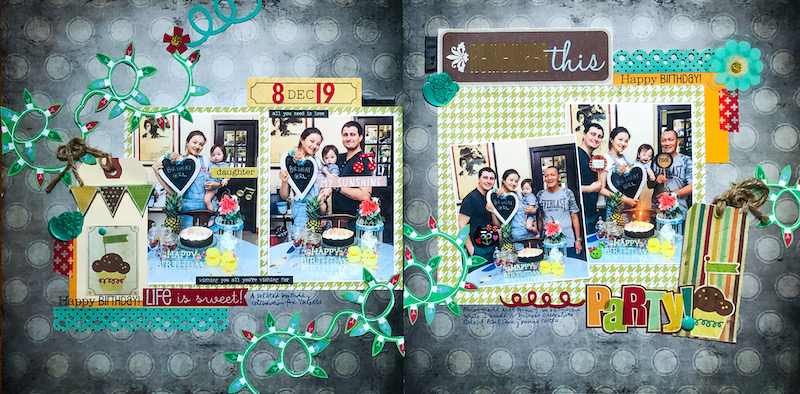
On this layout, I went with 2 sheets of patterned paper of the same design. I used a more muted base paper to really make the photos pop.

Extra tip #1: You can use different base patterned papers if you don't have 2 sheets of the same design. As long as they coordinate, they would be pleasing to the eye.

Extra tip #2: Use papers from a paper pack because they are designed to coordinate.


To ensure continuity between the pages, I used the same elements on both pages. Like the houndstooth paper and the Christmas lights. I matched up the Christmas lights at the center to tie the pages together.


I find it much easier to work on one page at a time instead of both pages simultaneously because I like my pages to be able to stand alone if they ever got separated. Also, working on a single page makes the task at hand a little less daunting.


Once I'm happy with the general layout of both pages, then I work on deliberate ways to tie the spread together through embellishments.

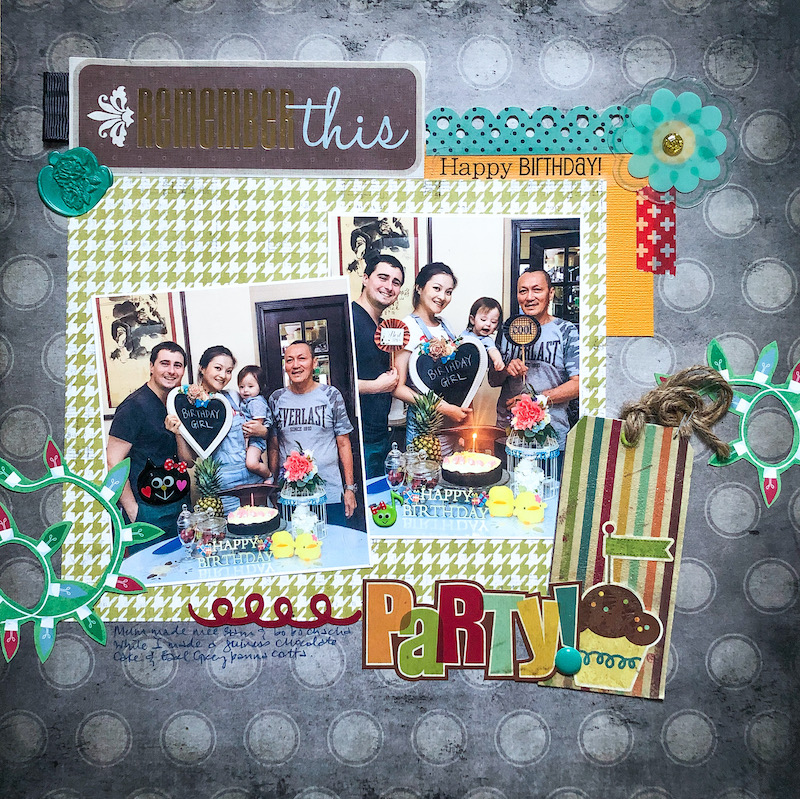
Photos don't have to be put in the same position on both pages. Here on this page, I tilted one of the photos to create more interest (and make it less noticeable as the photos are of different sizes...hehe).


Repeated elements on both pages help guide the eye from left to right, contributing to the overall cohesiveness of the pages.  Like the tags on both pages. Even though they are not exactly the same, they are quite similar (twine and cupcake). Or the ribbon tabs. And wax seals.

I also anchored the pages by adding a strip of yellow cardstock plus red washi tape at the bottom left  (page 1) and top right (page 2) edges to help with the cohesiveness of the overall design.


I used pops of red on both pages to help guide the eye along  the pages as well.


There you have it..how to create a double page...according to me. *winks*

Do you like creating double page spreads? What is your modus operandi for creating great double page spreads? Please share!


Share/Bookmark

Pin It

The album with lots of photos and tags


The-album-with-lots-of-photos-and-tags1

Happy 2018 friends! :)

So I accepted a seemingly simple project in November/December 2017 - a 4-page scrapbook album + cover with space for the givers to write personalized notes to the recipient. 

Not only did they take 3 weeks to send me the photos but the photos were mostly badly-composed ones taken with mobile phones.  That came unedited. Plus there were 50+ photos! And of course, they wanted it right after Christmas.  *dramatic sad music plays in the background* 


So I spent a few days thinking about the design of the scrapbook album since I wanted to use resources I had at hand and of course, decide which photos I wanted to use. Plus, the recipient was a dude which meant I couldn't use feminine elements. That was until the client said they wanted to fit as many photos in as possible. 

Seriously, at this point, I was ready to throw in the towel and say to the client, "I think you should get somebody else to do this..." because they haggled on the fee and just wanted to pay for a 4-page album.


But of course, the client was my sister-in-law and her colleagues. Yep. The family card came into play. So the show must go on. 


I went with pockets and pull-out tags for all the pages.  I kept the decorations simple and flattish - stickers and die-cuts to reduce bulkiness.


Some pull-out tags had more photos and space for the givers to write their personalized notes.


Now it's way easier to do a scrapbook album for people you know than it is for a bunch of strangers. Because I had no context for the photos at all. 


But since they supposedly like my style, I just did it my way - fun stickers and die-cuts with a little sense of humour. *winks*


Yes, there was great satisfaction in getting some of my stash used up. All my Xyron sticker machines were used to facilitate the completion of this project. 


Final count for photos included in album: 40.
Number of times I had to go to the store to print photos: 3.
Number of hours I spent editing photos: lost count.
Number of hours I spent working on the album: 50.
Sense of achievement and relief now that it's over: priceless.

Hope 2018 has been good to you so far! 


Share/Bookmark

Pin It
>
Related Posts Plugin for WordPress, Blogger...

LinkWithin

Pin It