Pages

Tuesday

It was a bao bun kind of day


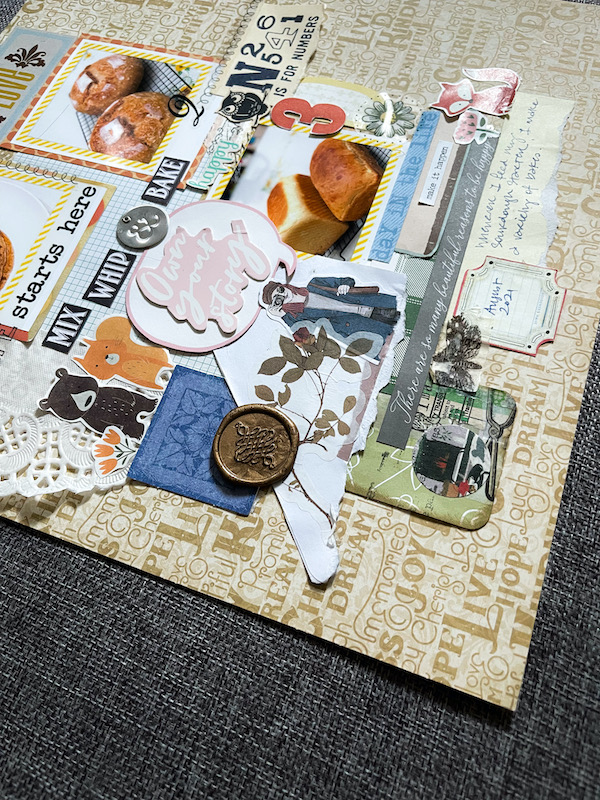
Last Friday, I woke up in the morning and decided that it was going to be a bad bun kind of day. I've made the meat buns several times (they were yummy but really ugly because your gal hasn't quite gotten how to pleat them properly yet) and also did the sweet custard buns. But I never tried making the flat sandwich bao buns.


And apparently last Friday was the day to try. Yep...your gal can be spontaneous sometimes. And also because her bao flour was expiring soon. *LOL*


Anyway, I did time it so that I could serve them for lunch..which included two proves and time to steam the bao buns in batches in my really small steamer. You would think that I own one of those bamboo steamers with several layers right? Nope. I can only steam 5 buns at each time. They need to steam for 12 minutes, then the fire is turned off and the buns have to stay in the steamer for 5 minutes with the lid on. Apparently if you open the lid too soon, you would get flat buns. Instead of fluffy soft ones. 


I did have trouble getting them to be the same size because the dough stretched during handling. But I was   really happy when I opened the lid to see fluffy buns! 

(I know you will share in my excitement friends...*winks* my family will just be like, "why didn't you just buy the frozen ones from the supermarket?" *hahaha* Yep, they will eat the processed stuff if I gave it to them but I like to make stuff from scratch..with better ingredients...and no preservatives).


I used the steaming time to stir-fry my pork loin and cut the cucumber and tomatoes. And make my sticky gochujang sauce to go with the filling. They turned out really yummy. And I would say make the buns...they are so much better than the frozen supermarket ones.


Lots of upcyling bits cut out from packaging and happy mail. 

Have you tried making bao buns?


Share/Bookmark

Monday

Make Stuff Monday - more happy mail bits using packaging


Still working hard on my pink and green themed happy mail package with more upcycled packaging bits.


The base is a Kiehl's kraft envelope for skincare samples. I also used Kiehl's kraft box packaging as a mat...love the in-built rounded corners...I just added a row of pearls to "pretty" it up. And of course, the rest of the cluster are just random bits from my stash....that's how I roll. *winks*


The base for this one is a Fresh receipt holder. Some patterned paper bits, washi tape, pearls and buttons. :)

Happy week ahead friends! :)


Share/Bookmark

Friday

Friday's Florals: This week's abstract florals


Happy Friday friends! Didn't get much painting done this week.  Didn't get much decent painting done this  week and found myself spending a lot of time trying to salvage pieces. *winks* 

Like this one. I wanted to paint some coneflowers and got carried away and just painted a lot of them. And then tried to salvage the piece by making the ones at the back look faded and the front 3 more prominent.  Did it work? *LOL*   

Enjoy your weekend!


Share/Bookmark

Thursday

Fresh floral displays using sake bottles


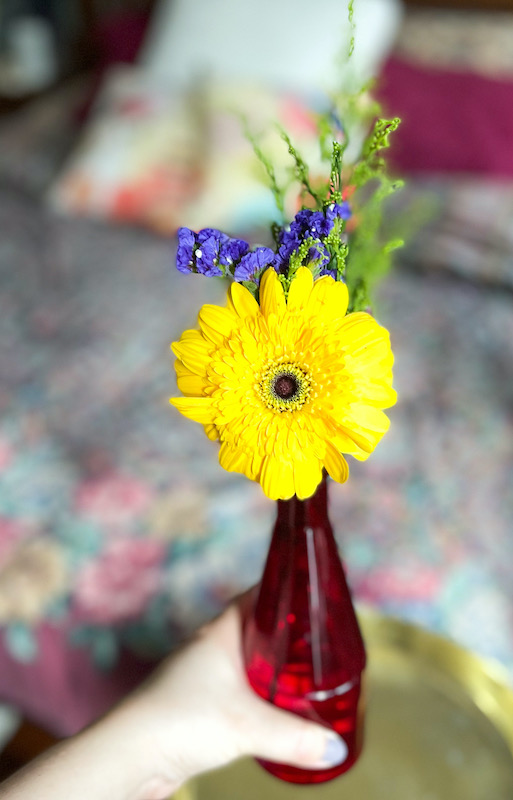
Happy Thursday friends!  Yesterday I picked up some fresh blooms. They were too small a bouquet to fill up my usual vase so I cut them down and used my sake bottles as "vases" to get 3 smaller floral displays.  You might recognise two of the bottles because they have been "decorated" previously.  The centre one is "naked" because I haven't got round to making her pretty. Yet. *winks*


This bottle was decorated a couple of years ago with a zipper, lace, pearls and a metal deer head from a paperclip. I actually have an altered bottle tutorial for it that was done back in 2015! Over the years, it has been used as a pen holder, a brush holder, a photo prop and of course, a vase. :)


This bottle makeover was just decorated back in April this year as an addition to my photo prop collection...but works great as a floral holder too. :)


And then there is the unadorned one.  I kind of like how the light shines right through it. I might opt for something translucent over it....like lace or printed acetate or clear glass paint. What do you think?


Share/Bookmark

Wednesday

The one about the mung bean cakes


Earlier this month, I made some mung bean cakes for the first time. 

The mung beans (green beans) were washed and soaked for 6 hours/overnight before being steamed till soft. After that, sugar, butter and dried cranberries are added and the soft beans are mashed and rolled into balls. The pastry is a yeasted one made with all-purpose flour and vegetable oil. The dough is wrapped around each ball of filling then flattened and baked in the oven for around 20 minutes. 

The pastry was light and crispy and went with the sweet bun bean filling.


I had never actually eaten a mung bean cake before ...and wanted to share it on IG so I tried one..and took photos. And since my dad was in the vicinity...he got to try one too. (I mean he was watching me eat...kind of had to offer him one...*LOL*)


There I was thinking that it would great with my morning espresso the next day. After all, I baked 10. We ate 2. There were still 8 left right?

Wrong. I underestimated the popularity of the mung bean cakes. Because mum and nephew #1 ate the rest the next morning. Yep. Each of them ate 4 mung bean cakes. *dramatic music plays in the background*


Mum was like, "I thought they were muffins and I brought them to school. And I had 2 for breakfast and 2 for snacks."

Nephew #1 was like, "I ate two for breakfast at home and brought the other two to school for snacking."

Guess they must be really yummy. *winks*


And that my friends, is the story about the mung bean cakes. Not terribly exciting under normal circumstances but in COVID 19 days, is an "exciting" event in my stay-at-home life. *LOL*

Playing along with The Studio Challenges.


Share/Bookmark

Tuesday

My first attempt at an abstract seascape watercolour painting


So here is my first attempt at an abstract seascape watercolour painting. Yep, I might have been a bit overzealous with the white splatters. But it was super fun.  :)

Hope you are having a great week so far! 


Share/Bookmark

Monday

Make Stuff Monday - recycled packaging for happy mail


Hello my friends! Today's Make Stuff Monday is a recycled packaging envelope that I've "prettied" up for happy mail. :)


I started with this kraft envelope that contained product samples from Kiehl's. Now, I don't usually get this when I make my purchase at the store but this came with an online order. 


Since I'm still working on the pink and green themed happy mail package, I pulled out stash that went with the colour scheme. :)


Of course I had to incorporate the pretty cardboard packaging from Fresh too...since we need to reuse all possible bits. :)


Can you spot where the pretty cardboard packaging went? Yep, I even included the flap portion so I don't even have to use my corner rounder! :)


I think it would be great for gifting some shower/bath bits like shower gel or shampoo...you know, stuff for self-care. 

What do you think?


Share/Bookmark

Friday

This week's abstract floral practice


Eh.. I may be a tad obsessed with this whole blurry, atmospheric effect when it comes to watercolours. Here I was trying to paint some watercolour blooms. And I had a minor mishap with a leaf..and I couldn't lift the colour off to "save" that area. So I just "flooded" the piece with water for the blurry effect, dabbing to remove excess water and using my paintbrush to control where the colour went. 

I really love how artsy it looks. :)

Happy weekend friends! 

Share/Bookmark

Thursday

Thursday's watercolour bird painting


I have been enjoying the #artfulaugust challenges so far even though I've missed a couple and need to play catch-up. Here is Day 19: Bird. Yeah, I can't believe it either - my first normal-sized bird! *LOL*

Hope you are having an awesome Thursday friends! :)


Share/Bookmark

Wednesday

The one about my hardworking sourdough starter


So my sourdough starter Blossom and her posse live in my fridge (a few small jars). Every few weeks, one of them gets a massive feeding 1:5:5 and starts to work hard for me. *winks*


I know a lot of bakers tend to feed their starters a few times (over a few days) before they start using them if the starters have been hibernating in the fridge. But I find that a massive feeding one day prior to using it works for me. Especially since I'm using the starter as the base for my levain so it does get another feeding before I use it to bake.

I will usually try to make a variety of bakes once I feed my starter...to maximize the "effort". :) I don't want to feed my starter every day and keep the discard for something else because of fridge/freezer space constraints. Plus I live in a hot and humid climate...my sourdough starter ferments in a few hours and gets a tad too sour for my taste if it lives at room temperature.


Anyway, a whole chunk of it goes to make sourdough pancakes.


And 2 free-standing loaves to practise my dough shaping and oven spring skills. :)


And some sandwich bread for the old folks who find the standard sourdough crust too hard to bite.


Lots of bits and bobs from some happy mail I got recently. 


Playing along with Stick It Down.


Share/Bookmark

Tuesday

An attempt at an abstract cityscape with reflections


Here is my attempt at an abstract cityscape with reflections using watercolours. It came together quite quickly (20 minutes) using the wet in wet technique with an old credit card, a big flat brush to wet the paper, a water spritzer to add more water and a rag to soak up the excess water. Super fun and extremely therapeutic. Give it a go! :)


Share/Bookmark

Monday

Make Stuff Monday - a decorated chalkboard


It's been a while since I've really tackled an altered project. This heart-shaped chalkboard had been in cold storage since 2019. I bought 2 of them and did a decorated heart-shaped chalkboard back in July 2019 with grandeur plans to make a masculine version that never did materialise. Because let's get real... no Yam dude wants to hold a heart prop. *LOL*


Lots of upcycling bits on this project...the only problem was that the surface area for sticking stuff on was  actually quite narrow. *winks*


It actually turned out quite pretty. :)

Happy week ahead friends!


Share/Bookmark