Friends, you know how much I love my stencils. I reach for them and some colorants when I need to quickly do up a background or to add a little bit of texture to help me finish up my projects. Here is one of my fave 6x6 stencil from The Crafter's Workshop used in 8 different ways.
 |
| Making a statement out of neutrals |
1. Tone down a bright background.
The background that was created with residual mist and another stencil was a little "loud" so I applied a very thin layer of light modeling paste with the stencil. You can still see a bit of the colour peeking through paste but the paste helped to tone down the background and formed the perfect backdrop for my focal point.
2. A "catchment" area for mica flakes.
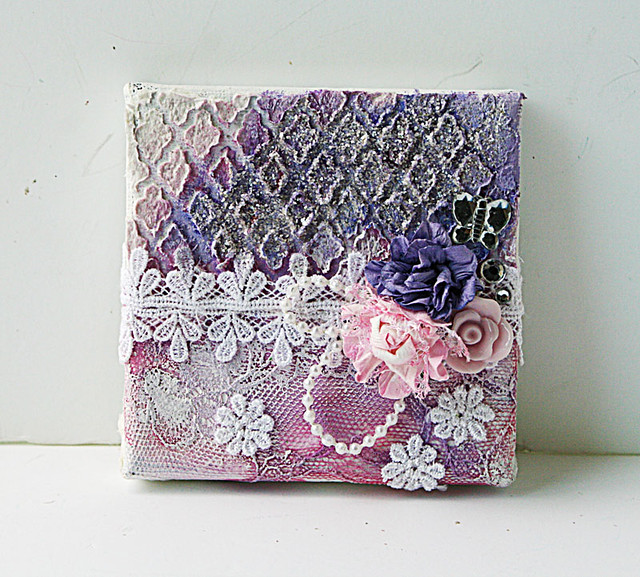
I really wanted the mica flakes to sparkle here so I used my stencil with a thick layer of light modeling paste, sprayed some purple mist, applied some gel medium and sprinkled the mica flakes on top for dimensional sparkle.
 |
| Mixed media canvas for ColourArte |
3. Cover up a "patchy" background.
The base layer was covered with remnant bits of tulle and lace that turned out "patchy" so I applied a thin layer of light modeling paste with the stencil to tie everything together.
 |
| For the love of purple |
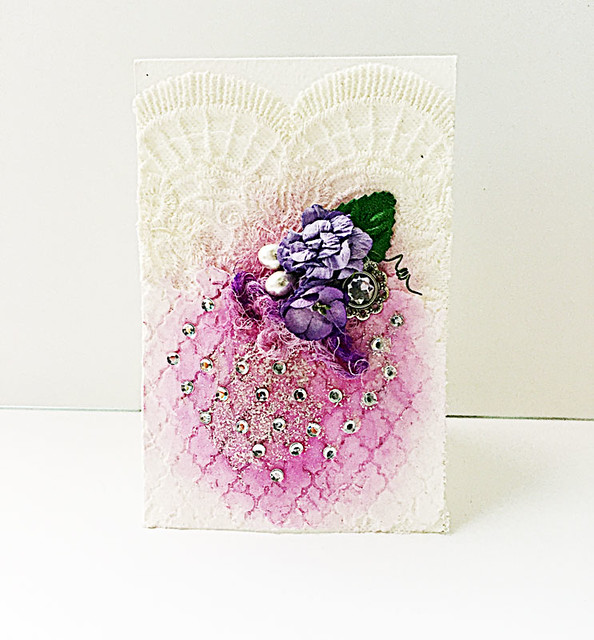
4. Serve as a grid.
Here I used the defined edges of the stencil design as a grid to stick my bling on.
 |
| How to create a vintage-inspired mixed media canvas |
5. Break up a pattern.
The vintage patterned paper I used for the background didn't help to guide the eye to the focal point so I broke up the pattern with the stencil + light modeling paste + Silks Acrylic Glazes.
 |
| Can I stick to supplies I pulled out? |
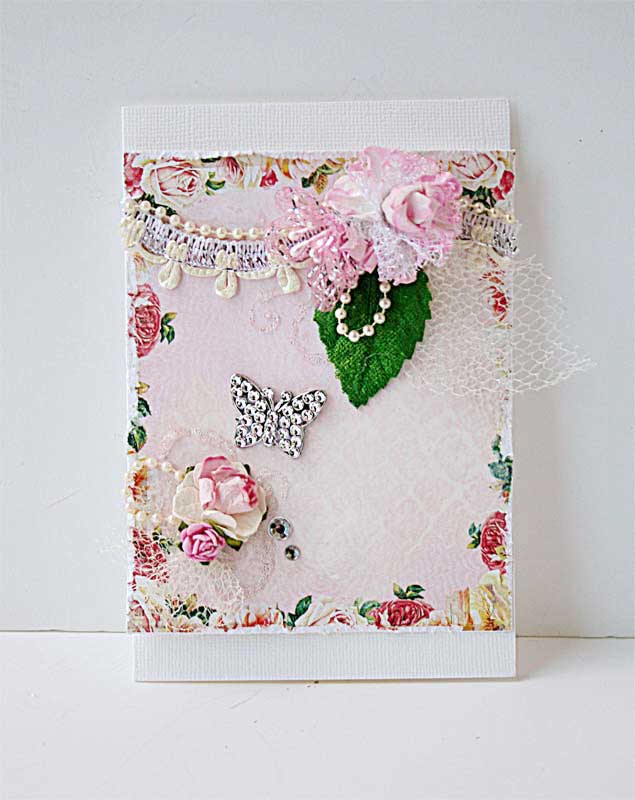
6. Add subtle texture to the background.
Here I used the stencil with some watered-down gesso for a subtle pattern on the patterned paper.
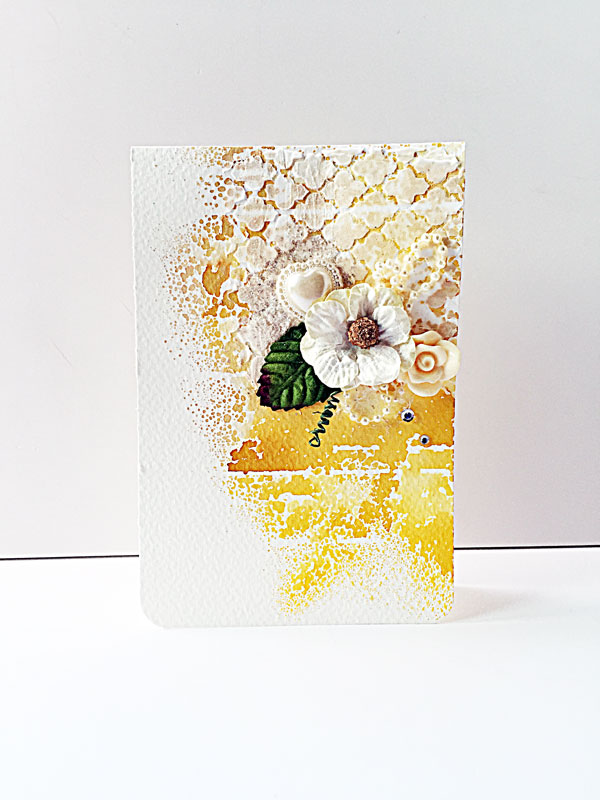
7. Create a "water-coloured" background.
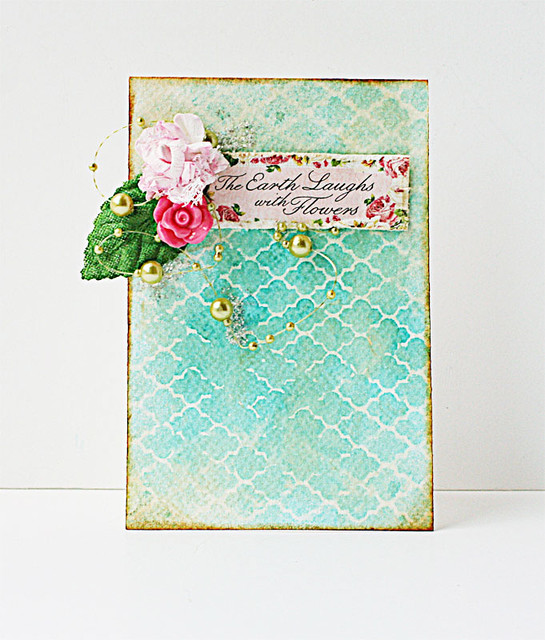
A light mist and some water on a stencil and you can get the look of a water-coloured background.
 |
| Purple mixed media box for Made with Love |
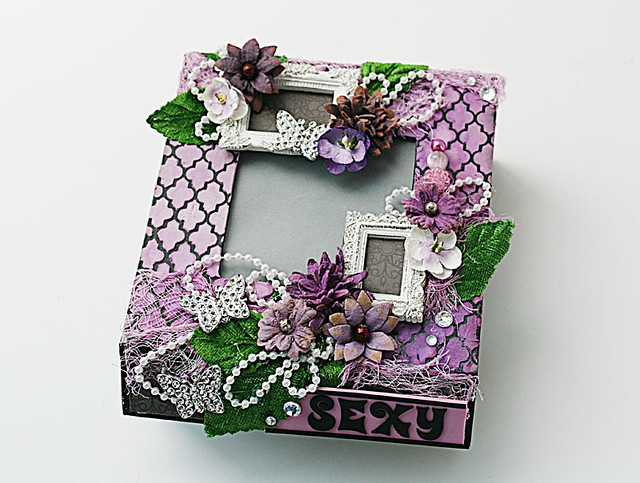
8. Add a decorative border to a box.
Instead of using patterned paper to decorate the base of my box, I used the stencil with light modeling paste and mist to add a decorative border around my box.
There you have it, 1 stencil, 8 ways. Do you have a fave?


I could have never imagined so many ways of using a stencil. Thanks for sharing really good article
ReplyDeleteYvonne, I loved the watercolor look and the purple box, thanks for showing so many ways to use the stencils !!
ReplyDelete8 Fab ways to utilize a stencil ! I too have this stencil and after reading your post I think I have barely used it ;) ! Each of your project has style and choose a fav is impossible!
ReplyDeleteWhat a fabulous post and you have inspired me to bring out the stencils!!
ReplyDeleteCheers
Dr Sonia
Amazing use of a stencil...can't believe how creative you are....the pieces are gorgeous.
ReplyDeleteYou are seriously amazing!!!!!!!!!
ReplyDeleteLove this post!! i shld get my craft supplies out!
ReplyDeleteI am always in awe with how you use stencils and colorants/mediums in your projects! Always adds the most beautiful and artistic touch to your work! You are a genius, my friend!
ReplyDeleteYou are the master of stencils! It's fabulous how you manage to get such different looks from the same stencil. My poor, neglected stencils almost never see the light of day.
ReplyDeleteYou are amazing!! I love the different ways you've showcased the stencil!! Each one is stunning!! Wow!! Have a great weekend!! Big hugs :)
ReplyDeleteLisa
A Mermaid's Crafts
Fave? Pick a fave? Impossible!!! Clever, clever girl & totally inspiring. My stencils have had a bit of a rest for a while. MUST get them out!!! Thanks for all these ideas, too:):)
ReplyDeletewow..All project are awesome in its way...
ReplyDeleteAll these in one place was so much awesomeness that I never commented the first time...just let my mouse take a stroll and my eyeballs...super cool post!
ReplyDeleteyou do amazing things with stencils.. love all your projects
ReplyDeleteLove love the way you add texture! Gorgeous!
ReplyDelete