
 |
| The pom poms I made for my cousin's wedding. |
My preparations for my cousin's recent wedding included stalking many wedding websites where there was a recurrent theme of tissue paper pom poms. The ready-to-pouf Martha Stewart ones at the craft supply store were $25 for 3 pom poms! [She must be rolling in dough...*LOL*] So I learned how to make my own...here's a short tutorial on how you can make these tissue paper pom poms.

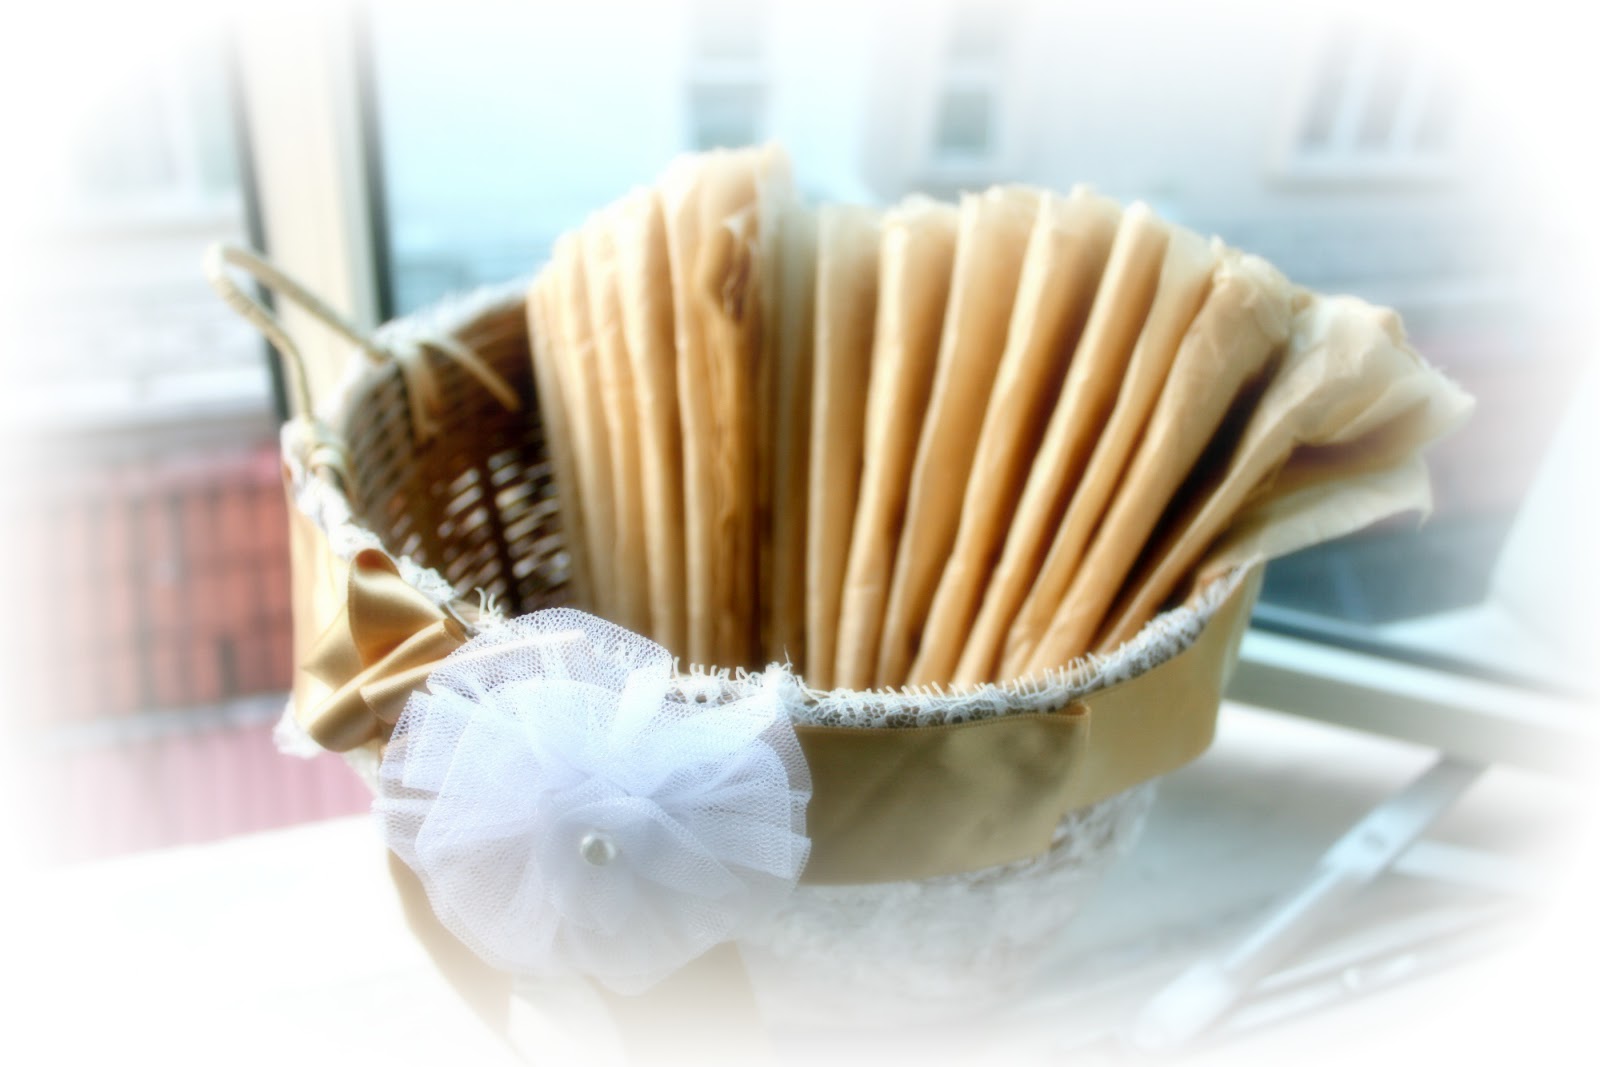
1. You will need a stack of 8 to 10 pieces of wrapping tissue. [I used them as they were in the package, you can cut the pieces to make smaller pom poms.] Run a scallop-edge scissors along the edges. Then accordian fold them.

2. Tie the center with string/ribbon.

3. Then comes the fun part....Gently pouf up each layer...

4. Your pom pom should be taking shape now...Pouf half the tissue layers, then flip over to pouf the other half.

5. When it's done, you have your tissue paper pom pom!:)

Those pom poms of course inspired my creation for LESSology Challenge #11: Flights of Fantasy.

The basket used to house some yummy lychees from the supermarket...the lace and ribbon were from my sister's bridesmaid dress [it was really ugly...]. I love that you can hang it at a party and maybe put some sweets in it and you can reuse it again...be gentle with the pom poms and you can use them quite a few times! :)
Here's how it can be stored away for future use. :)
Will you making some pom poms? :)
Love your Pom. $25 NO WAY.
ReplyDeleteI remember making these as a kid, only a smaller size.
these are FABULOUS...I so remember these..
ReplyDeleteGreat tutorial and I LOVE your hanging basket! What a great idea to use the pom pom almost like a "balloon".
ReplyDeleteThis is awesome Yvonne... Thanks for the tutorial!!! Totally loving it..make a smaller ones... and add as an embellishment!!! This is brilliant... hugs..xoxo
ReplyDeleteawesome tutorial and nice basket!
ReplyDeleteAww love those pompoms.... these are old school... great tutorial and your basket is soooo pretty....
ReplyDeleteLove love love how you made these Yvonne!!! I need to make some!!
ReplyDeleteIt is awesome-- I think I will make some for my daughters birthday party
ReplyDeleteCheers
Sonia
cardsandschoolprojects.blogspot.com
this is a lovely tutorial...and fab decorating idea...will definitely be trying these pom poms:) they look so pretty!!!
ReplyDeletethanks for the tutorial those are beautiful!
ReplyDeleteLove these Yvonne. My daughters always make them and I love every time I look at these beautiful creations:)
ReplyDeleteThank Yvonne, for sharing your tutorial! I love the finished product - just beautiful and awesome!
ReplyDeleteAbsolutely adore your pompoms, Yvonne! So easy to make, yet so delicate and gorgeous. They look so boutique. Good for you for making your own and thanks for sharing the process with us!
ReplyDeleteFabulous!!!!!!!!!!!! Tks. for the tutorial!
ReplyDeletelovely idea...can surely be used for birthday party decorations...thanks for the tutorial
ReplyDeletelove love this tut...thanks so much for sharing!!!!
ReplyDeleteWOW WOW WOW Yvonne. You have inspired me to make some of these. This is gorgeous!!!!
ReplyDeleteBeautiful! I've made smaller versions of these, but I love the impact of the larger ones.
ReplyDeleteOh now this I can use :-D
ReplyDeleteso fun! the lace looks pretty good on the basket though. =) love this pretty project, Yvonne!
ReplyDeleteSO beautiful Yvonne - you need to become a wedding organiser - a professional!!
ReplyDeletelove this hot air balloon with the pompom flower! My mom made some of these for my daughter's birthday and they were so cute!
ReplyDelete