

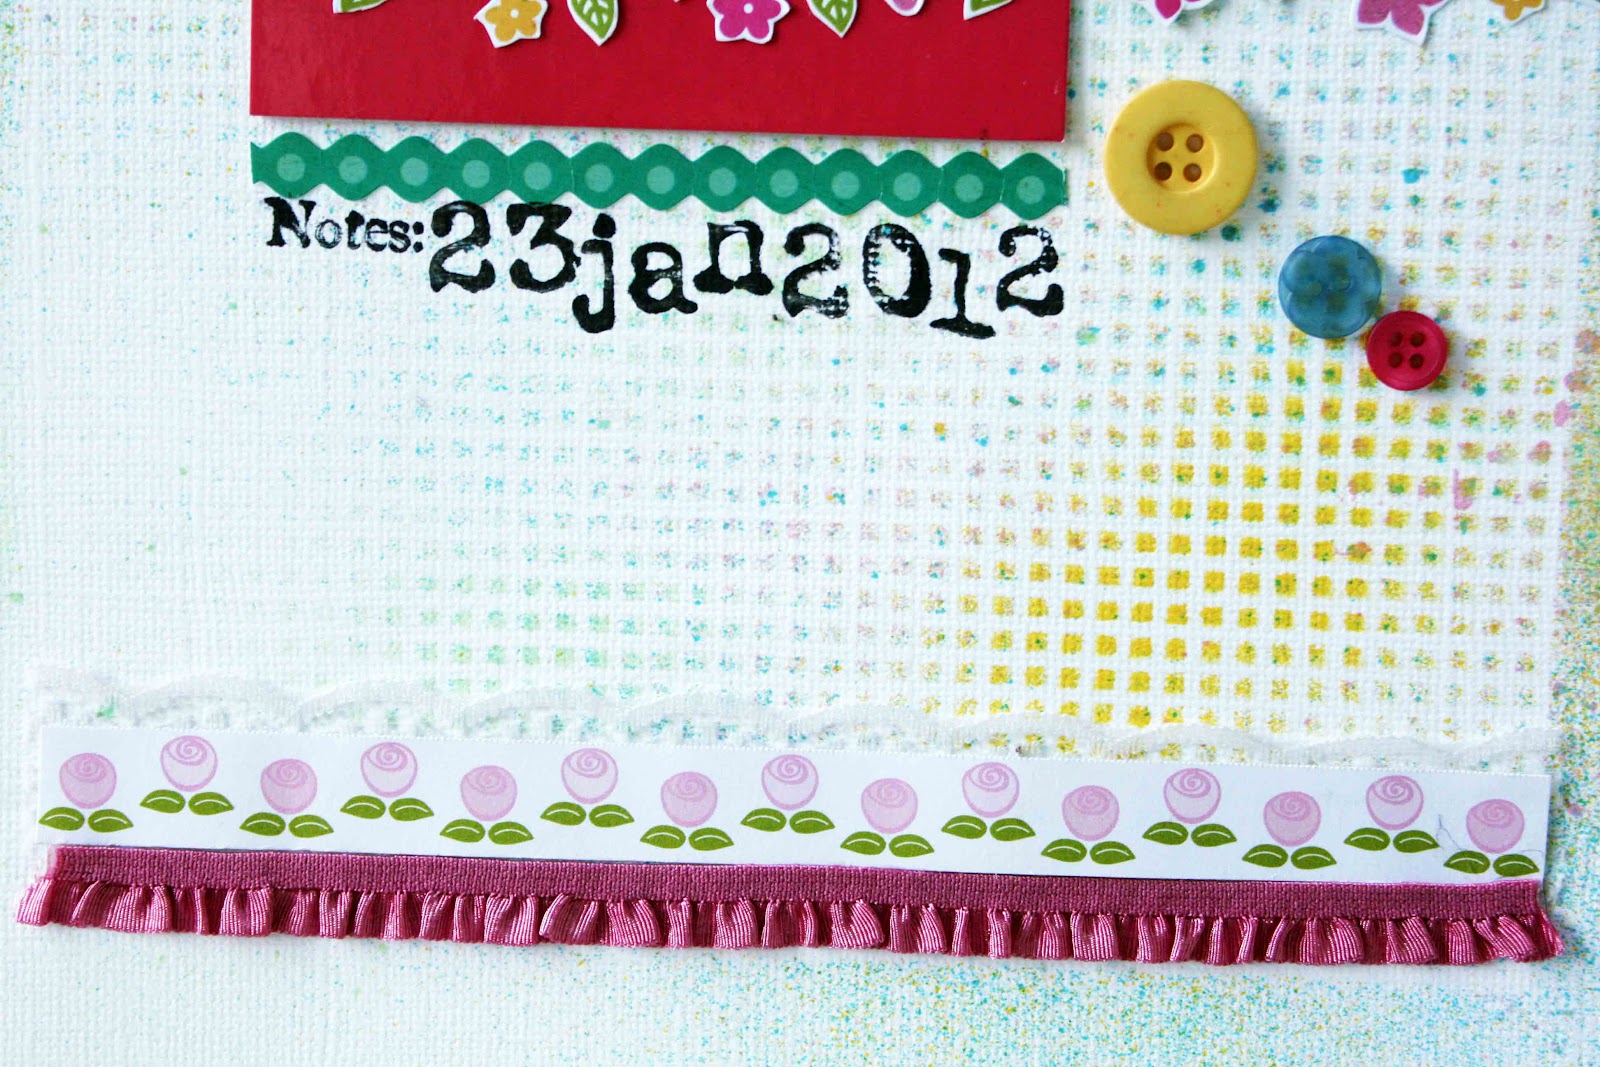
A lot of you have asked how I created this masked and misted grid background that I use very often in my layouts. It's actually a plastic grid used for needlepoint [similar to the ones I used for my first banner]. I love that the effect is very subtle but adds a lot of interest, especially when you use a myriad of colours. :) Today I'm sharing a tutorial for how I created this masked and misted custom background for my layout.

1. I start by laying pieces on white cardstock to form a rough layout... [you can use a sketch as a guide]. I really wanted to use the bold pink cardboard [packaging material] so I pulled pieces of scrap paper that matched that colour.

2. Then I remove the pieces and lay my plastic grid on the white cardstock.

3. Using the colours from the scrap pieces as a guide, I start randomly misting the grid.

4. And this is what I get when I remove the grid mask...a beautiful array of colours! :)
5. Then I put the main pieces back and start embellishing!

This is how I create a masked and misted custom background. What do you think? So totally doable right? :)
Supplies: American Crafts and Pebbles patterned papers, American Crafts felt thickers, badge and brads, SRM sticker, Sam and Lucy stickers, Kaisercraft rhinestones, Crate Paper sticker and chipboard, Maya mists and stamp, buttons.
P/s: Come play along with my guest Annette's colouring and paper piecing challenge!:)
this is great! thanks so much for sharing :)
ReplyDeletesarabeth
weeeeeell, that just looks SUPER!! fabulous little tute!! Love your LO - colourful and bright and happy!
ReplyDeleteI love your custom background...such a fun layout...always love your color combos...
ReplyDeleteSuper cool technique...I think I might even be able to do this one!
ReplyDeletethanks for the tutorial :)
ReplyDeletekisses
Rosana
Just love this and all the little details you added.
ReplyDeleteThis is so pretty, love the banner!
ReplyDeleteThat's a great background..found objects as masks are always cool! Terrific page! Thanks for sharing!
ReplyDeleteYou make it look so easy!!!
ReplyDeleteabsolutely a stunning page and love the misting, you always have some fun and great ideas to share and thanks for that Yvonne!
ReplyDeleteLove love love love this!! LOVING how you did that background and loving the banner too!
ReplyDeleteI love this! I've officially added it to my "try this" list.
ReplyDeleteI love how you use those grids- I have them but keep forgetting to incorporate them into my layouts- they do make fantastic masks! LOVE how you layer as well. I'm going to go try this right now- I also really like that tag banner- I wonder if I can make those with my jewelry tag punch? ahh a challenge!
ReplyDeleteYvonne, thanks for the AWESOME misting tip! I have plastic grids like that--what a super tool to use. :)
ReplyDeleteFabbie it is !! Gonna go hunting for a grid now !!
ReplyDeletethank you so much for the tip..i love your misted BG and always wondered how you got that checks pattern...now i know:)
ReplyDeleteyour layout is beautiful i like those cute banners and the felt sentiment...so cute:)
love the misted background. It is so pretty.
ReplyDeleteTFS! I love this lo and love your misting work!
ReplyDeleteThanks for the tute Yvonne... This layout is so pretty!!! I really heart this one... Awesome... Hugs...xoxo
ReplyDeleteso pretty and clever! Thanks for sharing.
ReplyDeletesuper fabulous...thanks for sharing your secrets:)
ReplyDeleteYes, SO do-able. and beautiful, too. Thanks so much for sharing, Yvonne!
ReplyDeleteabsolutely beautiful! Thanks for sharing the tutorial. Now I need to go to the craft store and pick up a piece of that plastic so I can try this out.
ReplyDeleteBeautiful Yvonne! Yup I've noticed that mask of yours a lot and it is so subtle and pretty. I actually have some mesh somewhere that you've inspired me to find now!!
ReplyDeleteAbsolutely love this! Definitely something I think I'm going to try!!!
ReplyDeleteso clever! now i'll have to get one of those mash, too! thanks for sharing, Yvonne! very pretty layout, too. love the happy springy colors!
ReplyDeleteWow! Fabulous! Love how you did the background. The entire lo is awesome!
ReplyDeleteYvonne, thank you SO MUCH for the tutorial! I love how you made your custom background - it looks amazing! As does your entire page!
ReplyDeleteAmazing page! Thanks for the awesome tutorial!
ReplyDelete