Pages

Thursday

10 mixed media canvas ideas


My walls can attest to how many mixed media canvases I've created in the last 2 years. *winks* I love that some bloggy pals are working their way to creating a mixed media canvas wall gallery too. :) Here are 10 mixed media canvases to help you get started....
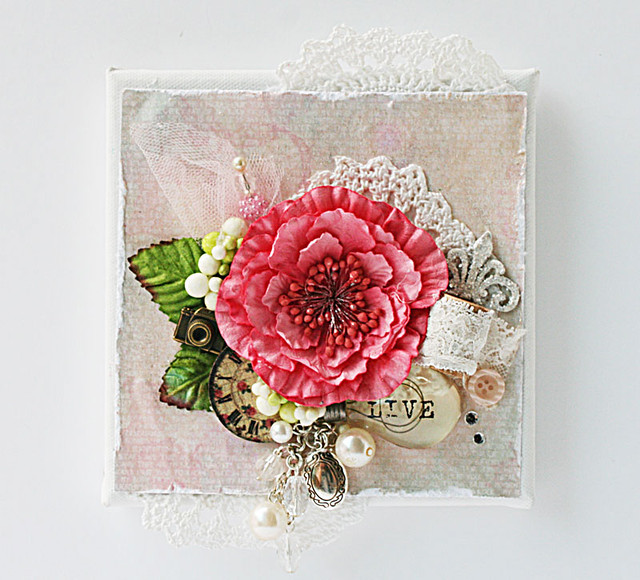
Live-mixed-media-canvas
Clustering all my fave things on a canvas
1.  Use one big embellishment as your focal point.

I wanted to use this big pink bloom as the focal point so I clustered smaller dimensional objects around it. The elements add texture and interest but do not detract from the focal point because thy are much smaller in scale.
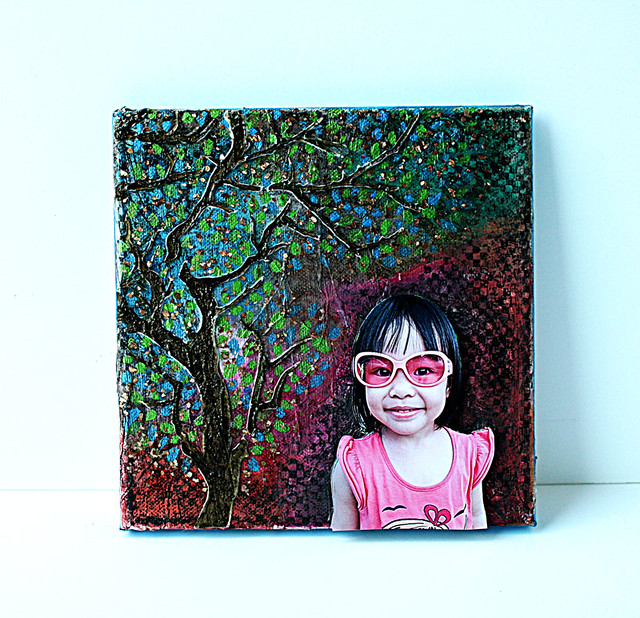

Mixed-media-canvas-by-Yvonne-Yam-for-The-Crafter's-Workshop
The almost ruined mixed media canvas

2. Play with paints and mediums for a whimsical scene.

It's hard to paint a realistic tree but a whimsical one is much easier. I used pearlescent paint for my leaves and added gold mica flakes for a shimmering tree. And if you read my original post, you would know that my niece's photo was used to cover up a major boo-boo. *winks*
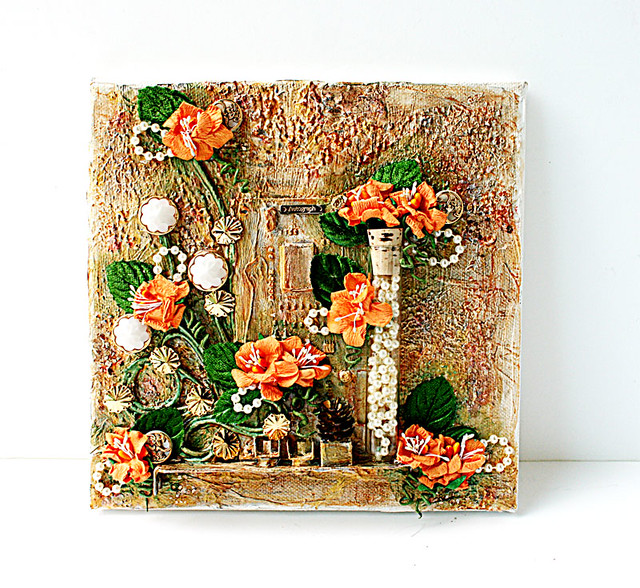
Mixed-media-canvas-with-old-computer-parts
Mixed media canvas with old computer parts

3. Use found objects for your "scene".

I really wanted to incorporate my old computer parts as well as the test-tube so I made a "shelf" for all my found elements to sit on. The computer wires became my "vines".
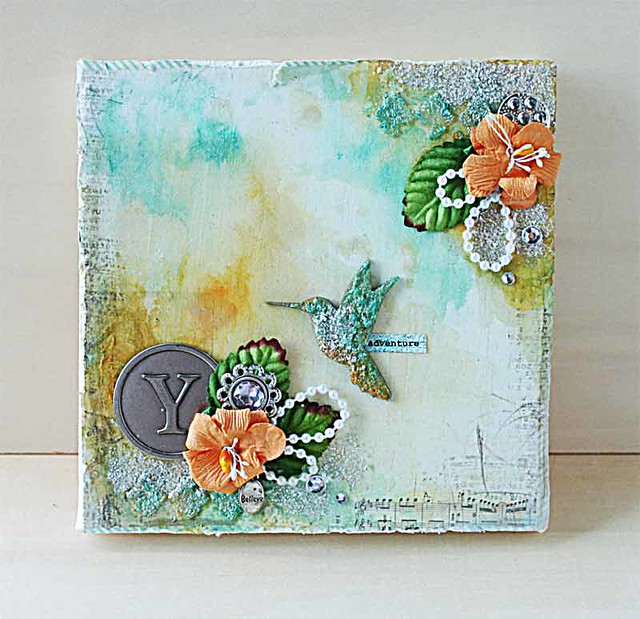
Adventure-mixed-media-canvas
A lazy person's mixed media canvas

4. Keep it simple.

I love the design on the patterned paper but the colours were too muted for me. So I intensified the the colours with colorants, added more stamping to mimic what was already on the paper, and finished with sparkle and some dimensional elements.
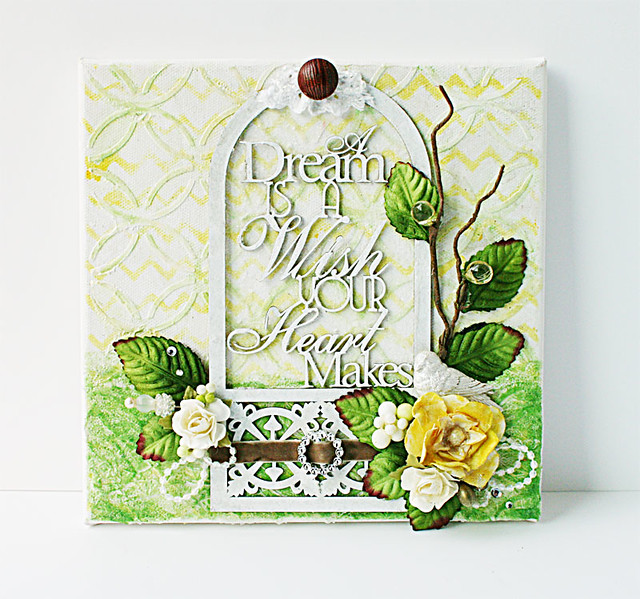
A-dream-is-a-wish-your-heart-makes-canvas
My latest love

5. Use a quote or sentiment.

I love this chipboard sentiment so I made that my focal point and just added blooms and vines to accentuate it.
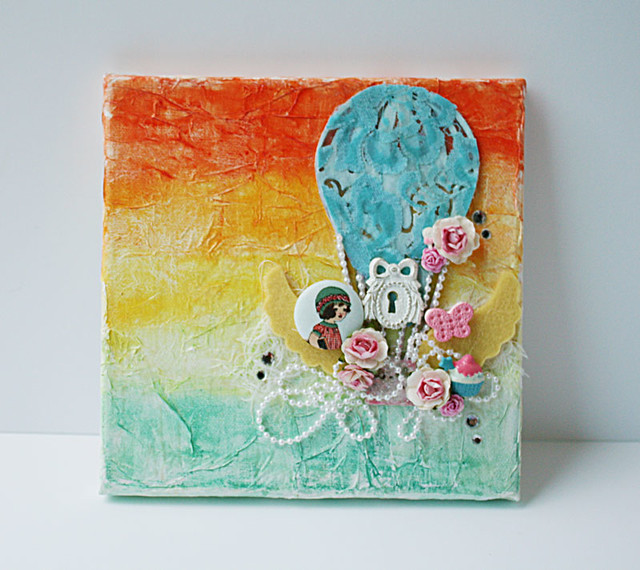
Hot-air-balloon-mixed-media-canvas
Happy birthday to me
6. Make it fun and unexpected.

You know me...I love an eclectic mix of things. The things don't really go together but that makes it fun and unexpected.
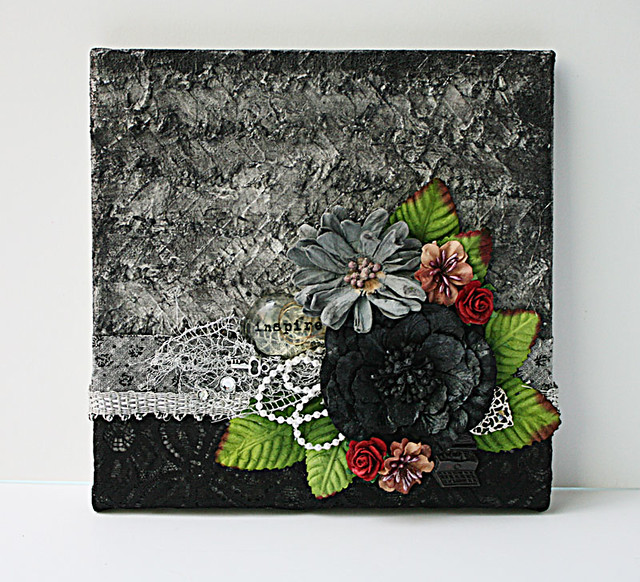

Inspire-mixed-media-canvas1
My obsession with Art Anthology paints
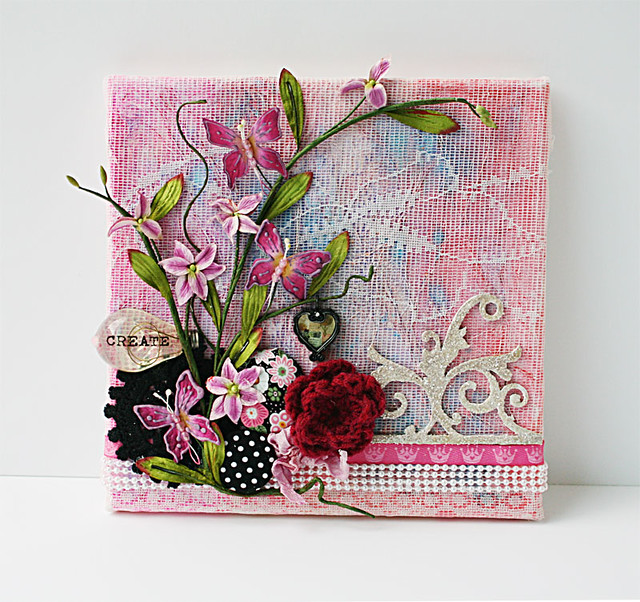
7. Give an unusual colour combo a go.

Unusual colour combos can produce interesting results. Black, silver and gray with pops of colour in the smaller blooms and leaves
Create-mixed-media-canvas
Vintage lace over a mixed media background
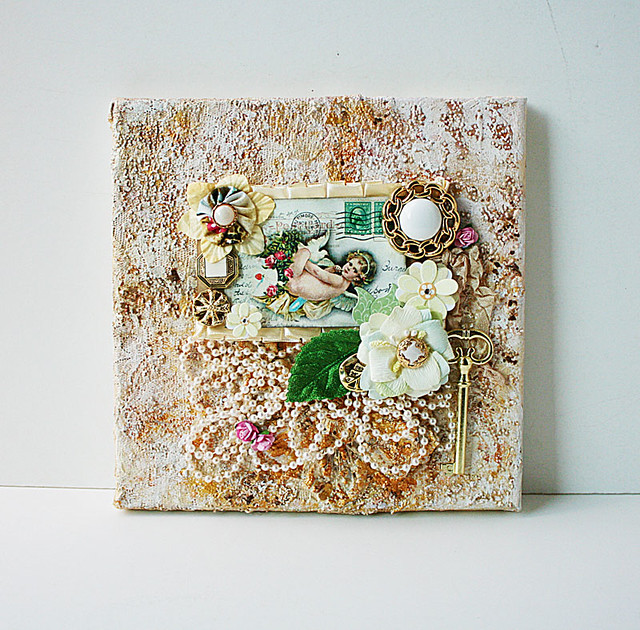
8. Go over the top with the layering.

What do you do if you want to use wrapping tissue and a piece of leftover vintage lace? Well, you use them both! I adhered my scrunched up wrapping tissue to my canvas base, added colorants then added my vintage lace as an overlay before embellishing on top of it. I LOVE the peek-a-boo effect of the lace. [Hmmmm...I should so do this again.]
Zeus-and-Zoe-mixed-media-canvas
Mixed media canvas with vintage tag

9. Cheat with a ready-made tag.

I love this vintage embellished tag so I created a textured background and then extended the elements from the tag to the rest of the canvas.
Room-scene-mixed-media-canvas
My dark side on canvas
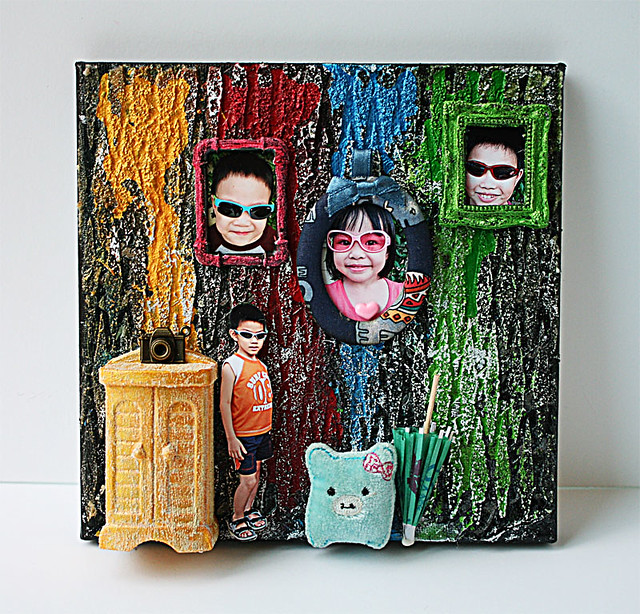
10. Play with frames.

I really wanted to use the frames I had so I created a textured background to serve as "wallpaper" for my whimsical room. I had a little "accident" with nephew #2's frame so he became the scale marker for my room.

There you have it. 10 mixed media canvas ideas. Which is your fave?


Share/Bookmark

Wednesday

Spending a day with my mummy...:)


Spending-a-day-with-my-mummy

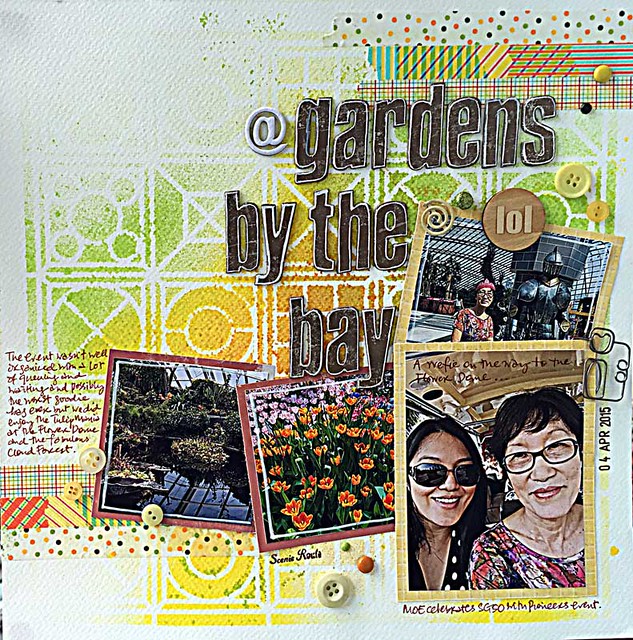
Earlier this month, I got to spend a day out with my mummy at Gardens by the Bay - a park spanning over 101 hectares of reclaimed land in central Singapore. This award-winning billion-dollar attraction is one of the Top 10 Indoor Gardens of the World and houses over 500,000 plants.


Since we both enjoy gardening and it was my mum's first visit, we took a gazillion photos. Yeah, I made her wear one of those paper crowns they were giving out....*LOL*


My page came together very quickly...the background was created with The Crafter's Workshop stencil and ColourArte Radiant Rain shimmering sprays. The photos were matted on remnant scrap paper and I used some washi tape to add some patterns to the page.


Playing along with Stuck?! Sketches.


Share/Bookmark

Monday

Tips for drawing and painting a girl...


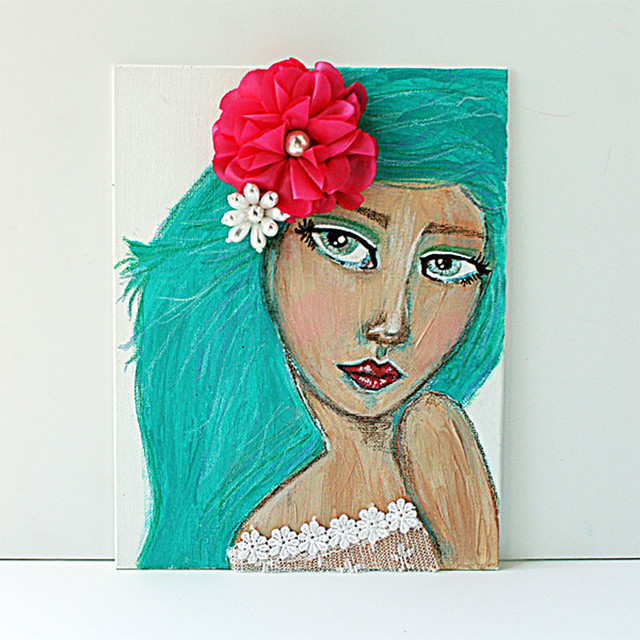
Mixed-media-girl-on-canvas

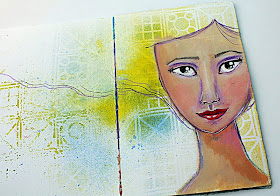
As you know, recently I've been obsessed with drawing and painting girls. I have only been at it for about a month but it's enough to debunk the myth that "I can't draw!". But let's not get ahead of ourselves here, I still think it's terribly difficult to draw and paint a realistic face but whimsical,  I think we all can do. :)

At first, I thought the eyes would be the most challenging part...but it turns out that the nose is the hardest. If you don't highlight the bridge of the nose, the face is just flat. If you try to create depth by introducing shadows, sometimes, it just looks like your girl has a bruised nose or maybe took the whole contour makeup thing a little too far...*LOL*


1. Use matte acrylic paint for the face and neck of the girl. If you are doing it in an art journal, craft paint would suffice. If you are doing it on a mixed media canvas for display, use artist quality paint for its lightfastness. Glossy paint would NOT work because you can't draw on top of it. You can add matte medium to your glossy paint to make it matte though.

2. Draw in the shape of the face and the features with a Prismacolor pencil. Don't worry about getting it perfect because when you draw on matte acrylic paint, it can easily be erased!


3. If it's still a little challenging for you, you can "cheat" by using a stencil or a stamp to help guide your process. These will help you in the placement of the key features of your face. 

4. Because of the wax in the Prismacolor pencils, you are able to blend the colours quite nicely. I'm partial to Prismacolors but feel free to use any colour pencils you have.


5. To paint the eyes, I use a combo of Posca white paint pen and Liquitex black ink in a Pentel Aquash brush. The Posca paint pen is filled with thin acrylic paint and you can buy them in various nib sizes for quick application. The Liquitex black ink is thin enough to be filled in a Pentel Aquash brush without clogging. You can also use Copics or Sharpies of course. Or just paint with a thin brush but this is easier. :)

6. For the hair, I painted it with Dylusions paint in Turquoise. I used my colour pencils to add some "movement" to the hair. Then I finished off with some Maya Road embellishments.

All the supplies used here, except for the Posca paint pen, Prismacolor pencils and Liquitex ink, can be found at Made With Love Singapore


Share/Bookmark

Friday

My last project for The Crafter's Workshop


My-last-project-for-The-Crafter's-Workshop

Today I'm sharing my last project for The Crafter's Workshop. It has been an awesome year being part of their first ever design team ...and my stencil collection has grown exponentially in the last 12 months! [yes...in the 3 digit region!]


I love how versatile stencils are...you can use them with watercolours. pens and inks as I did in these travel journal pages.


Happy weekend my friends! :)

Share/Bookmark

Wednesday

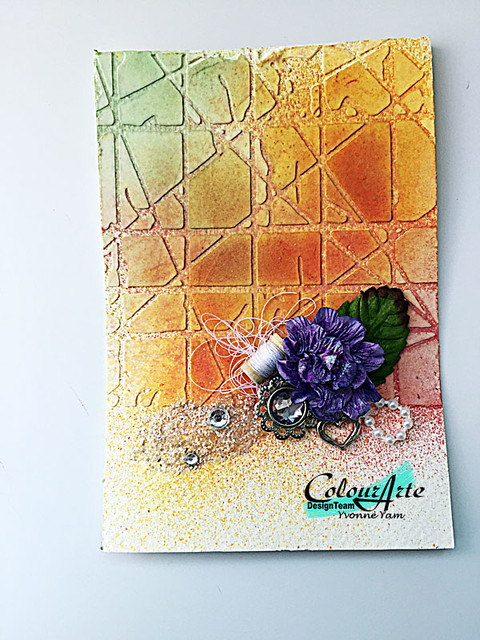
How to make a quick mixed media card...


Mixed-media-card-for-ColourArte-by-Yvonne-Yam7

Hello friends! Today I'm sharing my tips as well as a step-by-step process of how to make this quick mixed media card over at the ColourArte blog


My projects generally look more complicated than they are...this one took 30 minutes...and would have been faster if I didn't have to stop to take photos and make a tutorial..*LOL*

If it's something you would like to attempt, please check out my tutorial. :)

Share/Bookmark

Tuesday

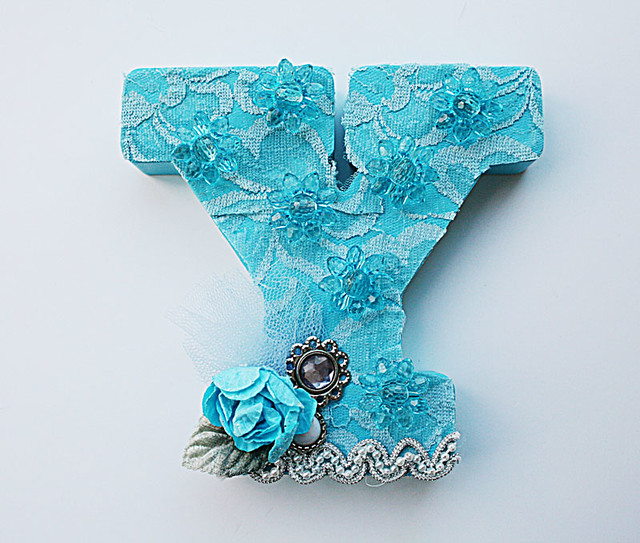
The story about the blue monogram


The-story-about-the-blue-monogram

So I have a decorated Y monogram in white, black and gold and thought it was time to add another! :) I had my eye on this cute blue one at Smiggle but cringed at the $5.95 price tag.[I like to buy things on sale...*winks*].


A couple of weeks later, it was on sale at 3 for $10. I was all set to buy but could only find 2 pieces that were in good condition [Yes, I'm a fussy buyer even when an item is on sale...*LOL*].


Well, it was a good call because Smiggle finally decided they were charging an arm and leg and the clearance price was 5 for $5! And all in good condition too! Yay! :)


Can you guess the colour of my next Y monogram project?

Share/Bookmark

Monday

Seeing things in abstract...


Happy-bird-day-card

Am I the only one who sees "things" in her mixed media backgrounds? *winks*[sinister music plays faintly in the background] That's one of the reasons why I love my residual misted backgrounds....you never know what you can get...


Oh well, I saw an abstract owl and dug through my stash to find this cute fabric owl button to match. :)

A super quick card to add to my birthday card stash!

P/s: Happy week ahead friends! :)


Share/Bookmark

Friday

Drawing practice...


So I have been drawing and painting religiously for the past week or so. Yep, you know how I am when I'm obsessed. *winks* Seriously though, I have never used the sharpener or eraser as much as I did since I started this obsession. *LOL*


This was my first girl. I know....she spent a little too much time in the tanning booth. *cue laughter*


My first side-facing girl...who looks like she really needs to tone down the makeup...


Then an attempt at another front-facing girl. I struggled with the nose a lot....she looks like she needs a nose job right? *LOL*


Fortunately there was light at the end of the tunnel when this book finally arrived. I got mine from The Book Depository [can't beat free worldwide shipping ] but it's also available at Amazon. 


And this was last night's girl.  Okay, back to drawing practice.

P/s: Happy weekend folks! :)


Share/Bookmark

Tuesday

Three things I'm loving right now...


As you know, this art thing is pretty time-consuming so I'm always on the lookout for things that can make my life a little easier. *winks* Here are three things I'm loving right now. 


1. Atelier Airtight Peel-off Paint Palette

So I was pretty skeptical about this Korean-made paint palette at first. After all, a normal plastic paint palette is about $1 or so and this was $15. But I wasn't maximizing the colour potential of my acrylic paints by colour mixing simply because I HATED to clean my paint palette.

I know lots of artists like to show off their well-used and dirty paint palettes. But I like mine to be clean and pristine. *LOL*

Then I read about how bad acrylic paints [they are essentially plastic] are for plumbing and the environment and decided to give this a go. I LOVE it. Seriously, the paint stays moist for days and when they do dry up, just peel the pieces off and dispose them the proper way instead of down the drain. Less cleanup and better for the environment. Can't beat that. :)


2. Making my own art journals.

If you art journal, you would know that it is extremely difficult to find an art journal that you like. Sometimes you like the paper but you don't like the way it has been bound. And vice versa. Believe me, I've tried some really expensive ready-made journals. They were designed for pen/pencil sketch artists and not for people who enjoy wet media.

Having to prep your pages with gesso and sticking pages together to get them sturdy are not things I enjoy doing. And it drives me crazy when papers buckle up! My only solution is to make my own art journal.

It is easier than you think. There are lots of YouTube videos teaching you how to make your own art journal. All you really need is paper, a bone folder, anawl and waxed thread [they come in a variety of colours but I used dental floss].

The type of paper is dependent on what you like to play with. Do you like smooth surfaces or slightly textured surfaces? For me, I went with hot-pressed watercolour paper because I like the smoothness. If you like a little more texture, you can go for cold-pressed watercolour paper.

Experiment with the papers and see what you like. For some media, you may still need to gesso the pages to create the effect you want. I buy large pieces of watercolour paper and cut them down to size [about $2.70 a sheet]. Instead of having a thickly-bound journal, I have thinner journals that I can carry around. Eventually I will bind them in a book that I'm proud to show off [errr..minus the ugly pages of course!]


3. Prismacolor pencils

These were in my Amazon cart for over a year. [Okay okay, I always have something in my Amazon cart. *winks*] And I finally checked them out in February this year. :)

I LOVE them. They are so soft and waxy and blendable. You can even blend them with your Copics for a paint-like effect. I love drawing with them on top of a matte acrylic paint base. :)

Do you need all 150 colours? No you don't. This is the only set of colorants that I actually have the entire collection of...I usually buy the 12 or 24 colour set. But having the whole set makes me happy. :)

There you have it...three of my fave things. What are yours? Tell me so that I can add them to my Amazon cart...*winks*

Share/Bookmark